|
the CEO! Creative Eternal Optimist! Blog
|  |
Monday, May 06 2013
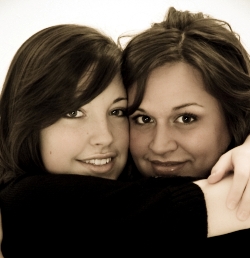
The first Monday of the month, the DCC Designer's Crafts Connection Blog Hop! Our theme this month is Wishes! "Make a wish", "three wishes", wish upon a star", classic, timeless, the power of the wish. If I had a magic wand  and were to "Make a wish" in this week leading up to Mothers Day it would be wishing my Mom could be here. She would love my "new" heritage home, seeing her chairs in the parlor and her artwork in the library, her cane resting in the umbrella stand by the front door. She would meet my darling man and get to dress up like she loved too for our upcoming wedding. The last picture I have of my Mom is with her grand daughters three weeks before she passed away. She would love to see these young accomplished women, happy and productive in their lives, Amanda now a nurse and engaged to a wonderful young man, Kate happy on the Island doing what she loves. I know she watches over us but to have her here once more is still a wish for Mothers Day.
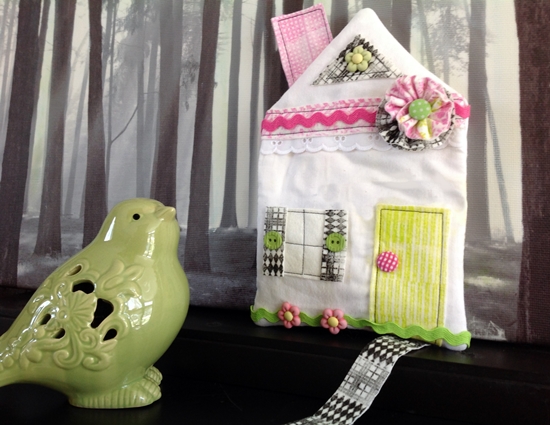
My design for the blog hop is one of whimsical house, a cottage, a design just featured Saturday for the release of designer friend Ann Butler's new stamp line with Unity. It is an ideal gift for Mothers Day, create a cottage or house for your Mom, personalize it with a house number, other details that recreate her home. I celebrate my new home and the memory of my Mom. To make this cute cottage, instructions are here! To see more delightful designs, just hop along with the DCC button in the side bar! To "wishes coming true!" 
Tuesday, April 09 2013

As a Designer I have the opportunity to review new products, this week it is Cousin's exciting new very cool Slide-Bracelet program available at Jo-Ann stores. The program consists of high quality leather bracelets and stylish components to "slide" on. Once the bracelet is cut to size, the clasp pieces are glued to either end. Cousins sent a package with several pieces to work with, I loved the flower slide with the center gem sparkle. What goes well with sparkle for this girl is a ruffle or two. I had dyed Organza ribbon with Rit Tan Dye and used this to create a ruffly center for my Slide-Bracelet. 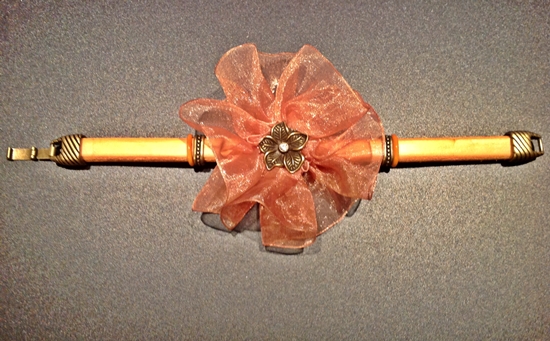
You will need:
Bicast Leather Strap 34740058
Metal Slide 34740012
Metal Clasp 3470005
E-6000 Adhesive
12" Organza ribbon (I used Rit Tan Dye or use ribbon color of choice)
Needle and thread, Jewelry Cutters, Scissors 1. Sew a running stitch along one end of ribbon. Pull tight and tie ends leaving a small opening in center.
2. Insert over back end of Flower Slide. 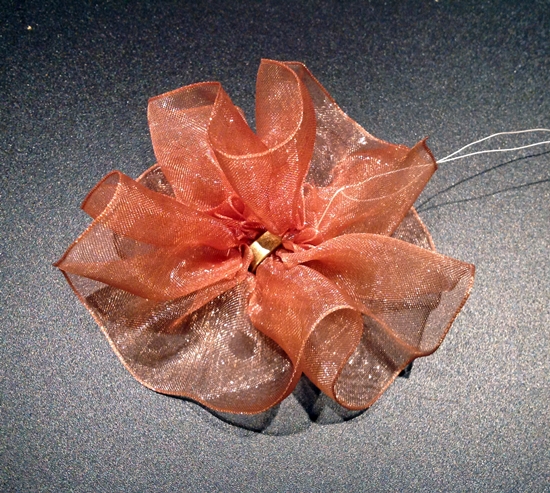
3. Following the excellent Cousin video to assemble the Slide-Bracelet, measure and cut to desired length. YouTube how-to video 4. Insert slides on bracelet and stoppers. Glue clasps to either end, let dry. Wear! I do not make jewelry, so my skill set going into this is minimum compared to the other designers involved in the DCC Blog Hop for Cousin, click on the button in the sidebar to see what they created. I found the Slide-Bracelet components high quality and very user friendly. The Slide icons are designed beautifully in metals. The clasps co-ordinate and in just a few minutes you can create a lovely bracelet to enjoy and wear! Well done Cousin! Like their products, like them on FaceBook!
https://www.facebook.com/CousinCorp/app_137541772984354

Saturday, March 09 2013
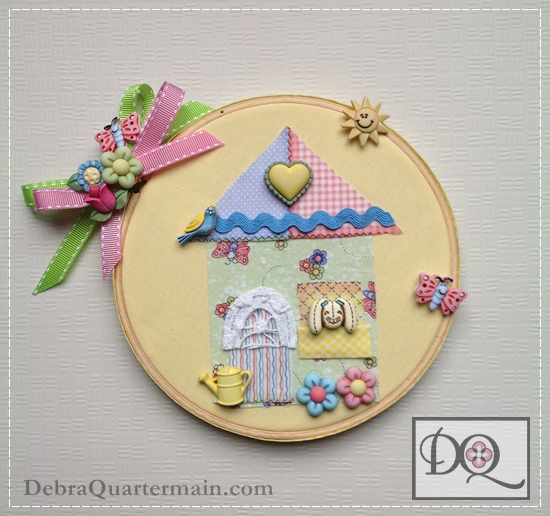
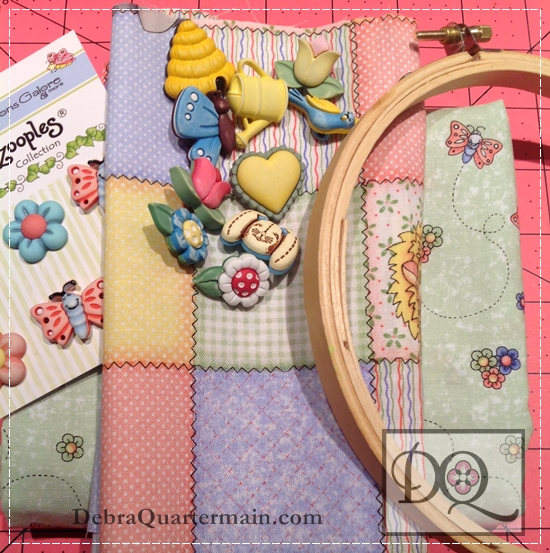
The Designer Craft Connection Challenge is on with the cutest buttons from Buttons Galore and More. I got to work with the Spring Fling Collection designed by the talented Vicki Schreiner. I had some of her fabrics and Bazooples buttons so I added those to this little cottage scene. An easy peasy no sew project!
Materials:
1 dozen assorted Spring Fling & Bazooples Buttons from Buttons Galore
6" hoop
7" x 14" piece of cotton fabric
Fabric, lace, trim scraps
6" square fusible web
½ yard each of two ribbons
Fabri-Tac by Beacon
5", 8" Westcott Brand® Titanium Steel Scissors
(Ruler, pins, measuring tape, pencil, invisible marker, iron, ironing board, pliers)
1. Fold fabric rectangle in half. Open up hoop and place fabric between hoop pieces. Tighten.
2. Draw pattern pieces on fusible web. Main House 3" by 3 ½". Roof Triangle 3" by 4". Window 1 ¼" square. Door 1 ¼" by 2" rectangle, round top of door.
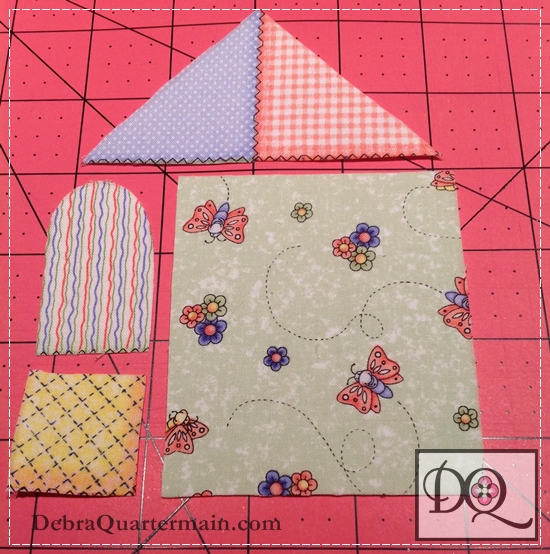
3. Fuse pieces to hoop fabric with hoop screw off centered. Begin with main house, add roof, door and window. Tighten hoop again if needed. Trim excess fabric from hoop.
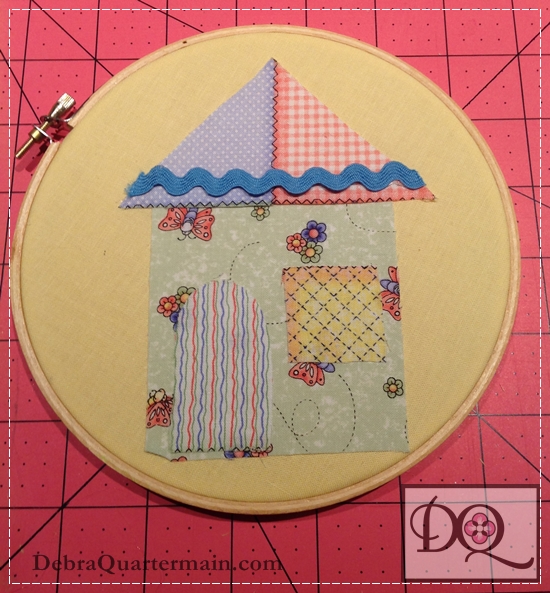
4. Embellish cottage. Tie ribbons through hoop screw. Snap off button backs to lay flat and glue to hoop.
This is such a fun project, one of those cute fabric ideas that does not require any sewing. Some stitches could be added for embellishment. Enjoy, create a whole neighborhood.
For this Designer Challenge Buttons Galore is offering a great giveaway collection of buttons and ribbon in a stylish container from Viewtainer! To win one of the Viewtainers filled with ribbons and buttons - Leave a comment on the Buttons Galore Blog Post. http://wp.me/p2hPby-1Du. The comment should contain your favorite project from the hop, and the container you would like to win. Comments need to be made by March 17th, 2013 at 11:59 eastern standard time. Hop to all the great designer button projects with the DC Button in the right Sidebar! Happy Hopping and Crafting! 

Thursday, March 07 2013
Lots of crafty goodies everywhere! Don't forget there is till time to enter....Designer Crafts Connection Blog Hop! AND to celebrate (inter)National Craft Month we have a super giveaway, a collection of products from FabScraps, https://www.facebook.com/pages/FabScraps/112579348780638?ref=ts&fref=ts. Julie McGuffee shared these products as a Trade Show find on TV, http://youtu.be/-OZjx6Yhmg0.
To enter to win, check out our DCC blogs in the hop, (button is in sidebar) then comment on the blog that features your favorite crafting technique and then tell what it was on Julie McGuffee's blog, Life in the Craft Lane.
This month from the 9th to 17th several DCC members are taking part in a Buttons Galore manufacturer challenge with a great giveaway as well!
I love Buttons Galore's buttons, one of my favorite designer friends Vicki Schreiner has an adorable line of buttons with them from her Bazooples collection. Here is a snealk peak at what I used in my design to be posted on Saturday, the 9th!
....and the Smoothform Design Team.... I am pleased to be part of their team along with several very talented professional designer friends! We have a super creative blog with a new project for every day of the month!
So here is to National Craft Month, to crafting, sewing, painting, embossing, doodling, to creativity! Have fun!
Monday, March 04 2013
It is the first Monday of the month and time for the Designer Crafts Connection Blog Hop! AND to celebrate (inter)National Craft Month we have a super giveaway, a collection of products from FabScraps, https://www.facebook.com/pages/FabScraps/112579348780638?ref=ts&fref=ts. Julie McGuffee shared these products as a Trade Show find on TV, http://youtu.be/-OZjx6Yhmg0.
To enter to win, check out our DCC blogs in the hop, (button is in sidebar) then comment on the blog that features your favorite crafting technique and then tell what it was on Julie McGuffee's blog, Life in the Craft Lane.
This month's challenge was to post about our favorite crafting technique. Well it isn't difficult to guess what mine is and technically it isn't crafting but sewing. it IS sewing! I love to sew, machine sewing and hand embroidery both. I love to create pretty, whimsical things.
I remember at 5 years old spending time in the summer on the front porch sewing next to my Mom with my tiny sewing machine. Since her birthday is in a couple days and she has been gone four years now it is lovely to remember those summer afternoons!
So here is a little roundup of all things sewn! Designs I have created and love!

Pin Cushions with my favorite hand stitch, the blanket stitch.
With cuddly characters I get to both machine and hand sew!
oh and I sew love to make aprons! Have a few pretty ones I am creating to wear at Quartermain House B&B.
.....and wait there is even more, beginning March 7th, we are also hopping in Buttons Galore DCC Blog Hop! Love their buttons!
....and the Smoothform Design Team was just announced. I am pleased to be part of their team along with several very talented professional designer friends! We have a super creative blog with a new project for every day of the month!
So here is to National Craft Month, to crafting, sewing, painting, embossing, doodling, to creativity! Have fun!
Monday, February 04 2013
It is the first Monday of the month and we are hopping with the Designer Crafts Connection Blog Hop. It is all about Valentine's, love is in the air! To catch all the love just hop along with the button in the sidebar!
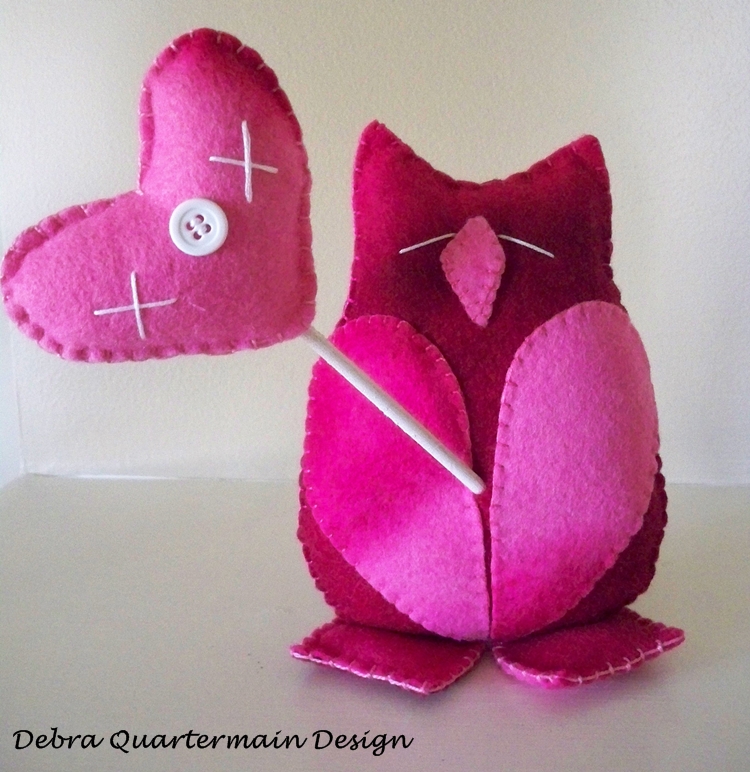
This Valentine cutie I designed for Rit Dye , featured on their blog and is in the current issue of Crafts 'n Things. Wool felt dyes beautifully, I demonstrated the techniques for an upcoming segment of PBS Quilting Arts with host Pokey Bolton.
This owl is made from a piece of ombre dyed felt with each segment of the felt strip held in the dye bath for a shorter period of time. I cut the pattern pieces for the owl so the heart wing halves were from the lighter end of the felt strip for contrast.
Enjoy the Valentine hop and make something special for the sweeties in your life!
Debra
Monday, December 03 2012
It is the first Monday of the month and the Designer Craft Connection is hopping with great gift ideas!
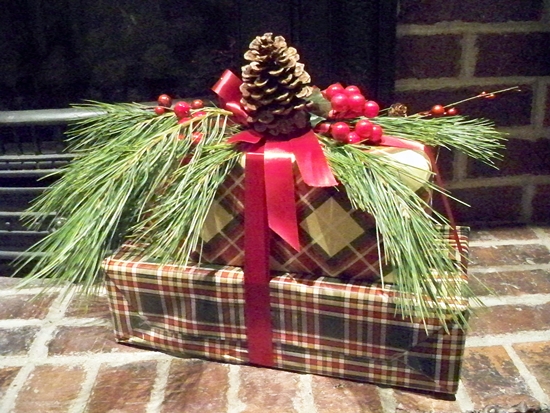
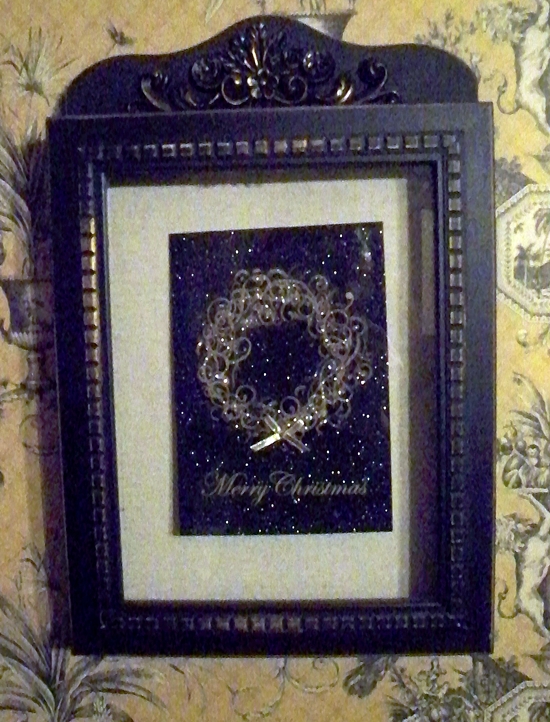
Gift giving also means gift wrapping. Recently I had a group of friends over to gift wrap presents. I like to co-ordinate wrapping with the Christmas decor of a home. Adding some fresh pine gives it a fresh look and of course the smell is wonderful!
A shadow box I found on sale was glammed up with some gold Rub n' Buff and I added a sparkly Christmas Card to the center of the box for an elegant holiday greeting. After the holidays the box can then be filled with whatever the recipient would like.
Place settings can be put together very inexpensively and given as gift to be used for New Years. I purchased dishes on sale, place setting of four for less than $20, the chargers were only $3 for the set of four, twelve foil doilies $1, six placemats $6 and the crackers were $1 each. For about $35 I put together four festive place settings. A black gift box tied with gold ribbon will be the wrap for this stylish gift!

Hop along with the DCC button in the sidebar to be inspired by thirty plus talented professional designers! Happy Hopping!
Monday, November 05 2012
The first Monday of every month the Designer Crafts Connection hops with thirty of the Craft industry's top designers. We are all professional designers, members of the CHA designer section. (Craft & Hobby Association)
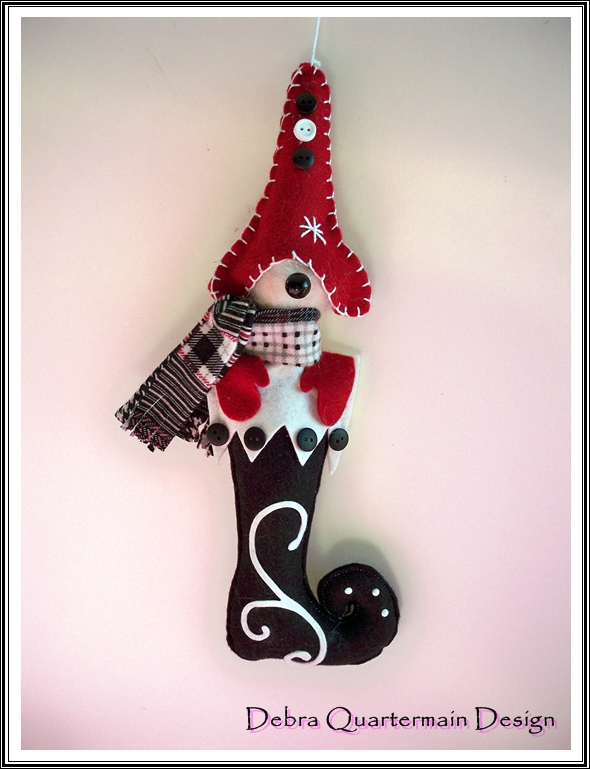
This month's theme is thank you gifts. November marks the beginning of the holiday season, invitations to holiday parties, gatherings, gift exchanges. My favorite thank you gifts to give are handmade ornaments. I design and create new ones each year. One of my favorite designs is this whimsical elf popping out of a stocking. I create them in different color combinations to match the gift recepient's holiday decor.
The elf's head is a needle felted 1 1/2" Styrofoam brand foam ball and the stocking is made National Nonwoven's wool felt. The scroll design on the stocking die cut with the Sizzix Big Shot. It cuts felt beautifully. Bead and button embellishments complete the ornament.
Be inspired with the projects offered by the other members of this talented designer group, just hop along with the DCC button in the side bar!
Monday, October 01 2012
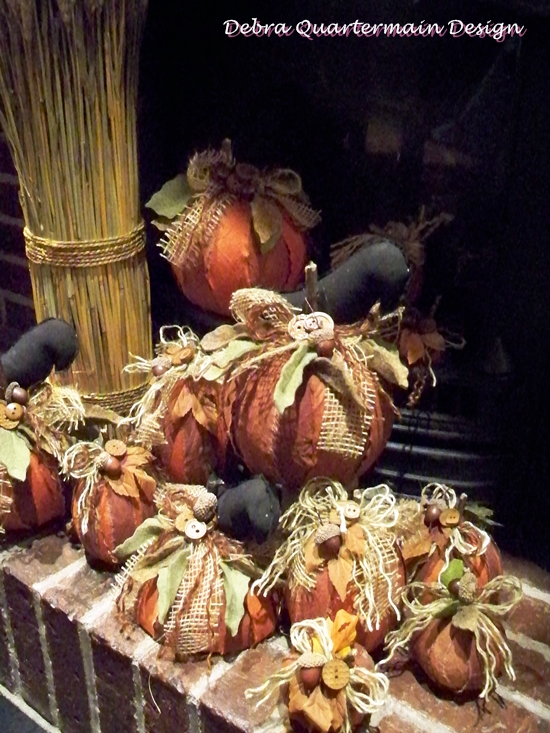
Create your own Prim Pumpkin Patch, easy peasy fall decor
using Rit Dyes and STYROFOAM Brand foam balls.
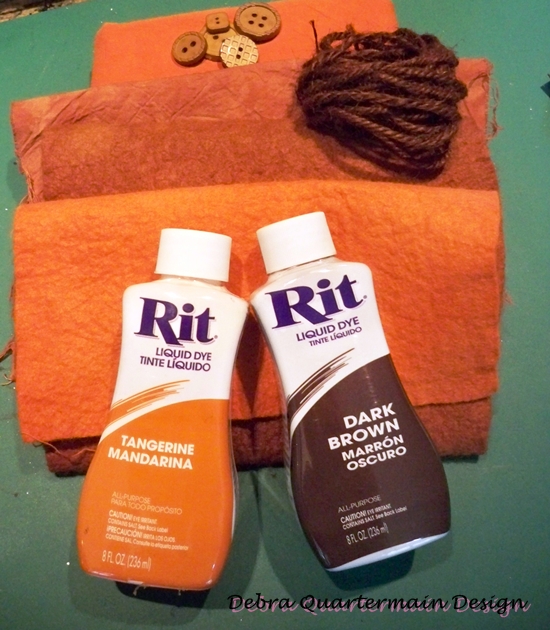
Using two colors of Rit Dye, Tangerine and Dark Brown
I dyed sections of unbleached cotton,
Blumenthal Lansing nylon buttons and twine.
Follow the stove top dye technique
http://www.ritdye.com/dyeing-techniques/stovetop
and dye a 12" x 36" strip of unbleached cotton
with 1 cup Tangerine, 8 cups of hot water. Remove strip from dye,
add 2 T of Dark Brown to pot with Tangerine, stir well.
Dye two more strips of unbleached cotton along with buttons and twine.
Remove one strip along with twine and buttons.
Add anotherTbs of Dark Brown and stir with third strip in dye.
A mottled effect and darker shade will result. Wash and dry fabrics.
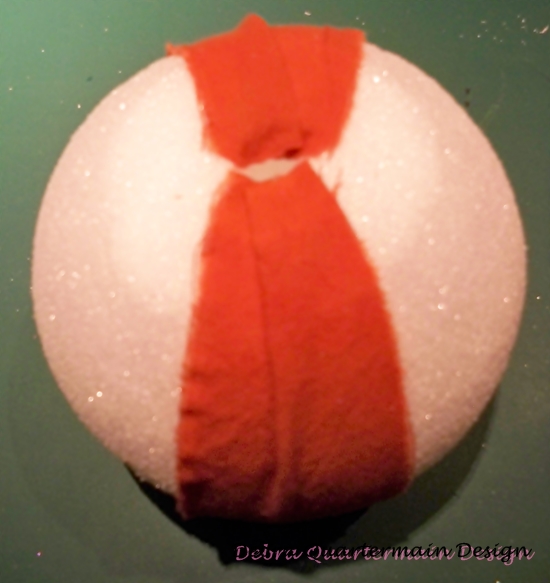
Use any size ball you wish to, I used several sizes from 3" to 5".
With a stick carve out a small middle hole for stem.
Glue stem in place. Rip fabric strips into 2" widths.
Begin gluing end of strip by hole. Wrap NSEW going around stick.
Trim off excess and contiinue with next piece.

Add third color of strip filling in all gaps.
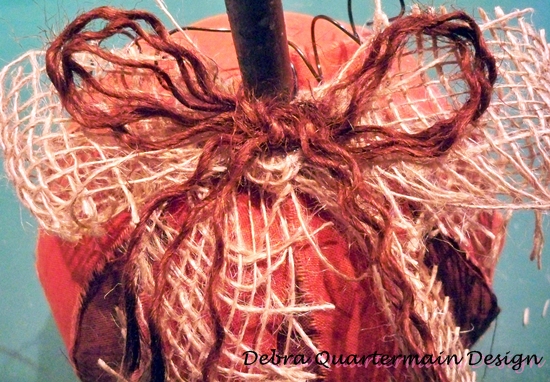
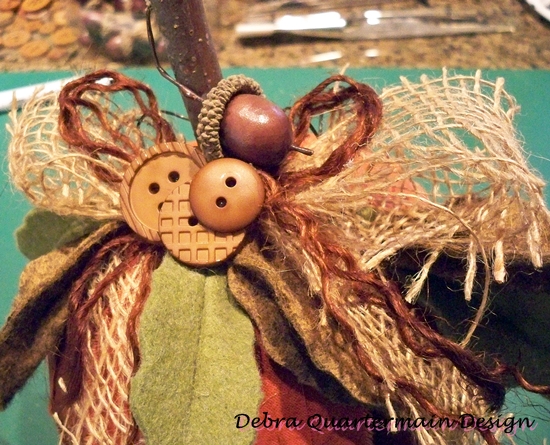
Embellish with bows and buttons.
Sew crow and don't turn right side out. Stuff and sew or glue opening
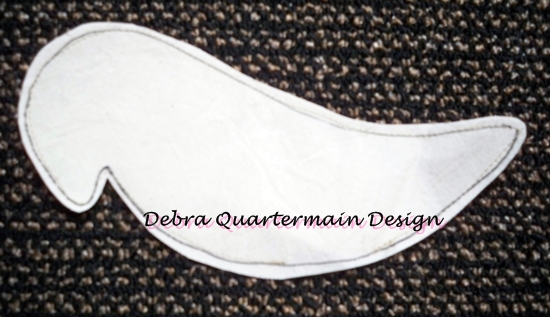
Paint crow with black craft paint. Let dry. Insert and glue into Pumpkin.

Glue some felt leaves in among burlap bow.
Glue and insert bird! To follow along on the hop
just click on the Designer Crafts Connection Blog Hop Button!
12 of our DCC designers will be taking part in another blog hop
beginning Saturday October 13th featuring Makin's Clay.

They will be giving out for the blog hop....
a prize package worth just over $100 retail cost.
In order to enter go to the Makin's Clay Blog
and leave a comment. Here is the link!
http://makinsclayblog.blogspot.com/2012/09/makins-clay-blog-hop-contest.html
Get inspired with some great clay ideas and enter for the pirze!
Happy creating!

Monday, August 06 2012
Today is the first Monday of the month which means the Designer Crafts Connection Blog Hop! Today this talented designer group is featuring crafty designs made with school supplies. I always look forward to participating but having recently moved I am still unpacking my craft supplies and getting organized. I am out of the loop for this round but hop over to Julie McGuffee's blog to get hopping! We always have a great give away too!
Speaking of school :) as I smoothly segue here! I just moved into the most beautiful house, a heritage landmark overlooking the river in downtown Fredericton. It is a classic Gothic Revival Style built around 1840 and was purchased in 1870 by the first province born University of New Brunswick president Thomas Harrison. Later Premier McNair who held four terms and was appointed Lt. Govenor lived in the home for forty years. Premier McNair held three degrees from UNB. The home has a rich heritage and is beautiful. I feel like I have lived here forever! I love the Victorian era so I now have an excuse to dress in period outfits! :) More exciting plans are in the works for the place!

(photo courtesy of Bill Jarvis)
Monday, July 02 2012
The Designer Crafts Connection hops this month with Vacation Crafts!
In Canada we are still celebrating Canada Day long weekend and with the 4th coming up for our US friends I decided to craft up something very quick and easy to take to any party, a wine bottle topper. Using a sparkly tag, some pretty ribbon and flowers. I made a loop with the tag so it can be reused by the hostess!

Check out all the other great vacation crafty ideas from our talented group of international designers by clicking on the Designer Craft Connection Button! Happy Hopping 
Monday, June 04 2012
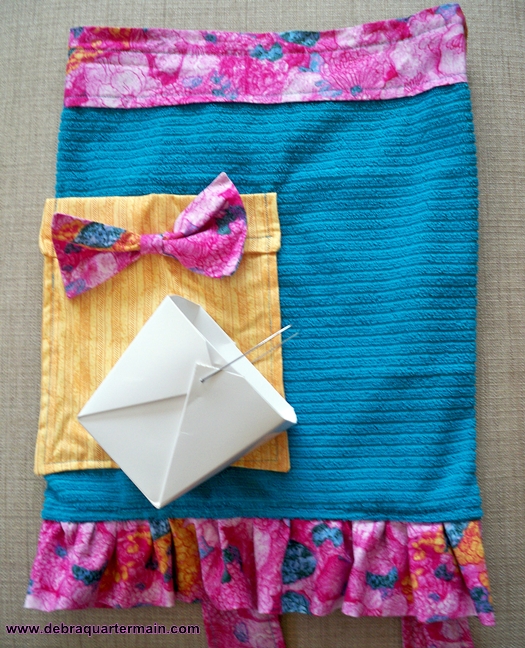
The DCC Designer Crafts Connection is hopping, the first Monday of every month. June's theme is Picnic ideas. I don't have a picnic basket but the take out containers I have gave me an idea to make a mini basket.
I enjoy a picnic, sandwiches, salads, fresh fruit like watermelon, tasty fare but also a little messy so what about an apron for a picnic. A teatowel apron, one you can wipe your hands on and keep the picnic outfit clean and dry! This handy little apron rolls up and fits perfectly in the take out box. Makes a great hostess gift too!
Check out the rest of the hop with the easy peasy button in the sidebar. Be inspired with some fresh ideas for this summer season by a group of talented professional designers! Enjoy!
Saturday, May 12 2012
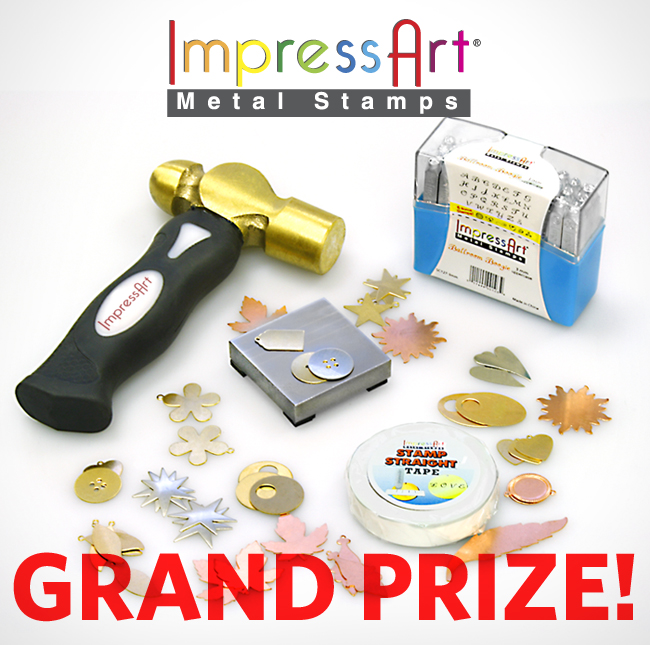
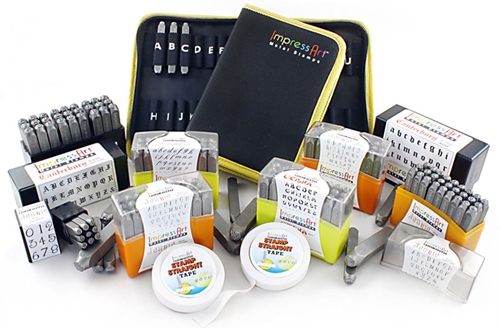
We are hopping with ImpressArt! The DCC Blog Connection designs with ImpressArt Metal Stamps. They are running a contest with a great giveaway from now until midnight May 21st. Details to enter on Monday! Be inspired over the weekend by the talented designers and their use of ImpressArt Metal Stamps.
I have never designed with ImpressArt Metal Stamps but found the tutorial on their website very easy to follow and it shows how exactly to use the stamps.
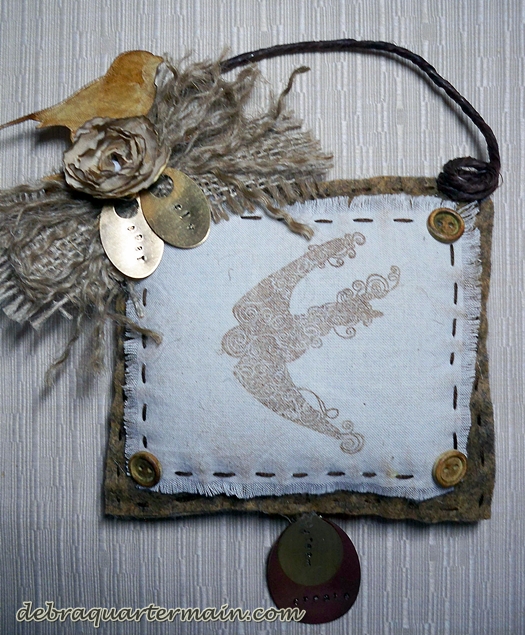
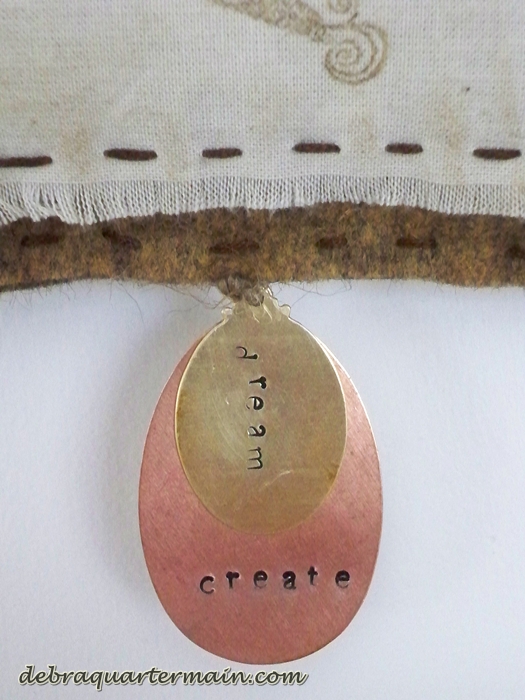
I was inspired by the oval discs which reminded me of eggs, thoughts of spring, my love of birds and my piece came together Bird Song. A new felt collection had also just arrived from National Nonwovens called Daydream Inspirations. The Havanna Gold was the perfect compliment for ImpressArt's discs.
You will need:
ImpressArt Alphabet Stamp Set, Newsprint, lowercase
ImpressArt Metal Stamping Hammer
ImpressArt Stamping Blanks, 3 ovals, I large oval
ImpressArt Steel Stamping Block
ImpressArt Stamp Straight Tape
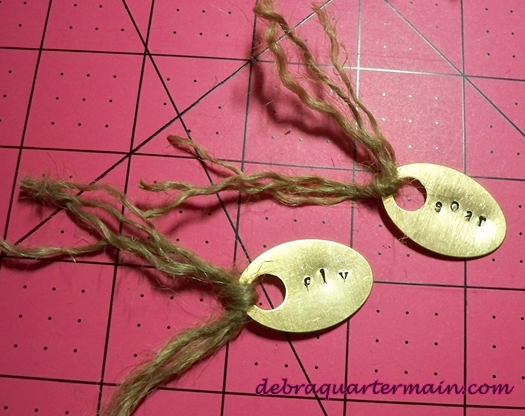
Following the directions stamp the word "create" on the larger oval, "dream, fly, soar" on the smaller ovals. Choose words which speak to you. My stamping is not in a straight line, I wanted a freer expression but I still used the guide for spacing my letters evenly.
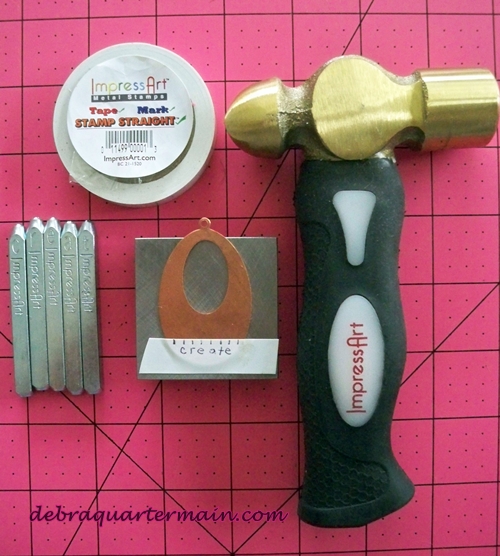
Here the discs are stamped and the letters antiqued with a Sharpie.
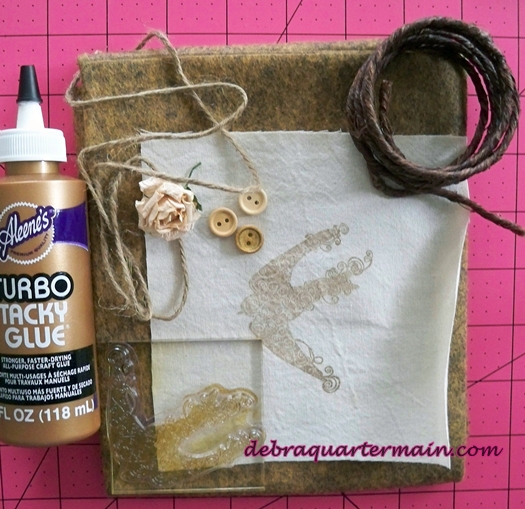
To create the pillow you will need.
6" x 12" Havanna Gold WoolFelt by National Nonwovens
4" square of unbleached cotton
3" x 6" burlap scrap
For the Birds Stamp by Fiskars
Brown Stamp Pad
12" covered wire
Paper flower
4 Brown buttons
Small Bird diecut or sticker
Brown floss, embroidery needle
1/2 yard of jute
Aleene's Turbo Tacky Glue by ILovetoCreate
Polyester fiberfill
Westcott Brand mat and scissors
Stamp cotton with chosen bird design. Heat set. Stitch cotton to wool felt. Stitch pillow together, stuff and close opening.
Bend one wire end andi insert through small hole in top of pillow, repeat for opposite side.

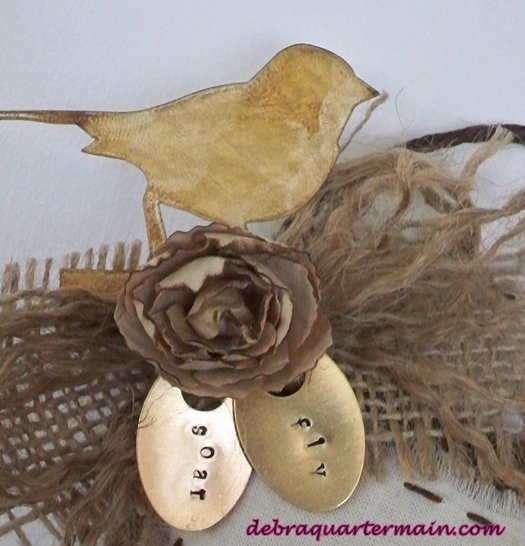
Tie loops of jute through discs. Tie burlap piece in center. Fray jute pieces and tie into bow. Glue burlap bow, jute bow to upper corner. Glue jute ends of discs to bow. Glue flower to center. Insert bird diecut and glue.
Tie small dream disc to large create disc with jute. Glue to center bottom of pillow.
Use stamp pad to antique flower and pillow front.
The Grand Prize! Enjoy the hop! Happy weekend and Mother's Day to all the great moms! 
Monday, May 07 2012
The Designer Craft Connection Blog Hop is all about jewelry this month! I wasn't sure what I was going to come up with as jewelry is not my area of expertise. I had a couple wood bracelets in my craft stash and I have been wanting to make a few dyed projects. I decided on a vintage kind of feel for my bracelet, gathered some other supplies and chose a color from the ColorRit Color Formula.
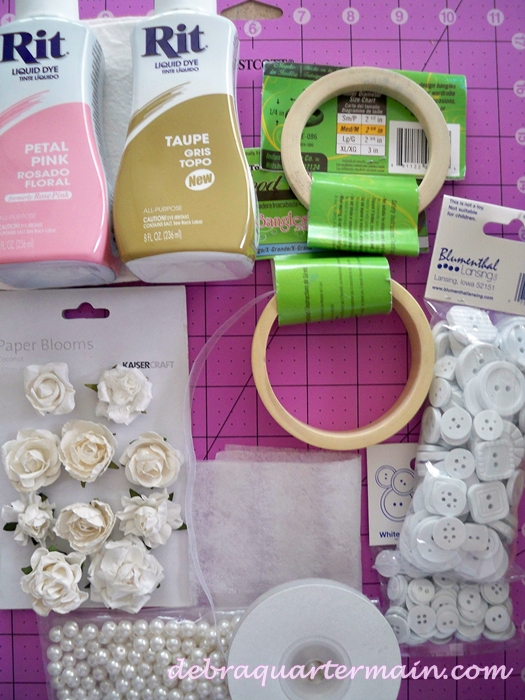
Materials:
Rit Liquid Dye Petal Pink and Taupe
9" x 12" Pina Colada XoticFelt by National Nonwovens
Favorite Findings Buttons by Blumenthal Lansing
Wood Bracelet by Diy Bangles
Sizzix Big Shot
Flower Die, 3-D Wrapped by Eileen Hull for Sizzix
KaiserCraft Paper Blooms
Pearls
1/2 yd Lace, 2 yd Ribbon, Aleene's Tacky Glue, Westcott Brand scissors, paper towel, plastic drop cloth, gloves, measuring utensils and container.
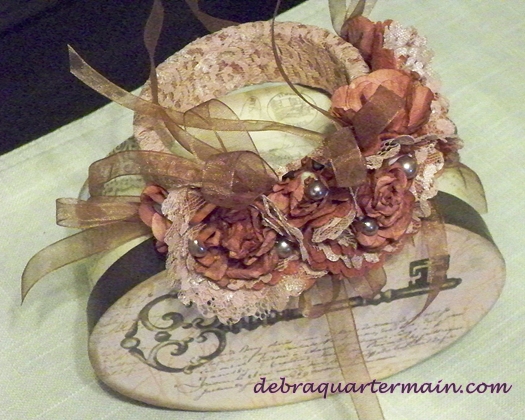
I wanted to create a tone on tone, an ombre effect by dyeing different materials in the same color family of whites and creams. The pearls did not dye so I substituted some colored ones I had on hand. I followed the directions and dyed all of my materials. I did not read my color formula directions carefully and added equal amounts of the Petal Pink and Taupe dyes instead of double the Pink to Taupe. However I like the color I created.
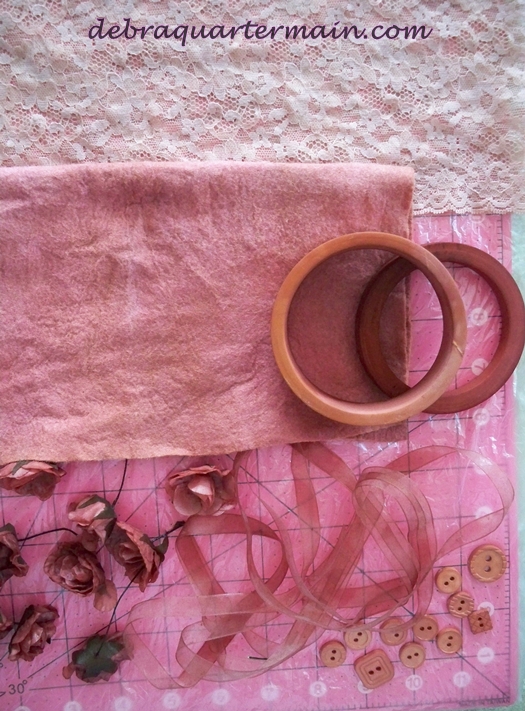
Use the Big Shot and Flower Dye to cut out several flowers from the lace and felt.
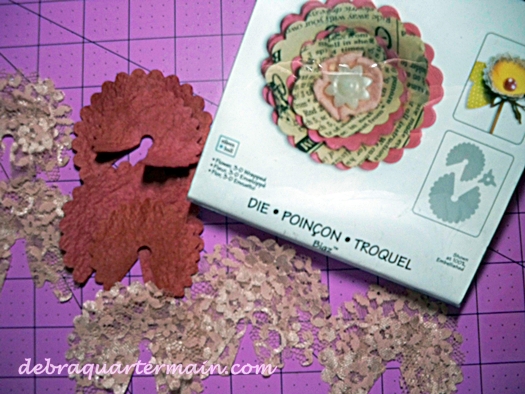
Begin assembling the flowers mixing the lace and felt. Insert a paper flower through the center of each flower.
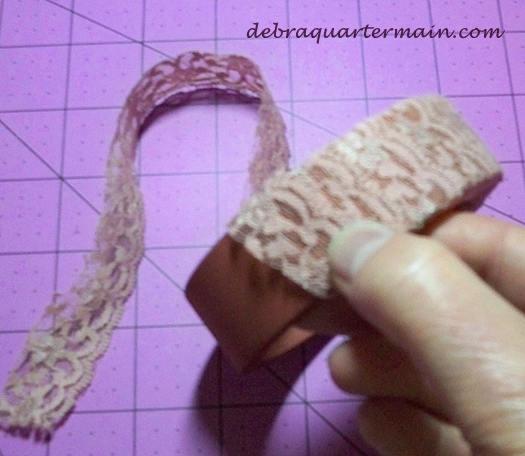
Cut a thin strip of lace and wrap bracelet gluing ends. Glue three larger flowers side by side to bracelet. Fill in with remaining paper flowers. Tie ribbon into half dozen bows, glue in between flowers. Glue on pearls and buttons. Wear and Enjoy! 
Happy Hopping, be inspired to create! Upcoming this Saturday the 12th twenty of us hop again with designs created from the fabulous ImpressArts metal stamps!
Sunday, May 06 2012
Like spring bursting into bloom so is creavtivity blossoming daily!
Monday, the Designer Craft Connection hops with Jewelry designs.
Saturday the 12th twenty of us from the DCC hop again with designs using the ImpressArt Metal Stamps. These very cool stamps imprint into metals and clay to create stunning jewelry pieces.
Wednesday, highights from the NBTA Council Days, I taught a fun workshop using stray socks, mittens and gloves from the Lost and Found to create silly creatures. The teachers were a great group and it was fun to have my cousin an elementary kindergarten teacher in my group! We went to Elementary School together.
The countdown is on to the opening of our Artist Cooperative, Artful Persuasion in downtown Fredericton on May 15th.
I am working with the gorgeous range of Rit Dye colors this week on a couple of projects for the company.
It is an inspired spring, May is bursting with creative goodiness!
Wednesday, April 04 2012
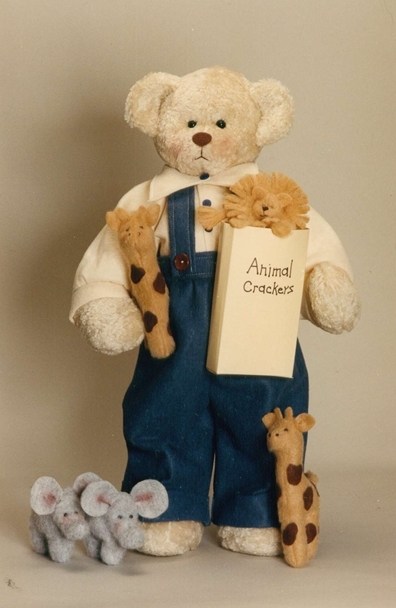
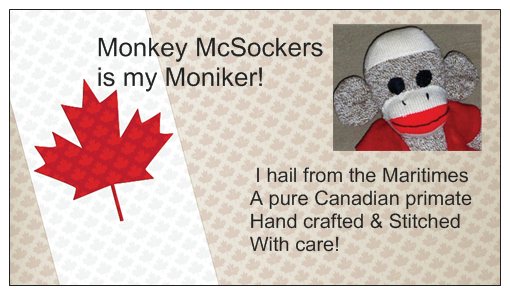
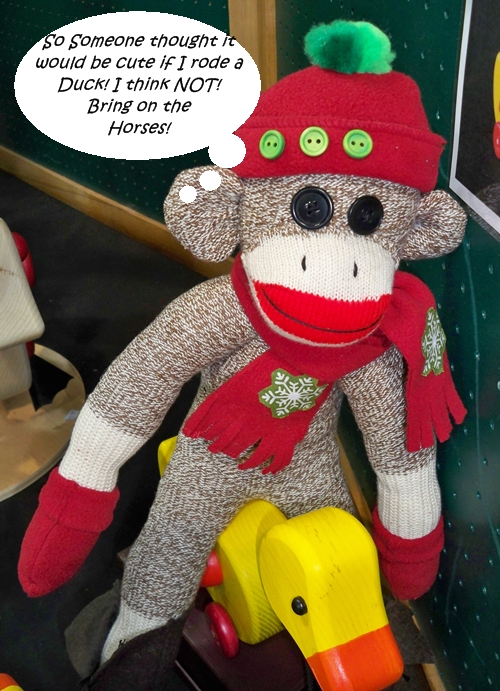
Sometimes things just keep popping up in our lives, when I wrote my second book Easy-to-Sew Playful Toys one of my favorite toys I designed was a monkey.
Appearance #2, the Sock Monkey is a classic toy which has been around for many years. It has enjoyed a resurgence in popularity in the last few years. The Fox River Mills Company manufacturers the Fox River Red Heel Socks. Each pair includes the pattern and cutting diagram for making a Sock Monkey. A couple years ago I was asked to design a Sock Monkey using STYROFOAM TM Brand Foam. He appeared in Crafts n' Things magazine.
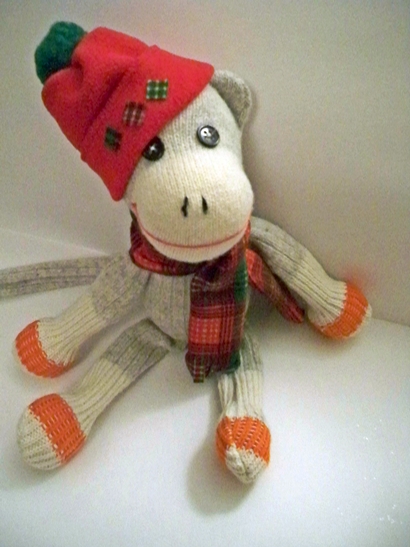
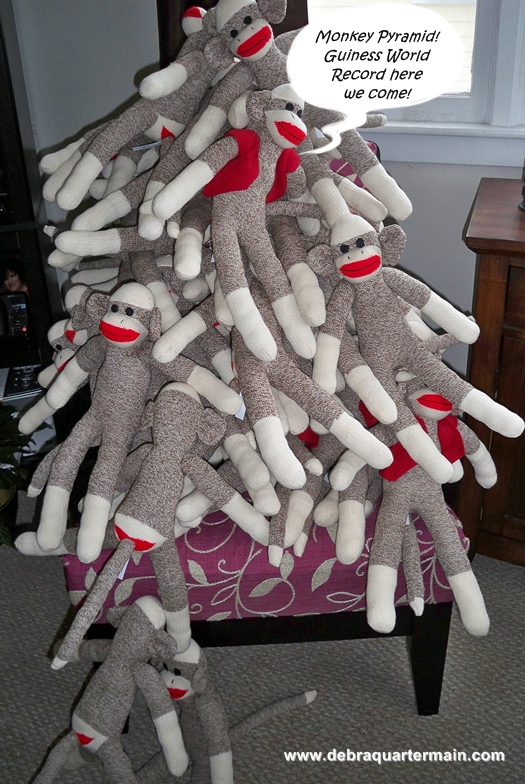
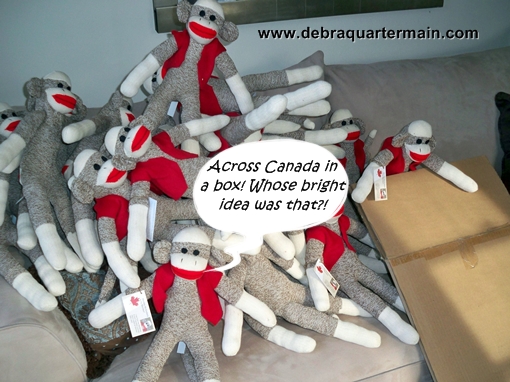
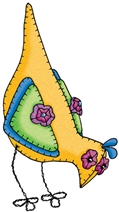
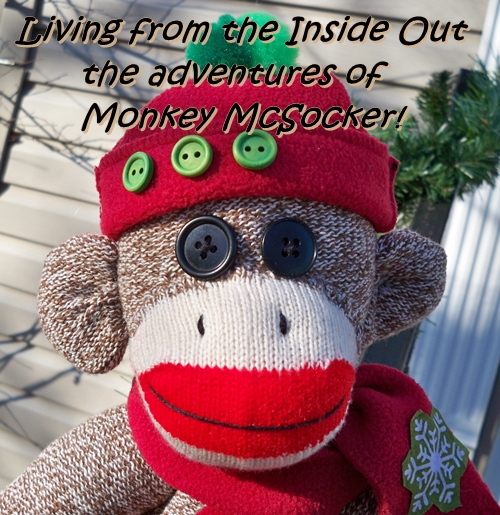
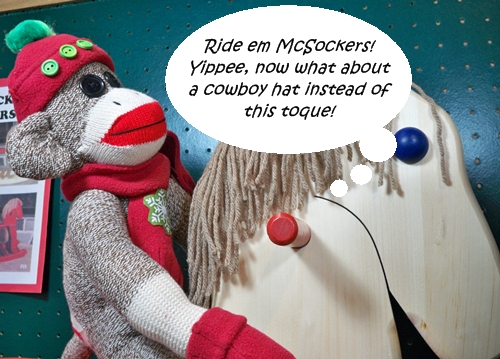
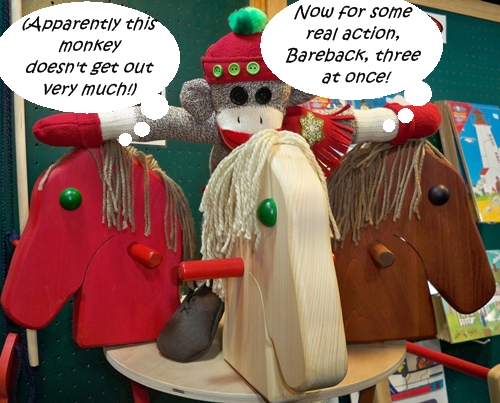
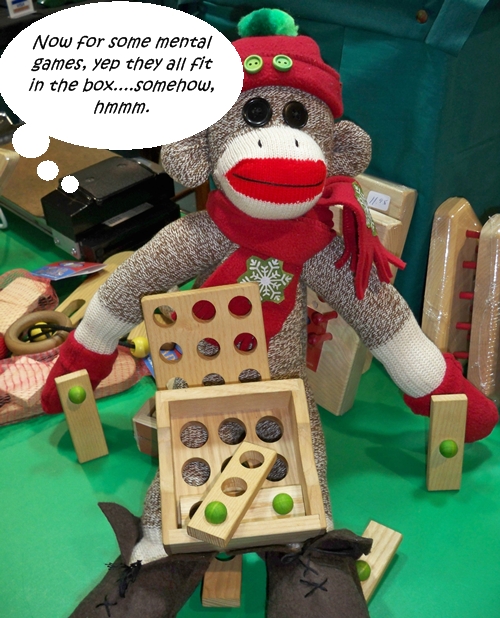
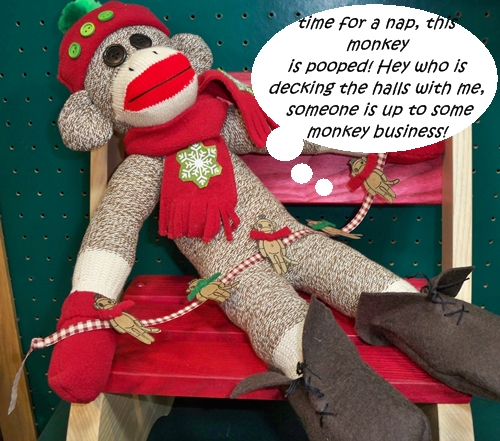
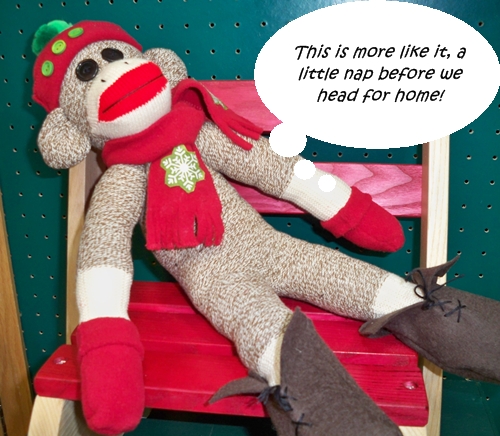
Appearance #3, a few months ago the Designer Crafts Connection Blog Hop featured When Creativity Knocks Sock Monkey DVD. We were asked to create a Sock Monkey or some creative version. I opted for the classic even though I made him inside out! I took him off to have an adventure with some wood toys. The next thing I know I am discussing providing samples for the Toronto Gift Show, happening the same time as I was away for the CHA show in Anaheim! I had to redraw my own pattern from the Fox River Mills instructions, add string jointed arms using upholstery thread and embroidered eyes, facial features for safety, register my filling content. Monkey McSockers was now ready to venture across the country!
Here is part of the gang getting ready to leave the nest and venture off to stores across Canada!
Monday, April 02 2012
It is the first Monday of the month and the Designer Crafts Connection Blog Hop is on! With Easter just a week away I wanted to design something to add to my Easter decor. I was also teaching a kid's needle felting workshop and they wanted to make a character inspired by Alice in Wonderland.
I decided on creating the White Rabbit with a dash of steam punk, (a departure from my usual cute bunnies !) The White Rabbit is a mixed media project incorporating needle felting, wool, foam, papers and embellishments.

You will need:
2 eggs, 1-7/8" x 2-1/2", 2 cones, 4", 12" sheet of STYROFOAM TM Brand Foam
.2 oz. Natural, Brown scrap of Wool Wisps by National Nonwovens
9" x 12" pieces of black and white felt by National Nonwovens
Playtimes Past Paper Collection by Graphic45
Flower, 3-D wrapped die by Eileen Hull for Sizzix, Big Shot by Sizzix
Antique Bronze Decorative Wall Hardware by Canvas Corp
Flip-Pal TM Mobile Scanner
Westcott Brand Titanium Scissors, Paper Cutter
Needle Pen Tool by Clover
Paper Adhesive, Mono Aqua, Glue Stick by Tombow
Fabric Fusion by Aleene TM, Ilovetocreate
Hot glue and gun
5" print Ribbon
6" Wire
2 black head Quilt Pins
1 white Chenille Stem
2 Wood Skewers, 3 Toothpicks
Cardstock
Ephemera
Glaze
Wire Cutters, Ruler, Pencil, Chalk, Foam base for needle felting.
1. Cut one foam egg in half for feet, cut two pieces 9" by 6" from sheet, stack and glue together for base.
2. Insert toothpick, glue two cones together for body. Cover lower cone with natural wool and begin needle felting.

3. Cover egg for head with natural, needle felt. On foam base needle felt natural into two ovals 5" by 1 1/2" for ears, trim to desired shape. Needle felt to head. Insert pin eyes. Needle felt small nose as shown with brown scrap of wool.
4. Cover half egg for feet with natural wool, needle felt.
5. Pull two thin strands of wool for hands. Cut chenille stem in half. Begin wrapping wool at center of stem and wrap to end. Bend end of stem and continue wrapping back up stem. Glue ends in place.

6. Insert a toothpick into head, glue to body (bare cone is top of body) pressing pieces firmly together.
7. Cut a piece of white felt 6" by 5". Fold in center and cut notch along top edge. Fold over for collar. Wrap and glue around top of cone.
8. Cut two sleeves from black felt 2 1/2" by 3". Cut a jacket 7" square. Fold the square in half. Measure 1 1/2" on open ends, cut in on diagonal 1" to make collar. Cut from this point on diagonal 3" back to edge. Cut back in on diagonal from this point to end. Fold collar, wrap jacket for fit around rabbit body. Decide on tails of jacket from back. Remove jacket and cut tails on diagonal.
9. Wrap jacket around rabbit. Glue in place. Fold sleeves in half, glue edges. Insert chenille stems with paws extended. Glue to back of jacket. Bend.
10. Knot ribbon piece in half. Trim ends to desired shape. Glue to front of rabbit.
11. Insert skewer through feet and body leaving 3" extending.
12. Cover base with papers, insert rabbit.
13. Embellish as desired!
14. Pocket watch was scanned with Flip-Pal Mobile Scanner and printed out onto cardstock. Glued to another layer, cut out and glazed.
15. Top hat was made from a 3" felt circle for base, a 2" by 3" strip overlapped and glued. Piece of black glued to top of cylinder and then trimmed around top edge.
16. Flowers were die cut and assembled inserting nail through centers. Insert nail ends into foam base.
Enjoy!
Follow the DCC hop to see wonderful spring inspired designs and great giveaways! Happy Hopping! 
Monday, March 05 2012
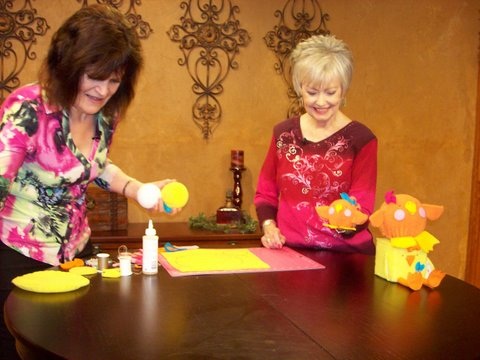
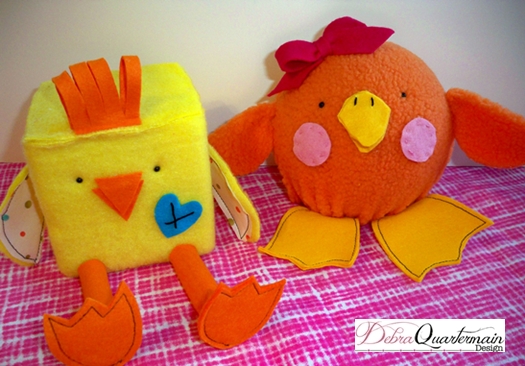
It is the first Monday of the month, time for the Designer Blog Hop Crafts Connection! Forty talented designers strut their stuff and offer some surprises as you hop along! We are celebrating interNational Craft Month! With Easter just a few weeks away I am featuring the tutorial for the cute chick/duck I demoed for a segment of Creative Living with Sheryl Borden.
Sheryl is holding the baby duck in the photo that I demoed on the show. In yellow it becomes a cute chick!
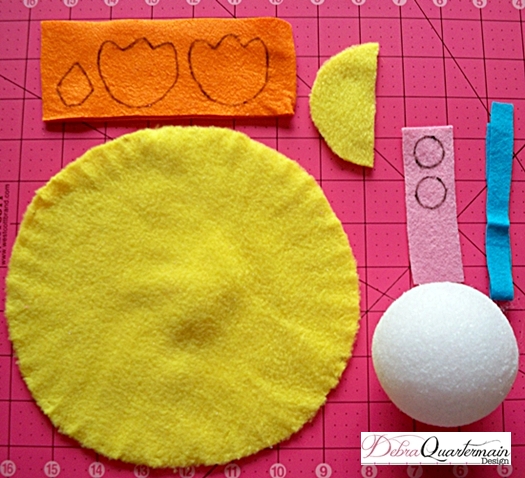
Materials:
3", 6" balls, 4" cube of MakeitFun STYROFOAM ™ Brand Foam
1/6 yard yellow fleece
1/3 yard orange fleece
9" x 12" pieces of Canary (yellow), Papaya (orange) scraps of Fuchsia, Seashell Pink, Caribbean Surf ( teal) Xotic Felt by National Nonwovens
6" fabric scrap
1 chenille stem
1 skein black, pink embroidery floss
6 black, 12 colored head quilt pins
Aleene's Fabric Fusion™
Upholstery thread
Embroidery Needle
5", 8" Westcott Brand® Titanium Steel Scissors
(Ruler, measuring tape, pencil, circle templates for large duck 12", small 8")

- Making the Ducks: For both the 3" and 6" ducks construction is exactly the same. The pattern pieces included are for both sizes. Any variations will be indicated in instructions. For the 3" duck cut a 3" and 8" fleece circle. For the 6" duck cut two 3" and one 12" circles. Cut two of each cheeks, beaks and four of each foot from felt. Cut ½" by 9" strip of felt for bows.
.
- With upholstery thread anchor thread at edge of the large circle. Sew a small basting stitch around the complete circle.
- Pull stitches slightly. Place circle over ball pulling stitches tightly. Circle should stretch to close. (On larger duck if this does not happen, a small circle can be glued on bottom to finish the body.) Secure thread and cut.
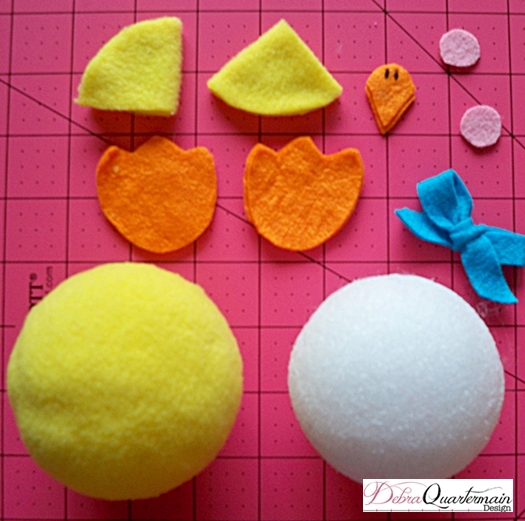
- For small duck cut 3" circle in half. Fold in half again wrong sides together and glue. For large duck fold each 3" circle in half wrong sides together and glue. Glue wings to sides of body as shown in photo.
- Glue beak pieces together angling top one slightly higher than lower beak. Make two small stitches at top of beak. (These stitching details are optional; they can also be recreated with a fabric marker.) Glue beaks to center of face slightly above wing line.
- Insert two black head pins as eyes. Adjust until you are pleased with location. Remove and dip in glue, reinsert pushing in to indent in face slightly.
- Sew around cheek circles with pink floss if desired or use fabric marker or add just as is. Glue to face of duck under eyes. Refer to photo for placement.
- Place feet together in pairs, reverse one pair. Glue together. Outline in black floss with a small stitch as an option. Glue feet to bottom of bird. Tie bow from felt strip, pin or glue to head.
- Making the Chicken: Use the ruler to cut a 4" by 16" strip of fleece. Cut two 4" squares of fleece and one 3" circle. Cut one 1 ½" by 3" topknot piece, two beaks, two 3" by 3" strips and four feet from orange felt. Cut one 3" circle from fabric scrap. Cut one heart from teal.
- Begin at one edge of cube and glue long fleece strip. Wrap fleece piece around cube bringing it back to the edge to meet. Glue in place. Glue each 4" square on the opposite two remaining sides along edges. Press fleece seams together, add more glue if needed.
- Cut 3" fleece and fabric circles in half for wings. Glue or sew with black around edges. Pin or glue in place on either side of chicken. (Approximately at 3" mark.)
- Cut chenille stem in two 3" pieces. Roll an orange strip around each leg and glue. Place feet in pairs reversing one set. Glue or topstitch in black around edges. Glue to end of each leg. Glue to edge of body.
- Glue beak pieces together with top one slightly above lower beak. Glue to face. Insert two black head pin eyes. Add glue to ends and reinsert indenting slightly.
- Fold topknot in half, cut through from fold to 1/4 " from ends. Glue to top of head. Stitch through heart with black floss. (Optional or use fabric marker.) Glue heart to body.
Have fun hopping! Leave a comment here to enter your name for a fabulous pair of Westcott Brand® Extreme EdgeTitanium Steel Scissors!
Monday, February 06 2012
It is year since the Designer Crafts Blog Connection began. What a year! Each month a fresh challenge, great give aways and generous manufacturers who have supplied us with product to use and review. A sincere thank you to our sponsoring companies and to our creative leader Julie McGuffee! Julie has posted many pictures from the show which was wonderful as I was exhibiting in the L+D section of the show and didn't get many photos.
This month we have returned from CHA, the Craft & Hobby Association's Trade show. Each year attendees from all the world, editors, publishers, manufacturers, celebrities and retailers come together to present and shop the best and newest creative products and techniques.
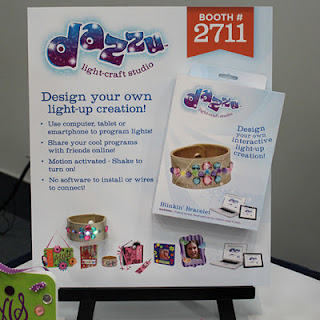
The Innovation Showcase and Awards highlights the newest products in the industry. The winner was Shoe Attitude, tattoos for shoes. Runners up were Cool2Cast and the Knook the knitting needle crochet hook from Leisure Arts. I thought the kids LED light, sticker kits by Dazzu were very cool and Baby Boutique, diaper covers and accessories for the eco-conscious mom were cute and so smart!
photos courtesy of Julie McGuffee
The fashion finds at the show were very creative especially the Ilovetocreate booth where EcoHeidi took broken cups and saucers and fashioned a brilliant colorful skirt.
Because of my areas of interest especially in felt and needle felting I was so pleased to see several felt companies at the show. EKSuccess who now has the Dimensions Brand introduced a series of adorable animal kits which include a silicone mold in the larger kits.
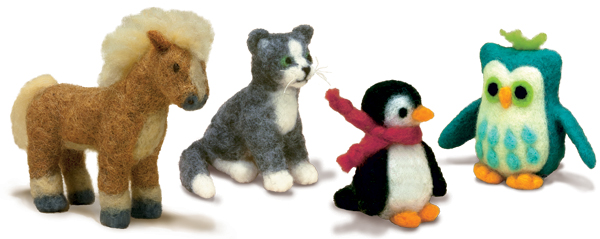
photo courtesy of EKSuccess
A new Canadian company Pollika had a collection of 100 percent wools, rovings and Wope, a wool rope with the added strength of jute included. Kunin's ecofelt showed bright patterns and tapestry inspired designs, felt has come a long way! The New Image Group had a beautiful felt purse line with a collection of embellishments to personalize your bag your way.
Texture and iconic elements were very evident at the show, birds, wings, dress forms, travel, body, shoe, clothing tattoo art. Fabric and felt elements were found incorporated into paper, mixed media designs.
Please hop around to discover more about the show, every designer brings a fresh and unique perspective. Happy hopping! Debra
Monday, January 09 2012
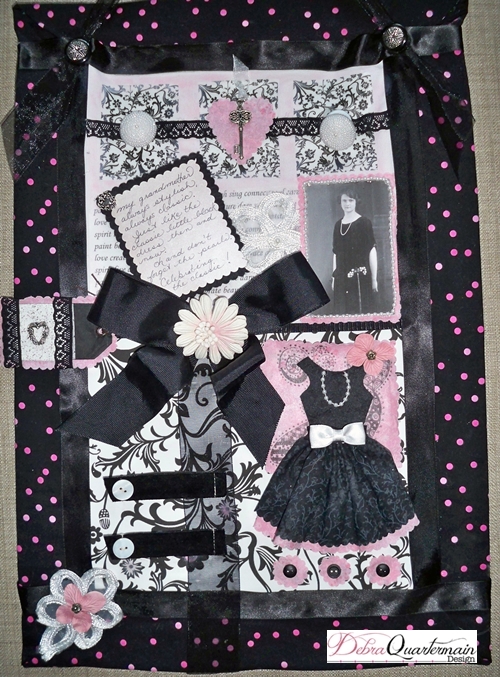
This month the Designer Crafts Blog Hop Connection theme is Journalling. The talented Julie McGuffee who keeps us organized is host of the show Scrapbook Soup which now can be seen online as well! It features interesting ideas, tools and products for scrapbooking and journalling. Use the button in the sidebar to hop along and see the inspired projects of our designer group!
As primarily a sewing designer I incorporate stitching into as many projects as possible. I decided to create a piece to hang in my studio, a tribute to my grandmother. I have a picture of her when she was a young woman wearing a black dress, it is a beautiful photo and I wonder from her expression what she was thinking. She was always very stylish and wore beautiful hats to church and lovely suits there and to IODE meetings, church teas and bridge club.
Often when I dress up in a classic black dress and add her pearls she left me I am reminded of how we are tied to the memories of those we love, even though they may not be here any longer, their spirit and love is always felt. Remembering my grandmother. 
Friday, January 06 2012
 It is finally a Fowl Friday with Fran & Freda! We are so happy to say Happy New Year to all our peeps! We survived the holidays, always a sad time for us as we mourn the loss of many of our feathered cousins, the Toms and finally leftovers, the soups are gone! It is finally a Fowl Friday with Fran & Freda! We are so happy to say Happy New Year to all our peeps! We survived the holidays, always a sad time for us as we mourn the loss of many of our feathered cousins, the Toms and finally leftovers, the soups are gone!
Hey though we are excited about a totally different kind of soup Scrapbook Soup, the very cool scrapbooking show hosted by the talented Julie McGuffee who heads up our Designer Crafts Connection Blog Hop is now live online! We are especially excited as we don't get the show here and now tomorrow we can watch!!! Popcorn is ready and Freda has pics, album and glues ready to go. She has posted so many profile pics on Hatch.com she now has enough for a complete scrapbook! Can't wait to see the results, um sure think I am busy for the rest of the weekend!
Monday the DCC Blog Hop is all about scrapboks & journalling, a perfect way to be inspired for the new year! Hop along with us!
Catch Julie and her show tomorrow! Follow the Fowl always! Fran & Freda 
Sunday, December 04 2011
The first Monday of the month and the DCC (Designer Craft Connection) is hopping! This month's hop is sponsored by When Creativity Knocks, Sock Monkeys Go BanAnas,
 
Fox River, Red Heel Sox, Judikins , Sock Monkey Stamp and RIT, the Dye Company!
To enter the contest open until December 19th
Go to http://www.whencreativityknocks.com/ website
In the Member Log in box click: Create An Account
-Entry Code: Sock Monkey
There is also a discount coupon to purchase the WCK VideoBook: Sock Monkey Goes BanAnas
Now on for the adventure! We were sent Ana's video book to create a sock monkey along with the red heel socks from Fox River. Ana has several tips and an updated version of the traditional pattern to make a sock monkey super easy.
However do not make it at 11pm at night when you have already worked a 12 hour day! I have to admit I was half way through sewing when I realized I had missed the crucial first step of turning the socks wrong side out. Thankfully the socks look great on the inside too (and the hat hides a bad hair day or in this case the toe bumpy seam line!)
On with the adventure!

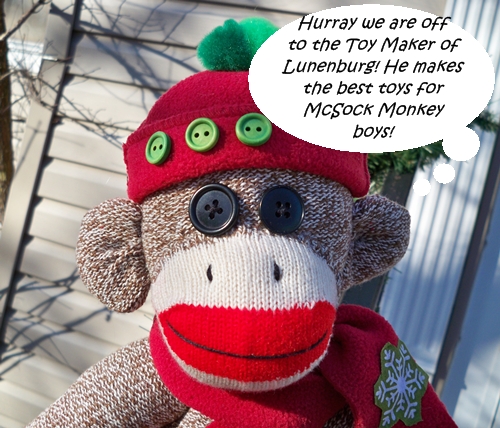
Visit the Toymaker!
Just click on the DCC button in the right sidebar to catch up with some other monkey adventures! 
Tuesday, November 15 2011
A bonus this month with the Designer Crafts Connection hopping twice! Today's hop features the Flip-Pal™ Mobile Scanner! I am fortunate to have had the company send one to me to use. Before it arrived I did some research and read reviews, all very positive. The website features great videos and instructions. As soon as I opened the box I knew this was going to become a necessity in my studio! Already loaded with a memory card and batteries, I simply flipped on the switch and was ready to scan immediately (within a few seconds to be totally accurate.)

Flip-Pal™ mobile scanner presents the "Scan & Share" Blog Hop Challenge
Flip-Pal™ mobile scanner has partnered with the Designer Crafts Connection Blog Hop to offer the "Scan & Share" Blog Hop Challenge!
This challenge is two fold?first for participating "Scan & Share" Blog Hop designers to create personalized gifts and projects in a wide array of different crafting categories while using the Flip-Pal™ mobile scanner and second, having blog hop followers join in and share their creative ideas.
To submit your "Scan & Share" ideas, click here. The blog hop follower and participating "Scan & Share" Blog Hop designer who creates the most creative and productive ideas using a Flip-Pal™ mobile scanner will each win a Flip-Pal™ mobile scanner. (Please visit their facebook page and "like" them too!)
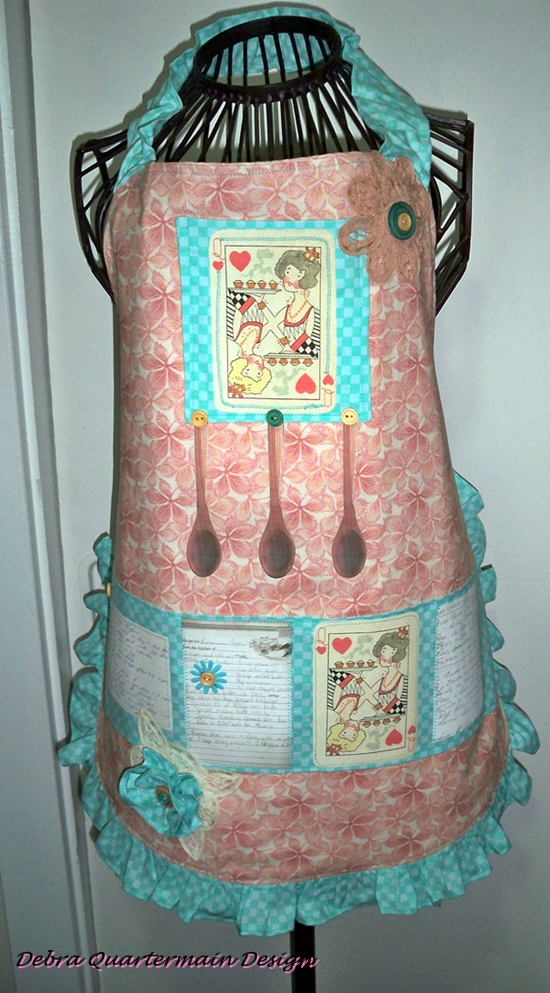
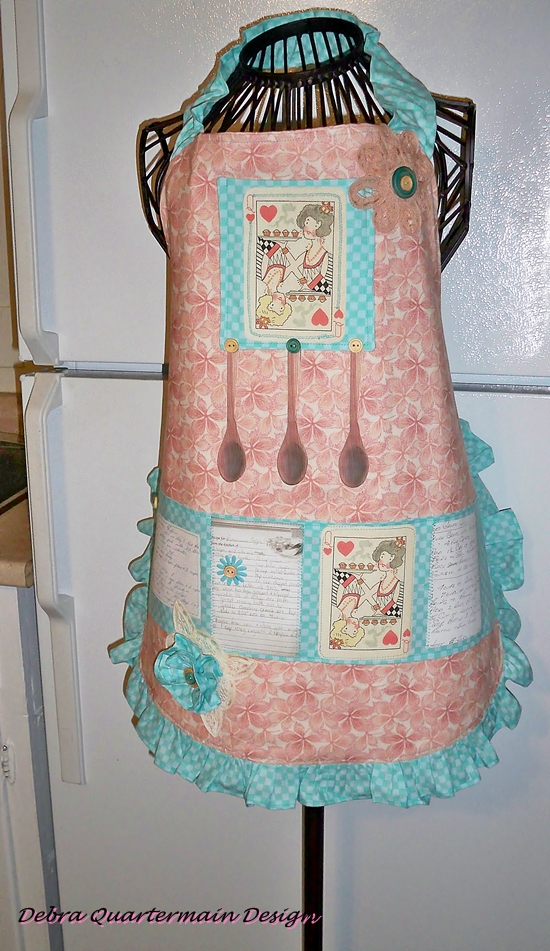
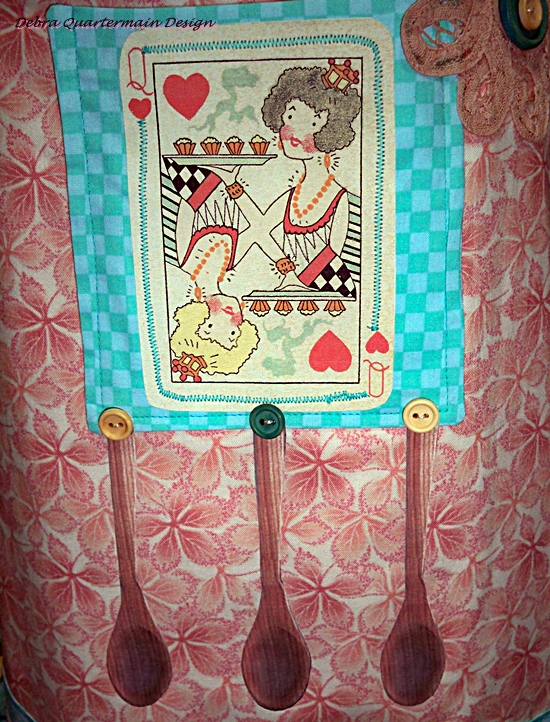
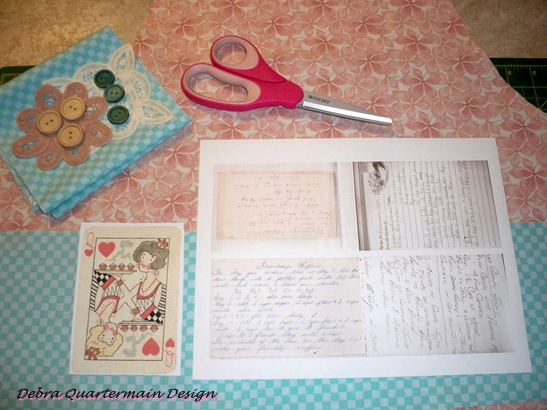
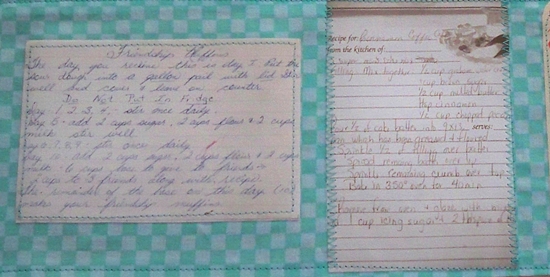
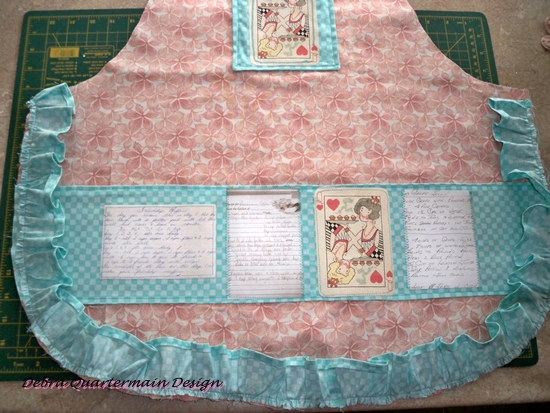
Now on to my project, since I am primarily a sewing designer and love to sew I wanted to use the Flip-Pal™ Mobile Scanner in an apron for my daughter the pastry chef. I have a cookbook of my Mom's like a lot of us do, the one where she handwrote in recipes, pasted in ones from friends. The pages are worn, many covered with spots of dried batter and the book now has to be handled carefully. With the Flip-Pal™ Mobile Scanner I could gently open the book and hold it over the page scanning in whatever recipes I wanted. The Friendship Muffin recipe is one I remember her having a container of this mysterious batter which was portioned off to friends and supplied us what seemed like forever with muffins! Here are some of the recipes included in this retro cute apron along with an image from the Vintage Workshop Kitchen 11 collection.
The details I added to this apron I made using the Flip-Pal™ Mobile Scanner to personalize and make it special could be applied to a purchased apron. Printed out on Avery Printable Cotton it can simply be ironed on, no sewing required! Just think of all the special thoughtful gifts to be made! Hop along with the DCC button to the right to be inspired with more projects and ideas just in time for the holidays!
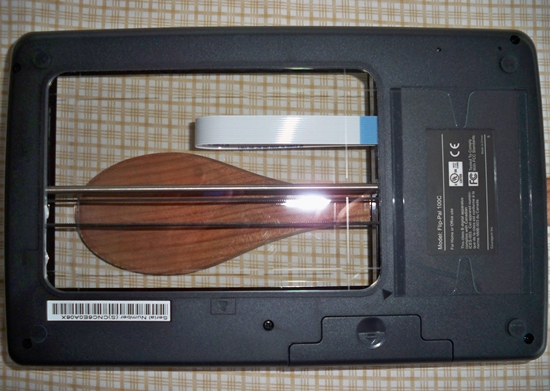
I also wanted to create a fun detail with adding wooden spoon appliques. I took out my favorite wooden spoon, picked up the Flip-Pal™ Mobile Scanner, took off the cover and placed it over the wooden spoon. It required two scans, it is a big spoon. :) The scanner has a Stitch feature which "stitches" scans together, just make sure to have adequate overlap. Below is my scanning of the spoon, "stitching" them together, sizing and printing out on Avery Printable Cotton.
I printed out the recipes onto one piece of printable cotton after scanning them.
I cut them apart, ironed onto the fabric border and stitched in place and yes there is the Friendship Muffin recipe!
(When using the scanner please be aware of copyright issues, scanning for your personal use differs from scanning work that is not yours to be combined and sold in items.)
Here is to creating with inspiration, integrity & great products!
Disclaimer
This website and blog belonging to Debra Quartermain Design are written and edited
by myself, Debra Quartermain. I give my honest personal opinion and review of all the
products that are submitted to me. I reserve the right not to review or use products
unless I feel I can give a fair assessment.
I am not paid to review products. However, I do receive products free of charge to
try out. I will and do accept and keep free products and other forms of compensation from companies.
Importantly this blog and website abides by word of mouth marketing standards. I
believe in honesty in both opinion and responsibility to my readers and the companies
I deal with. I will only support and endorse products and services I believe in and based
on my personal and professional experiences. I cannot verify anyone else's experience
with a product and any claims or further information should be obtained from the manufacturer.
Monday, November 07 2011
November is a busy month for the Designer Crafts Connection Blog Hop! We hop the first Monday of every month but this month we have TWO hop dates, today with ideas for Fall/Thanksgiving Decorating and on the 15th with a very cool Flip Pal Mobile Scanner Hop! Also we have even more exciting give aways with the Sizzix Fresh Vintage Blog Hop involving many of our DCC members. Details below.
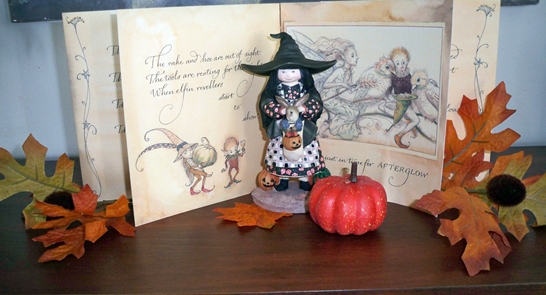
Here in Canada we have already celebrated Thanksgiving but I wanted to share some easy decorating ideas for this special holiday. Many of us are both short on time and space when it comes to decorating for a holiday or event. For my mantle this year I used a lovely illustrated book opened to pages with elf and fairies carrying pumpkins and gourds. Choose a child's storybook, artwork or vintage cards, add some silk leaves and pumpkins or gourds. I have a special figure which reminds me of my daughter Kate dressing up for Halloween. I add silk leaves here and there surrounding candle sticks, books for a simple touch of fall festivity. I sprinkle them down the center of the table.
 Visit our NEW: Designer Craft Connections Facebook Page for details on our November 7th and 15th great give aways! Be part of the in crowd. LIKE our NEW Designer Craft Connections Page on Facebook so you will learn about our challenges, giveaways, and announcements. Make sure to share our Designer Craft Connections Page with your Facebook friends so they can join in the fun.
Happy creating! Debra
Monday, October 17 2011
Just a reminder of the DCC Designer Crafts Connection Blog Hop for October featuring Westcott Brand Cutting Tools. Many of the designer projects are up for auction with proceeds going to the Breast Cancer Research Foundation, please check them out, there are so many cool designs! The give away of a large assortment of their awesome tools is ongoing. You have the rest of the month to enter just by leaving a comment on their blog post http://westcottbrand.blogspot.com/2011/10/designer-crafts-connection-charitable.html
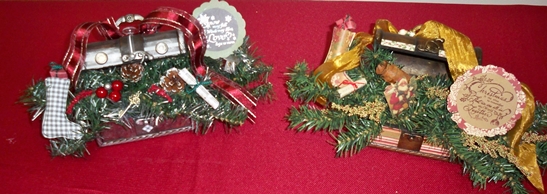
This month I started teaching some craft and sewing classes and workshops. Next weekend is spooky fuin with the kids, making costumes, using fabric paints, glitter and lots of glue! In the Thursday eveniing class two of my students, best friends were very pleased with their Holiday centerpieces. I provide the guidance and illustrate some techniques along the way. Once the students were immersed in the project their unique creativity began to shine. They were so pleased with their finished design, that makes teaching so rewarding when someone who does not believe they are creative leaves at the end of class knowing "I can do that!"
This week's class is card making, we will be embossing, stamping, glittering, using die cuts and embellishing to create four to six cards. There is still room in the class if you live locally and want to make some cards for the holidays coming up! Keep creating! Debra

Monday, October 03 2011
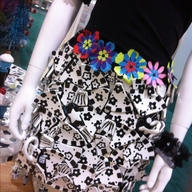
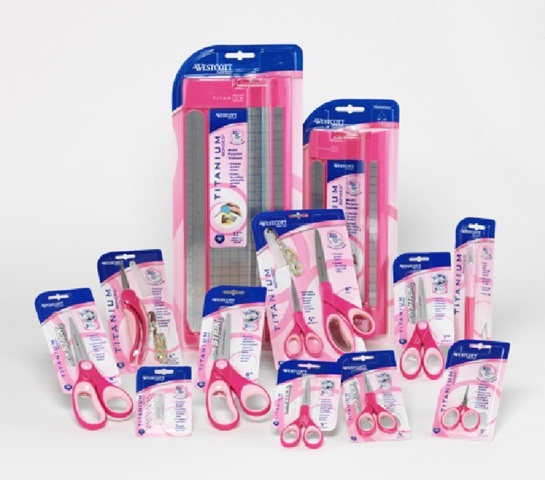
The colors of fall are a rich crimson array of shades and hues, swirling leaves and crisp lively days. The color of October is also pink, Breast Cancer Awareness month. This month's Designer Crafts Connection Blog Hop is sponsored by Westcott Brand® Cutting Tools. We were challenged to use Westcott Brand pink tools in creating a design incorporating
Duck Brand® Duct Tape and VELCRO® Brand Hook and Loop Fasteners . Westcott titanium steel non-stick scissors are ideal when working with adhesive products.
Several of the designers involved in the hop have donated their projects to be auctioned off with Charity Wings for the Breasr Cancer Awarenss Foundation, http://www.charitywingsnews.blogspot.com/2011/10/westcott-brand-and-friends-auction-for.html Westcott Brand has a fabulous giveaway for DCC blog hoppers, A Deluxe wonderful designs for a great cause. Please check it out.
Assortment of Westcott Cutting Tools (assortment may vary, US Residents only). All you have to do to be eligible to enter is comment on the DCC Blog Hop Post prior to November 1st. You can also visit Westcott Brand on Facebook.
Now for the design! There is a Wild Gal in every woman and inspired by the Duck Brand hot pink zebra print I created a ruffled belt and pin. I was travelling while creating this design and it was a very portable project to work on. Westcott Brand Scissors, a roll of Pink Duck Brand Tape and a Roll of Zebra Print, Velcro Brand Closures.

How to:
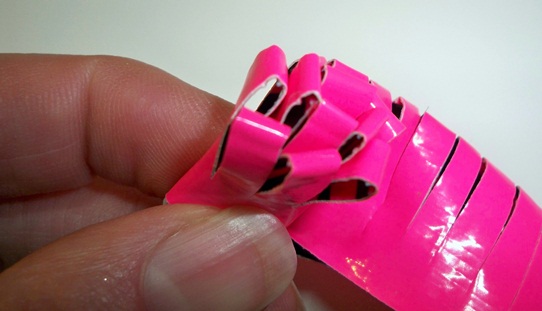
Outer Flower- With adhesives sides of duck tape rolls facing and aligned begin rolling together. Measure and cut 3'. Begin snipping along strip to 1/4". Roll. Use a 1" circle of tape to adhere bottom of flower.
Inner Flower- Repeat as for outer flower rolling tape together for an 18" length. Fold in half lengthwise. Begin snipping through layers at fold to 1/4".
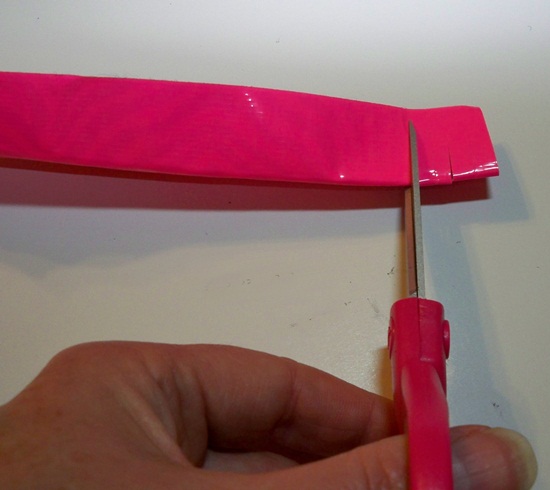
Finish snipping length and then roll for center of flower. Insert in center of outer flower adhering with Velcro Brand dots. Affix a pin back to end of outer flower.
Belt instructions to follow tomorrow, now get hopping with our DCC button in the right sidebar and see all of the amazing projects created using Westcott Brand® Cutting Tools
Thursday, September 29 2011
September is National of should I say InterNational Sewing Month. I could not imagine my life without sewing or actually remember any time I was not sewing. Some of my earliest memories are of sewing next to my mother in the summer on our front porch. I had a tiny machine and I made doll clothes from the scraps she had. My mom like so many mothers at the time sewed most of all of our clothes. I remember the summer sewing because my mom also worked outside the home as a teacher so the summer was when she had freer time to sew.
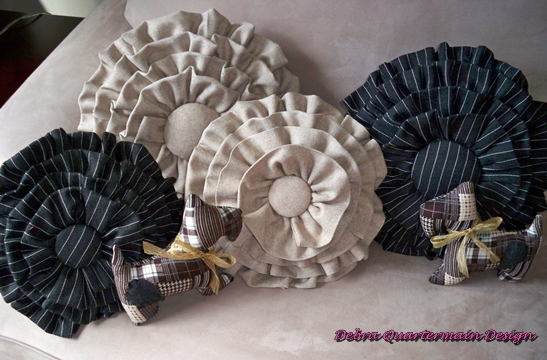
I am taking part in a couple craft shows this fall, the first one this weekend Saturday and Sunday at the Capital Exhibit Center in Fredericton. I have had such fun just designing fabric items for the show. I have been working with soft wools and plaids making posie pillows and small pillow animals. I went back in my patterns to a Scottie Dog which appeared in my first book "Nursery Decor". Popped out a pig and of course added a black cat!
Come by if you are in the area, for the virtual world Monday October 3rd the DCC hops again with out October Pink Challenge sponsored by Westcott Brand scissors. We have been sent some fabulous Duck Brand tapes to work with (hot pink zebra print!) and Velcro Brand closures. Westcott non stick scissors make working with these products so easy! A new round of amazing designs from the Fresh Vintage Sizzix Blog Hop today. My talented designer friend Eileen Hull keeps coming out with beautiful die collections for Sizzix. Happy Creating Everyone! Debra
Monday, September 05 2011
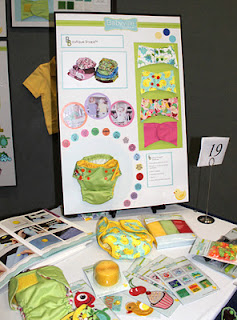
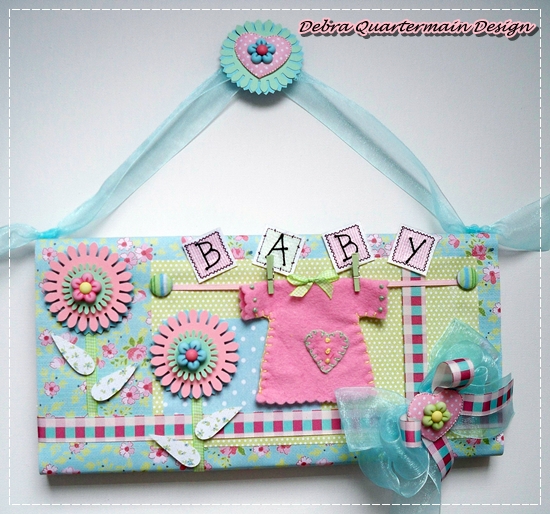
The Designer Crafts Blog Connection hops today. This month's theme challenge was a design related to a celebration, birthday, holiday or any other special occasion. I chose a baby shower theme specifically "baby girl". I was inspired by some beautiful papers I was given at the summer CHA show from KaiserCraft, adorable Bazooples appliques and buttons and I must admit being the mother of two girls I love everything girly! I created a whimsical welcome sign for the door. Setting the mood for a celebration begins at the door!
Materials: 2 co-ordinated papers by KaiserCraft from the Miss Nellie Collection
12" x 12" x 1" sheet of STYROFOAM TM brand foam
4 Bazooples flower buttons by Buttons Galore
Bazoople Alphabet letters & 2 pink check heart appliques by Expo International
1 yard each of green check and pink plaid ribbon
2 yards blue sheer ribbon
Punches, spiral, flower, large heart
Cardstock scraps pink, blue and green
9" x 12" piece of pink wool felt by National Nonwovens
Embroidery floss, green and yellow
2 fabric brads
2 mini green clothespins
Power Adhesive Tabs & Mono Aqua by Tombow
Non Stick Scissors & Multi Purpose Trimmer by Westcott
ruler, embroidery needle, paper cutter, knife, cutting mat, pencil.
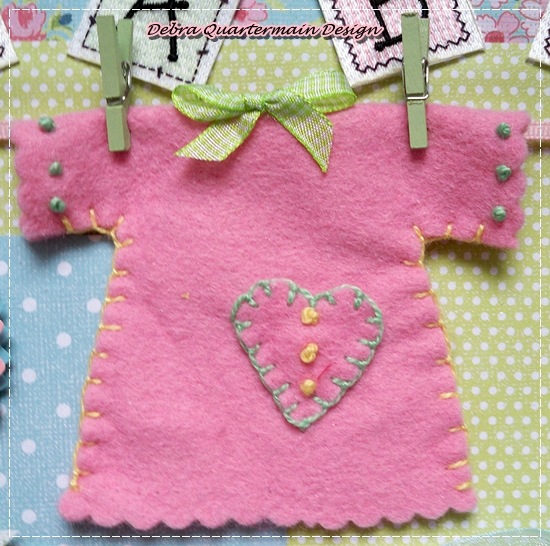
How to: As with every design the most fun in making it is making it your own. The tiny night gown could be created from paper, be a onesie or diaper. Size needs to be about 3". Choose colors to complement your special baby celebration!
1. Cut foam in half lengthwise. Cover one foam piece with floral paper. Cut two more pieces of paper 4" x 8" (green pindot) and 3" x 4" (blue dot). Adhere as shown to front of foam covered piece.
2. Add ribbons and glue in place. Add narrow ribbon for clothesline. Fasten at ends with brads. Make hole through foam and paper, glue brads in.
3. Punch out three spirals and circles for each flower, three for each one. Punch out two hearts for leaves. Assemble with popdots. Make stems from 3" piece of green check ribbon. Clip shank off flower buttons and adhere to flower centers. Glue flowers to left front.
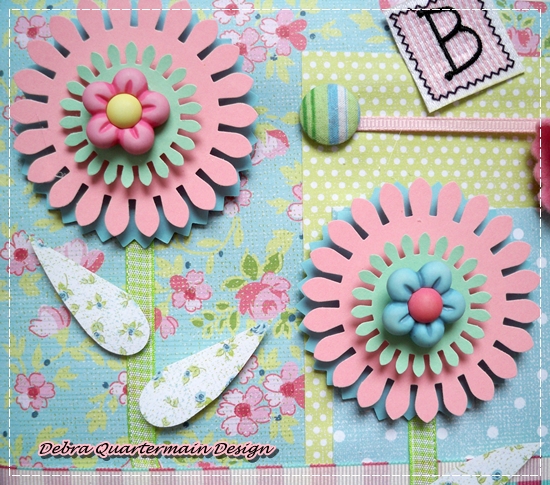
4. Create or add premade baby outfit to clothesline with tiny clothespins. If making your own garment from felt cut a front and back 3" x 4". Cut 1" heart pocket. Blanket stitch pocket to front. Accent with yellow french knots. Blanket stitch pieces together. Add green french knots to sleeves. Tie tiny bow and glue to center front.
5. Tie bow from sheer ribbon with three loops. Add another small bow to center. Glue heart applique and button to center of bow. Adhere to lower right of front.
6. Cut a piece of sheer ribbon 24". Tie ends at 2" and glue to top corners. Glue two spirals with heart applique and button to center of ribbon. Glue BABY letters to top over clothesline.
Create other items to complement. Use other half of foam standing upright for a centerpiece, decorate both sides, add baby items like booties to bottom for stand. Make mini versions for place cards. Celebrations bring us together in the special moments life offers, a cherished wee one arriving is truly a time to celebrate with joy!
This month's give away is a DVD set of the new TV show, Scrapbook Soup, Series 100. As you hop around look for the Scrapbook Soup logo which appears in eight blogs in the ring. Post where you saw them in the comment section of Julie McGuffee's blog. You have until the 15th to enter. Happy Hopping!
Monday, August 01 2011
It is the first of the month and that means it is time for the Designer Crafts Connection Blog Hop! Of course there are wonderful projects from forty plus talented designers and a great give away with details found on Julie McGuffee's blog.
This month's challenge was to post a project related to our favorite craft technique. Mine is not a big surprise by now, I love to needle felt! I just taught a group of kids this week to needle felt and they loved it. It is very easy to do and using STYROFOAM brand foam as a base makes all kinds of characters possible.
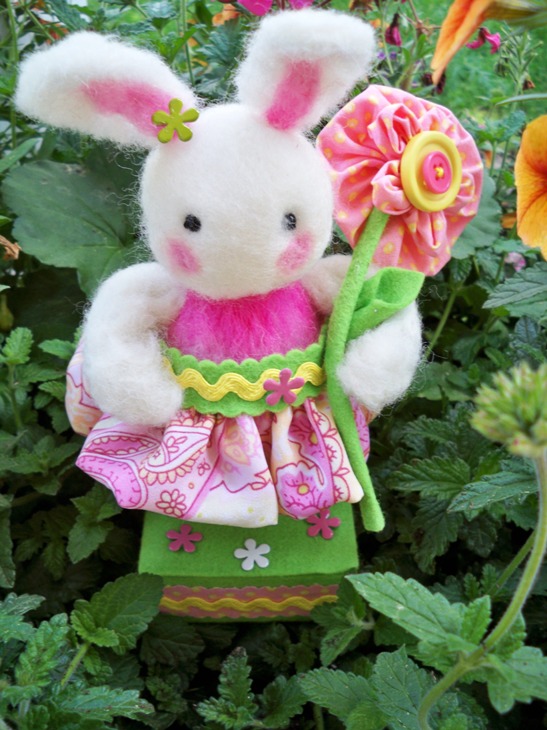
The sharp barbed needle repeatedly punched into the raw wool felts it into the foam shapes. On my How to page there are step by steps and a video in the home page which shows you how easy it is! I use Wool Wisps from National Nonwovens. This little bunny below is made from a ball and egg. Since it is a hop, a bunny seemed appropriate! Just hop along on the button to the right! Follow the JOY of Creativity! Debra!
Thursday, June 30 2011
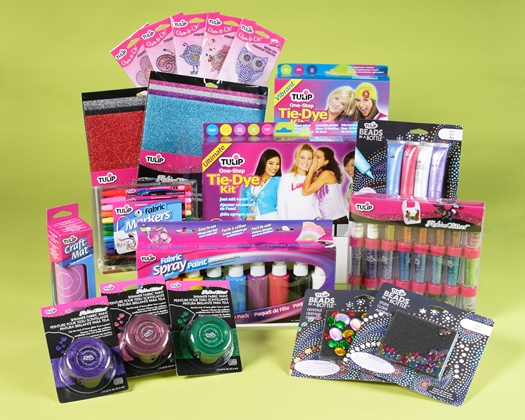
 This month's DCC Designer Crafts Connection Blog Hop is an exciting challenge and even more exciting for you, great designs and a fabulous give away! We got to design with I Love to Create (Tulip) BEADS IN A BOTTLE! To see all of the fabulous designs our very talented group has come up with just click on the DCC button in the sidebar! This month's DCC Designer Crafts Connection Blog Hop is an exciting challenge and even more exciting for you, great designs and a fabulous give away! We got to design with I Love to Create (Tulip) BEADS IN A BOTTLE! To see all of the fabulous designs our very talented group has come up with just click on the DCC button in the sidebar!
I had an outdated pair of white denim jeans so I cut them off and with some great retro inspired fabrics created a cute ruffled skirt. I accented the top with the BEADS IN A BOTTLE. The product is so easy to use and with a tiny squeeze you can create beautiful gemstone beads!


For contest details on how to win this wonderful array of I Love to Create Products and have fun creating your own unique designs just click on the link! http://ilovetocreateblog.blogspot.com/2011/06/beads-in-bottle-blog-hop.html
Monday, June 06 2011
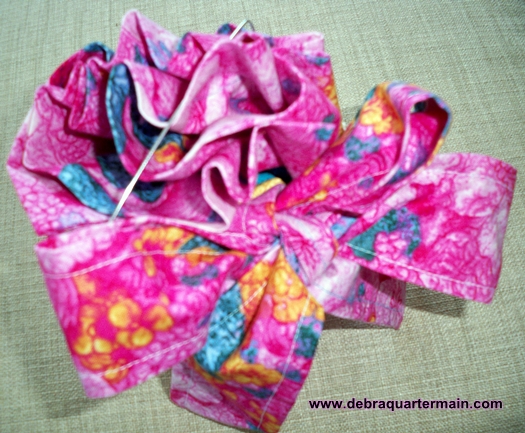
It is the first Monday of the month and time for the Designer Crafts Connection Blog Hop. This month's theme is Patriotic designs in time to craft for the July 4th celebrations. Forty talented designers have participated so hop along to be inspired. Post a comment on Julie McGuffee's blog to be eligible for this month's Giveaway!
My project was inspired by the fabric and felt wedding bouquets I have seen lately. Mine is a quick and easy version ideal for an early July wedding. It was a great way to use up pieces of fabric. I simply tore them into strips, folded and gathered. Some I twisted into roses. Leaves were cut and sewn from National Nonwoven's Xotic Felt. The base of the design is a 5" STYROFOAM Brand Foam ball. Happy Hopping & Crafting! Debra, CEO!
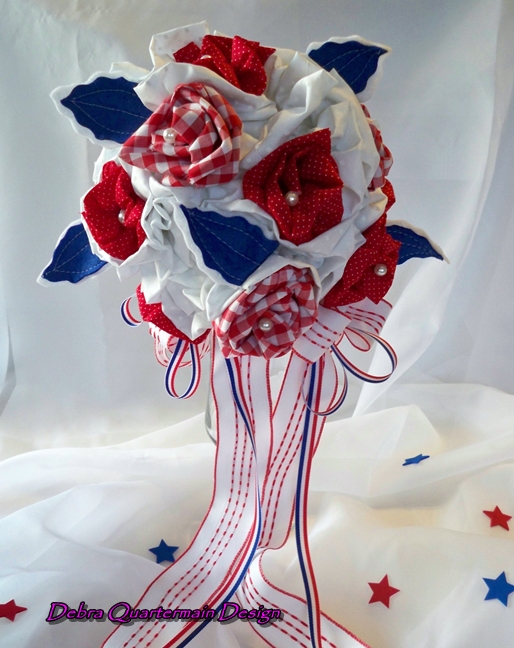
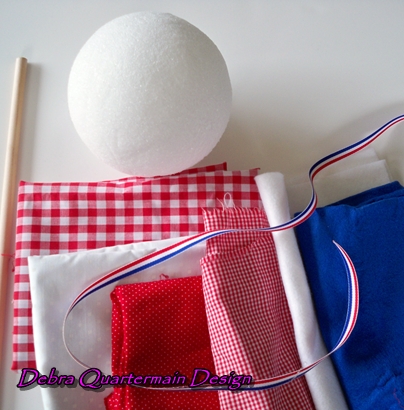
You will need: Variety of fabrics, ribbons, 5" ball, dowel, adhesive, pearls.
How to: Tear strips of fabric into 3" to 5" widths by 22" in length.
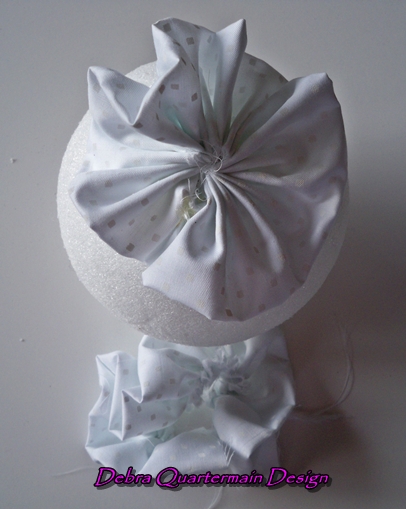
Fold strips in half right sides out and gather long side of raw edges.
Pull stitches tight and coil. I began by covering ball completely with white ruffled coils of fabric. Add red polka dot ruffled coils in between white. Make fabric folded roses from gingham and glue into centers of white coils. Cut blue leaves from felt. Glue in between flowers. Glue pearls in flower centers. Wrap dowel with ribbon. Insert into ball. Tie looped bows from a couple ribbons and glue to top of ribbon covered dowel at bottom of ball.
Monday, May 02 2011
It is the first Monday of the Month and the Designer Crafts Connection is a hopping! The theme for this month is Mother's Day. One of our members is in the hospital and this month's project is dedicated to two designers Lisa Rojas and Veronica (Ronnie) Goff. They are always smiling, talented women with a big hearts, mothers, friends and two of the most wonderful warm people you will ever meet! Here's to you lovely ladies and to your speedy recovery!
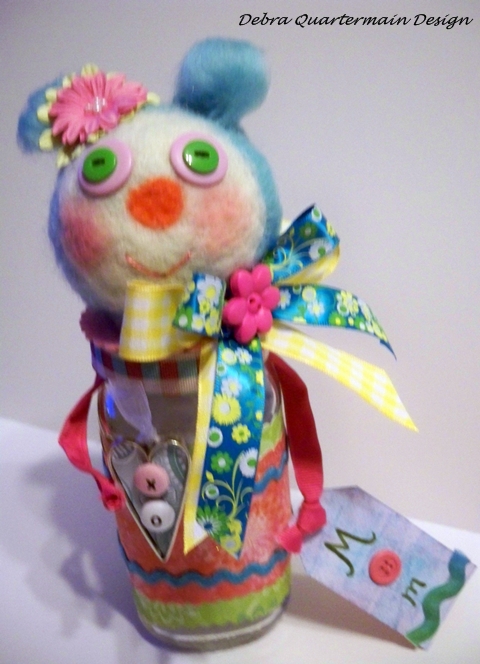
My project for Mother's Day was inspired by a giftbox I received for Easter. I created a "Love Bug" gift jar for Mom which could be filled with any of "Mom's" special treats from candies to love notes.
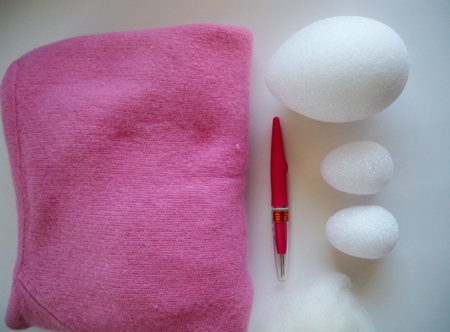
I used one of my very favorite techniques needle felting with Wool Wisps from National Nonwovens and STYROFOAM brand foam to create the bug head.
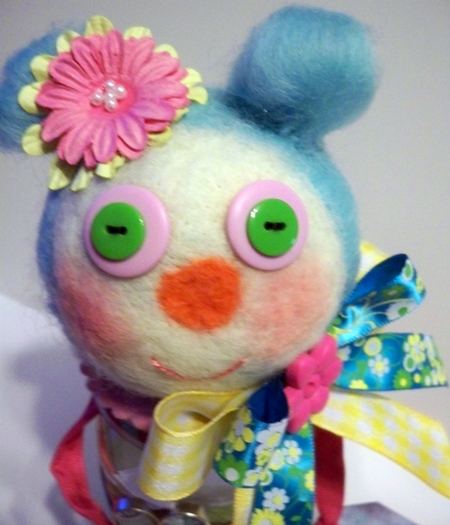
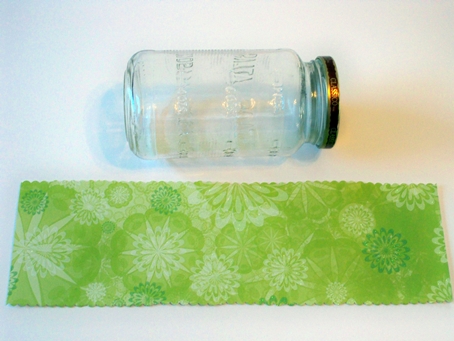
Recycling a jar and left over pieces of scrapbook papers to decorate it with.
Ribbons, buttons, ricrac and flowers complete the "Love Bug!" Sending lots of love your way Lisa and Ronnie! Don't forget to check out the forty plus talented designers in the connection, just click on the button in the right sidebar! Happy Hopping! Debra, CEO!
Sunday, April 24 2011
I like Mondays! So here is to a Marvellous Monday full of sunshine and surprise, new creative endeavours! Spring seems to have officially arrived and hopefully the snow is finally gone!

Beginning with May the Designer Crafts Connection will post the first Monday of every month, so next Monday there will be a collection of wonderful Mother's Day projects.
This past week I was introduced to Pinterest, where you can "pin" images that interest or inspire you from the web to "boards", ownership and origin is acknowledged, pins are repinned and followed by others. There are different categories and you can create your own style boards. There are many beautiful ones and a great resource for inspiration. The pinmarklet goes in the tool bar and "pinning" is simple. Follow the JOY! Debra
Thursday, April 14 2011
Drum roll or egg roll please! It is the Designer Crafts Connection Blog Hop! This month's theme is Easter Crafts. Just click on the button to hop along and see all the other Easter treats! Julie McGuffee has a give away when you find the Scrapbook Memories logo as you hop along. Full details on her blog!
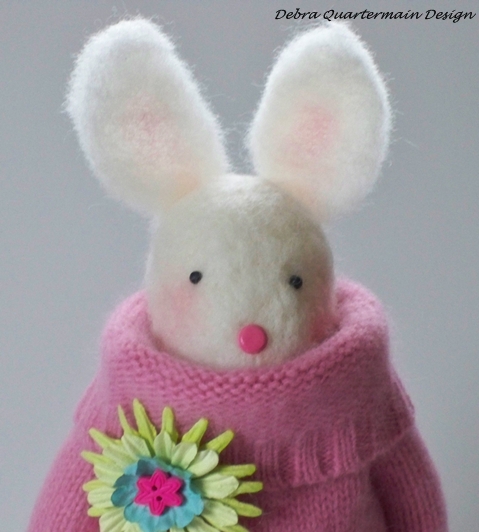
My Easter design is a Canadian Easter bunny, there is still a chill in the air so a sweater please but the snow is gone so tootsies are laid bare and sport sandals, flipflops or Berks! I have recycled an angorah sweater and used my favorite STYROFOAM brand foam and wool from National Nonwovens.

Sweater, Wool Wisps, Clover Pen Tool
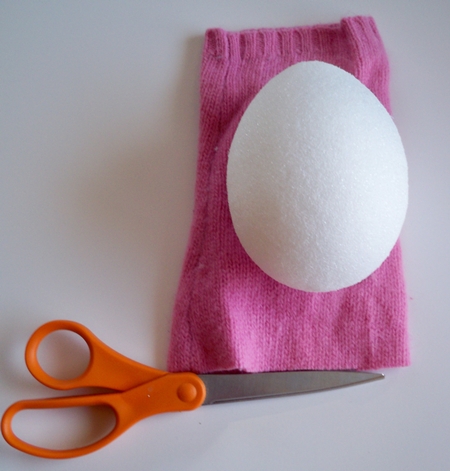
Cut off 8" of sleeve for body.
Sunday, March 13 2011
It is the monthly Designer Crafts Blog connection and our theme this month is Weddings! The winner of the Cricut Treasure Hunt will also be announced on Julie McGuffee's blog!
For this DC blog hop I created a wedding favor inspired by the classic Wedgwood blue and white although my blue is not a traditional blue. The wedding favor tradition began centuries ago when English aristocrats gave out small gifts to guests to take home from the wedding. These gifts signified good luck which the happy couple passed on to their guests and often it was five pieces of candy or almonds which represented fertility, health, wealth, happiness and longevity. The wedding favor these days can be almost anything from candy gift boxes to tiny plants.
The wedding favors that guests appreciate the most are the ones which are a personal expression of the couple, representing who they are and something they have created together for their guests. In considering this I have created a wedding favor which is handmade from some of my favorite materials to work with, is "green" which is also an important consideration to many young couples.
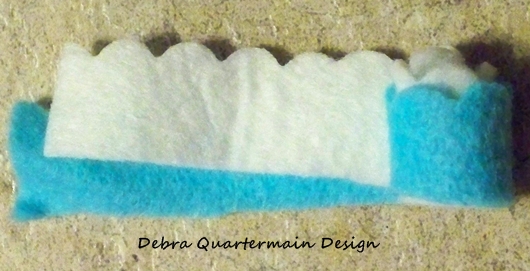
The wedding favor I designed is made from National Nonwovens Xotic Bamboo felt. I used Ocean Breeze and Pina Colada. The stuffing used is Fairfields Natur-fil.
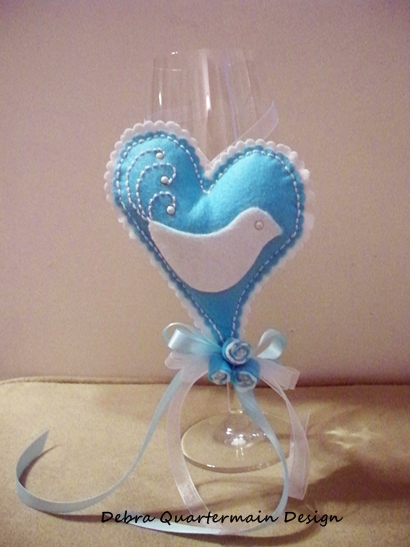
These could hang from the chairs with the doves reversed to face each other every pair of chairs.
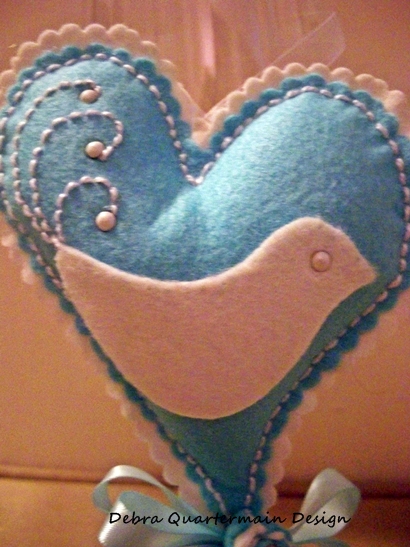
The felt hearts are cut with Fiscars scallop scissors. The Pina Colada (white) felt heart is cut a 1/4" larger all the way around than the blue. The bird was fused to the felt heart front. A straight stitch is used to embroider the bird's tail feathers. Hot fix pearl studs embellish the tail feathers and create an eye. The hearts are placed together and straight stitched all around the edge, leave small opening and stuff, finish stitching heart shut.
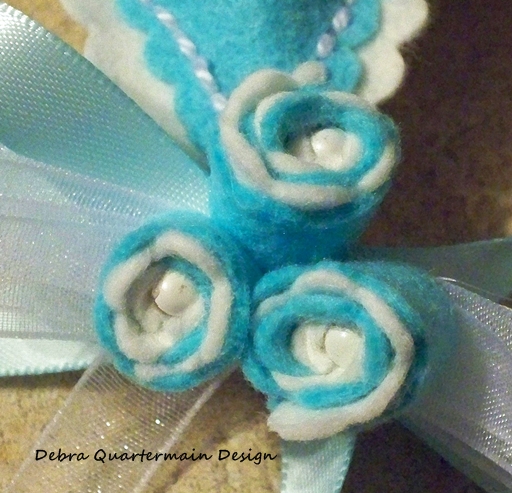
The roses are made with 1/3 " by 4" long strips of felt cut with the scallop scissors, rolled and glued. A hot fix pearl stud is glued in center. Some ribbons tied and layered finish off the favor.
A paper message with the names of the happy couple would finish the favor perfectly! Enjoy the DC connection Blog Hop of forty talented designers! Debra, CEO!
Thursday, March 03 2011
What a day! What a month! Today is the official launch of the Designer Crafts Connection monthly blog hop plus it is National Craft Month! Forty designers have joined together to bring the latest exciting and inspiring projects and trends in the industry! Plus a fun treasure hunt and give-aways all at the click of the magic button next to this post hop your way along!
Our first post is about trends we observed from the international CHA (Craft & Hobby Association) trade show held the end of January in Los Angeles. I was unable to attend but this time but the other members of the group have great photos and comments on what they saw. From hopping around myself and reading posts the show was full of girlie, layered pretty stuff, dress maker forms everywhere, florals, mixed media so much happening perfect to chase the winter blues away!
Now for the treasure hunt! So easy! To enter to win the Cricut Expression, hop around the ring to identify the blogs who have featured the Cricut logo. Comment your "finds" on Julie McGuffee's blog! Our next DC Connection hop will be on the 13th "Wedding Favors!" along with another great giveaway! Happy Hopping & Happy Crafting! Debra, CEO!
|