This week I am very pleased to be taking part in a special blog hop, the CHA PaperArts + Blog Hop. Several CHA Designer members were paired up with companies participating in the summer CHA PaperArts Show. I was very fortunate to be paired up with one of my favourite companies
Ellison/Sizzix, even better I got to design with
Laura Kelly's dies with Ellison!
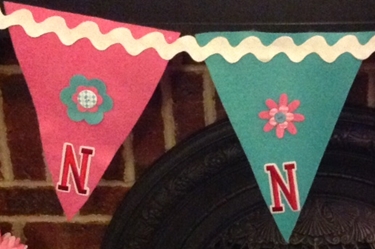
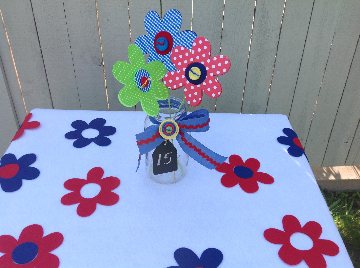
My project is a whimsical summer calendar centerpiece, great project for the kids to create and to use on summer vacation. They can write the date on the chalkboard tag each day and change out the sun for a cloud or raindrops to also monitor the weather.
Let's get started! You will need:
Sizzix Big Shot
Cutting Pads (I got to try out the colored ones!)
Flower Die by Laura Kelly
Sun Die by Laura Kelly
Add some color!
Polka dot and check papers
9" x 12" Craftcuts of Prestofelt by Kunin Felt, Yellow, Green, Red, Royal Blue
9" x 12" Classic Craftcut by Kunin Felt, Yellow
Chalkboard Tag
6-9 Assorted Buttons
Mason Jar
4-1/8" x 12" wood dowels
3-1.2 yard lengths of Craft Floss, Red, Yellow, Blue, Black
1 yard Red Rick Rack
1 yard 3/4" wide blue Ribbon
Scissors, Adhesive, Embroidery needle
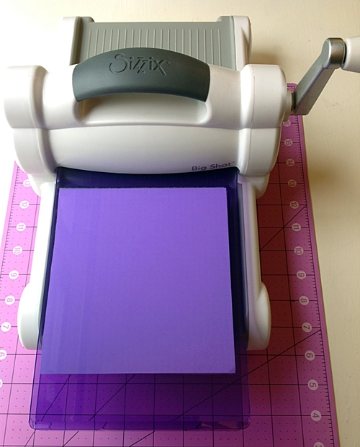
Cut two pieces of patterned paper and 1 piece of Prestofelt the size of the die. Now to make a "Sizzix Sandwich"! Place the die face up on one of the cutting pads, add the "filling", one piece of paper, the felt and the remaining piece of paper and place the second cutting pad on top. Now place the "Sizzix Sandwich" on the Big Shot and slowly push through turning the handle away from you.
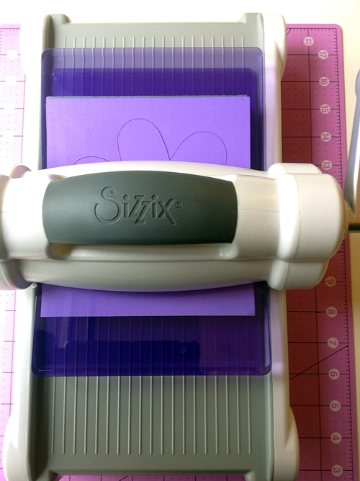
The "Sizzix Sandwich" will emerge out the opposite end with three perfect diecuts. Repeat for each flower, I cut extra to have several color combination choices.
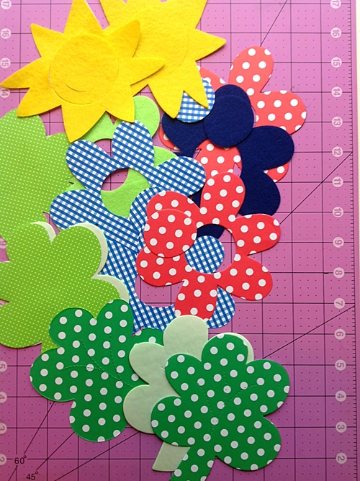
As you can see, I cut out several extras for future projects. The colored cutting pads are so easy to find on the craft surface even as it becomes more and more covered with crat materials. Now to assemble flowers. Dowels can be painted or left plain.
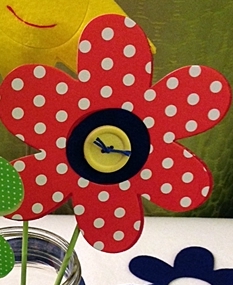
From scraps of felt cut three circles slightly larger than flower center circles. Peel backing off of Prestofelt flower and adhere adhesive side to back of paper flower. Place dowel end to center of flower. Peel larger circle back and place over center opening on back of flower. Add flower center to front of flower sandwiching dowel in between the two center pieces. Repeat for two remaining flowers. Tie floss through buttons and glue to flower centers.
For the sun, make two small stitches for eyes through felt. Repeat assembly as for flowers using yellow Prestofelt for back of sun. There is a small cut in felt center for a smile. Cut a piece of red floss to fit and press into place, it will adhere with the Prestofelt adhesive side.
Glue rick rack to center of blue ribbon. Tie ribbon around jar top. Slide on chalk tag. Stack buttons, tie through centers with floss. Glue to center of bow. There you have it, a quick easy summertime project for the whole family! Now for the contest details and how you can check out all of the great designer projects this week!
Win $500!
Follow the CHA Paper Arts+ Blog Hop all week on the CHA Blog for updates on new designer blog posts and projects. Each post will have a “password”, collect all of the passwords.
The first two people to tweet CHA @Craftandhobby the correct phrase will win:
1st Prize: $500 toward travel to the Paper Arts+ Show (trade only)
2nd Prize: $25 AMEX gift card
Here is your “password”: Chicagoland
Don’t forget, registration is now open for the CHA Paper Arts+ Show in Chicagoland where you’ll see, touch and learn about product, like the products that were donated for this Blog Hop by Ellison/Sizzix. Paper Arts+ is A CRAFT FUSION experience with exhibits offering everything from paper to jewelry to mixed media materials. The industry will be there looking for fourth quarter trends and new product SKUs. Members attend for FREE! For more information and to register, visit www.craftandhobby.org/paperarts.
Thank you for stopping by!
Debra