|
the CEO! Creative Eternal Optimist! Blog
|  |
Tuesday, March 27 2012
 Talented designer friend Eileen Hull is hosting a spring linky party with a great giveaway! My project from my archives features the Sizzix Scoreboard TM Teacup Die by Eileen Hull. Several designers are using more of Eileen's dies to create fabulous fun projects! Hop around and enjoy, be inspired! Talented designer friend Eileen Hull is hosting a spring linky party with a great giveaway! My project from my archives features the Sizzix Scoreboard TM Teacup Die by Eileen Hull. Several designers are using more of Eileen's dies to create fabulous fun projects! Hop around and enjoy, be inspired!
My design incorporates my love of fabric and needle felting, my inspiration the Alice in Wonderland movie.
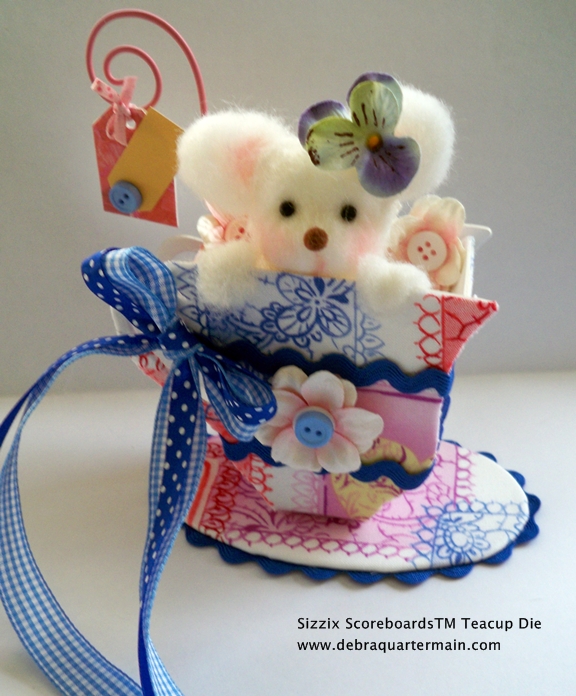
Materials: Teacup die, 12" x 18" piece of print fabric, HeatnBond Iron-on Adhesive, 1 1/2", 2" balls STYROFOAM TM, Natural Wool Wisps by National Nonwovens, 1/2 yd each of 1/2" blue check ribbon, 1/4" blue dot ribbon, 8" of 1/8" pink polka dot ribbon, 1 yd blue rickrack, 3 button flowers, 1 pansy flower from Prima, 2 blue buttons, yellow & pink paper scraps, pink wire, 2 black quilt pins, brown pompom, blush, needle felt tool, foam pad, sharp scissors, iron & board, mini iron, pencil, toothpick, Beacon's Fabri-Tac and Zip Dry glues.
How to:
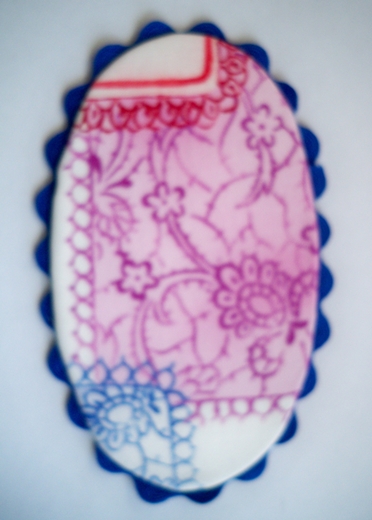
1. Fuse HeatnBond to fabric piece following manufacturer's instructions. Place teacup die pieces on wrong side of fused fabric leaving 1/2"-2" space around each piece. Fuse pieces. Cut carefully around each piece leaving a 1/4" border, clip around curves. (For handle omit border) Use mini iron to fuse 1/4" border over edges. Flip saucer and two cup pieces, fuse fabric to back of pieces. Cut along edge of cup pieces.
2. Score and assemble cup together. Glue. Glue rickrack around edge of the saucer.
3. Use fingers to indent eye sockets for mouse on 1 1/2" ball. Cover ball with wool and needle felt. Cover second ball with wool, needle felt. Insert second ball into cup and glue.
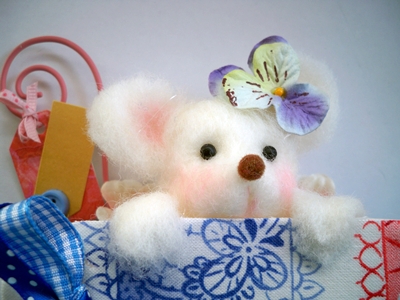
4. Needle felt a 4" square of wool on foam pad. Cut out two 1" ovals for ears, two 1/2" by 1 1/2" for paws rounding ends. Blush ear centers, cheeks. Insert eyes and glue on nose. Needle felt under nose for mouth center, blush. Needle felt ears to top of head.
5. Wrap and glue rickrack around cup. Glue flower to center front adding blue button. Tie ribbons together and glue to handle.
6. Insert toothpick into mouse head and insert into ball in cup pushing together. Glue paws over edge of cup. Glue pansy to ear. Glue flowers behind mouse.
7. Cover die tag with pink paper. Cut smaller tag 1/2" by 1" from yellow. Glue to pink tag. Glue blue button in place on tag. Tie to pink tail wire. (Tail was a dollar store find, a photo holder, I cut off wires) Insert tail into mouse foam body in tea cup.
Enjoy the Spring Linky party and be inspired to create some fresh spring accents! 
Monday, March 26 2012
Easter is only a couple weeks away and even though my girls are grown now, we still have our traditional easter egg hunt. I enjoy always each year too finding a stray egg that was missed. One year as I hid the eggs our little dog followed behind me eating several candy eggs before I caught her! OOps I meant when the Easter Bunny was hiding the eggs!
This year I am counting the days till Easter weekend, I haven't seen my youngest since Christmas so can hardly wait until she is home and the three of us are together. My daughters are such a joy! My oldest daughter has just bought her first home, so exciting and she is moving in June.
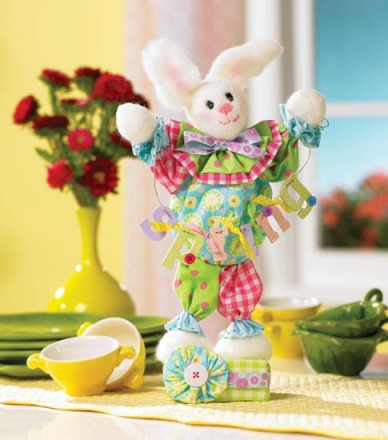
This year if you are looking for inspiration to craft some eggs to fill a basket or two Crafts 'n Coffee is having an Eggstravaganza and giveaway so hop on over! I have experience with hopping seems my bunny designs have multiplied over the years! I will be sharing some of my favorites. Full instructions for the Jester Bunny at http://www.creativehomeartsclub.com/projects/articletype/articleview/articleid/670/spring-jester-bunny
Designer friend Eileen Hull who designs dies for Sizzix is hosting a linky Spring Party and giveaway. Eileen's dies are wonderfully versatile allowing you to create layered textured accents and elements from a variety of materials. Check out the inspired creativity! 
Friday, March 23 2012
 It is Fowl Friday with Fran & Freda! Well at least I am here, Freda is soaking in the tub, a case of sunburn. It has been unseasonably warm here for the last few days and Freda dusted off her little polka dot bikini. Reclining on the deck sipping lemonade all afternoon left her a bright pink! Debra's favorite color yes we know! However "painful pink" is definitely not pretty! It is Fowl Friday with Fran & Freda! Well at least I am here, Freda is soaking in the tub, a case of sunburn. It has been unseasonably warm here for the last few days and Freda dusted off her little polka dot bikini. Reclining on the deck sipping lemonade all afternoon left her a bright pink! Debra's favorite color yes we know! However "painful pink" is definitely not pretty!
We were reminded of our gardening adventures when Debra left us in charge of watering the plants. First the beauty shot, aren't we cute!
Unfortunately we were under the impression and did not read the notes left for us that pots outside needed to be watered more often than those in the hot sun! Who knew! Follow the Fowl & dont't forget to water!

Monday, March 19 2012
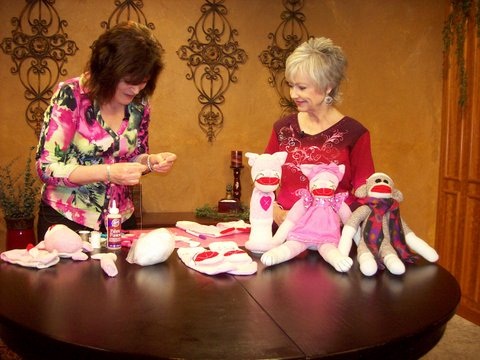
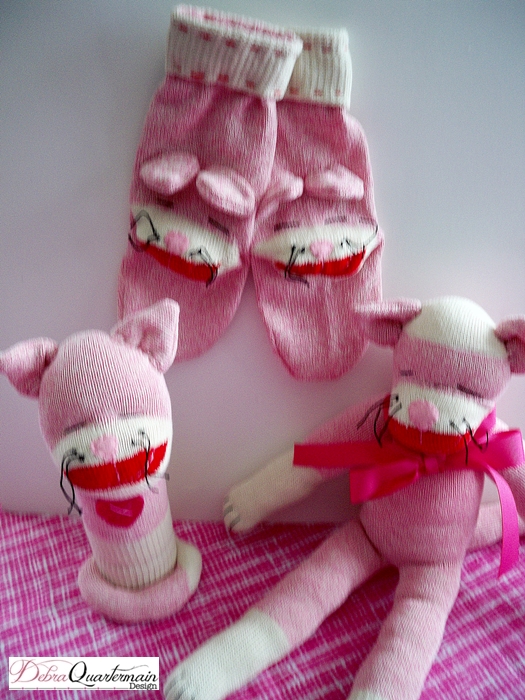
March is interNational Craft month so let's get crafting. One of the segments I taped for Creative Living with Sheryl Borden was showing how to make a Sock Kitty Water Bottle Cover. With one sock you can create an easy bottle cover.
Materials:
1 Fox River red heel sock
2 oz of polyester fibrefill
Scraps of Fuchsia, Seashell Pink, Caribbean Surf ( teal) Xotic Felt by National Nonwovens
1 skein each of black and pink embroidery floss
Aleene's Fabric Fusion™
Upholstery thread
Embroidery Needle
5", 8" Westcott Brand® Titanium Steel Scissors
(Ruler, pins, measuring tape, pencil, invisible marker)
1. Turn the sock inside out. Place flat with heel centered and facing up. Use a 4" circle to draw head curve just above red heel which is the muzzle. Draw two triangle ears and tail along opposite folds at end of sock.
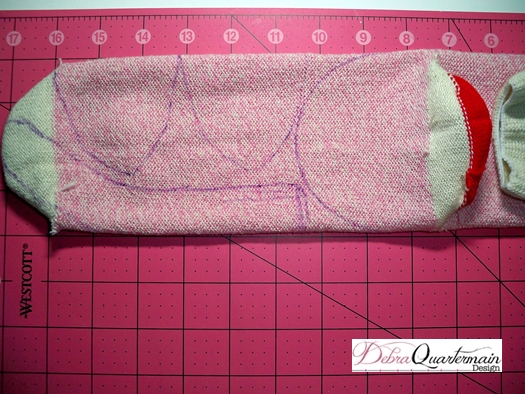
2. Pin pieces. Sew along drawn pattern line. Carefully cut around pieces leaving a ¼" border.
3. Turn tail and head body pieces right side out. Cut small slit in fold of each ear and turn right side out.
4. Stuff head pushing stuffing into heel which is cat's muzzle. Under head stitch in a circle through sock and pull tight to create neck. Secure threads and cut.
5. Put a dot of glue in center of muzzle above red muzzle. Using pink floss embroider nose in place with small straight stitches. Embroider down from nose and across muzzle to make smile.
6. Anchor black floss at back of neck bring through to edge of white above muzzle as shown in photo. Make a ¾" stitch for eye taking floss through to back of neck. Pull stitch tightly to indent slightly. Repeat for second eye.
7. Secure floss at back of head. Take floss back through front of muzzle on one side of nose. Make a knot, leave a 3" length for whisker and cut floss. Repeat this for remaining three whiskers.
8. Fold raw edges of ear slit in. With upholstery thread stitch a small line along bottom of ear. Pull to gather. Secure thread. Place on seam line of sock and stitch in place. Repeat for second ear.
9. Stuff tail. Turn raw ends under and stitch around opening. Pull stitches tight and secure. Place tail along bottom of sock. Stitch in place.
10. Fold a collar piece 1-1/2" by 4". Stitch with pink floss. Place around neck and stitch in place. Cut two hearts, place together and embroider initial or add two crossed stitches with pink floss. Sew or glue to cat or collar.
Here is the water bottle cover shown along with a Sock Kitty and a pair of mittens. Socks are an easy way to craft and an even better wat to use up stray socks! Happy crafting!
Friday, March 16 2012
The Fowl are in the house for Fowl Friday! Our stats are through the roof and we got to spend the afternoon with the textile students at the NB College of Craft and Design. We are a couple of cheerful chicks, happy hens and fabulous FOWL!
Debra does not take us out very often so was a very big deal! We got passed around the entire class. Our feathers were ruffled and tickled, we gigled especially Freda, she is super ticklish!
Debra talked about her designer career and the steps along the way. Much to Freda's dismay she related the story of Freda and that weekend! That weekend Freda had a rooster in, apparently one she had met on Hatch.com! The textile students are a talented group, they create their own textiles, papers by hand with a variety of interesting techniques and use Illustrator Photoshop to design repeats.
It was a great afternoon a break for us and we finally got to leave the apartment! Things are looking up! Follow the Fowl!
Wednesday, March 14 2012
Today I am making a presentation to the textile students at the New Brunswick College of Craft and Design in Fredericton, NB. I am both excited and slightly nervous as they are a young innovative talented group and I am hoping I can make an interesting presentation.
In putting my presentation together meant a trip down memory lane and to all the experiences I have had along the way in this creative journey. Many happy accidents and mistakes I have hopefully learned from. I did not have a plan but fell into a path and followed it, I have learned now to realize preparation is a huge part of it but also serendipity plays a part too. However that means putting yourself in a place, being visible to make that happen. To be open, to be yourself and to believe you have a gift to share.
To today and the bunny that began it all! Follow the JOY!
Tuesday, March 13 2012
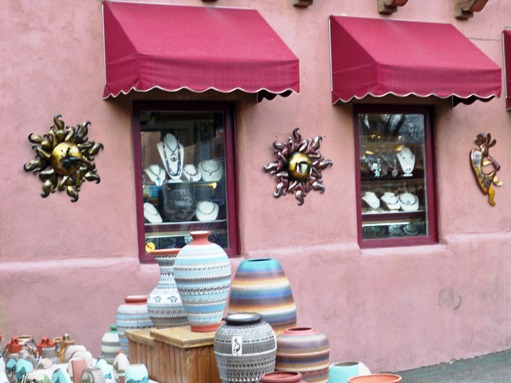
While in New Mexico we took a drive up to Santa Fe. So many beautiful shops, one of those with an outdoor market was arranged with thought to the art and the enviroment.
The softly striped pots played off the awnings. There is a magic in NM, the mountains magnify the brilliant blue sky. People who visit often return to live there.

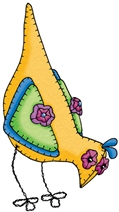
Friday, March 09 2012
Finally we get to see a friendly face around here! Debra has been making mostly feliines lately and we were getting concerned. Freda has been watching her tail feathers so much she has a stiff neck and can only walk sideways!
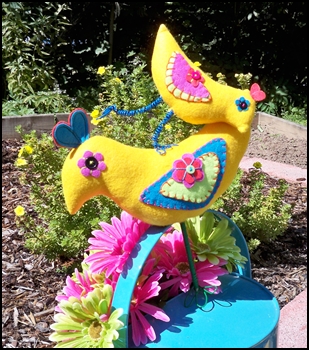
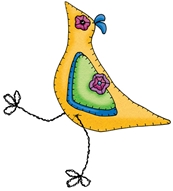
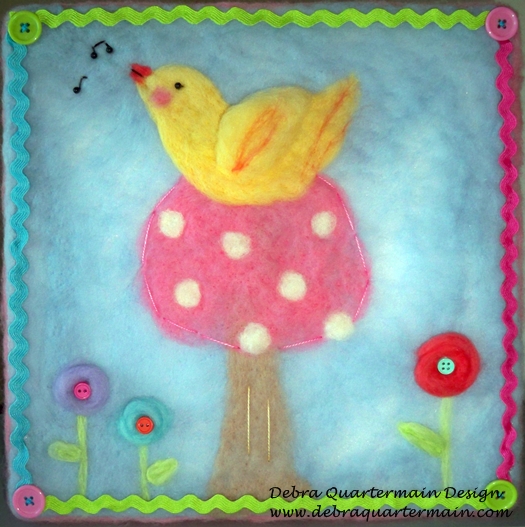
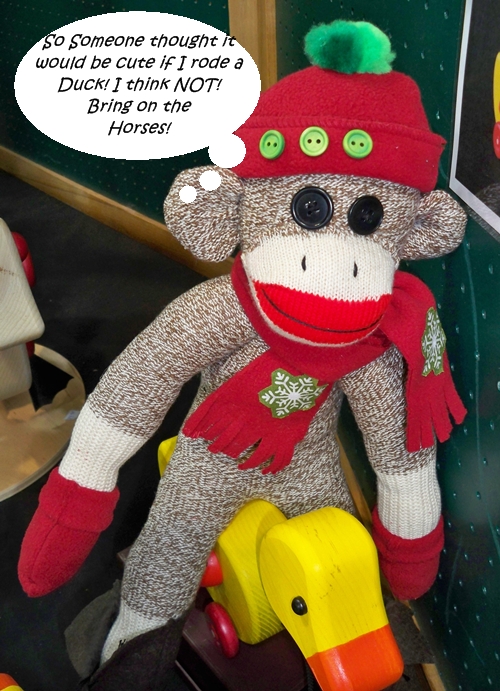
This new friend began as a 12" sheet of Makeit:Fun STYROFOAM Brand foam and the Spring Blossoms Wool Wisps Collection by National Nonwovens. Debra began by drawing a design lighty on the sheet. With her Clover pen needle tool she just needle felted away creating our very cheery spring friend! Adding some stitches, buttons and trims and in a very short time he was singing spring!
Obviously he hasn't looked out the window at the four foot high snowbanks yet! He still thinks he is in New Mexico, has a bit of an attitude as he was on the PBS show Creative Living with Sheryl Borden. Another Prima Donna, he and Freda will have to sort that out, ah should be a fun weekend! Follow the Fowl!
Monday, March 05 2012
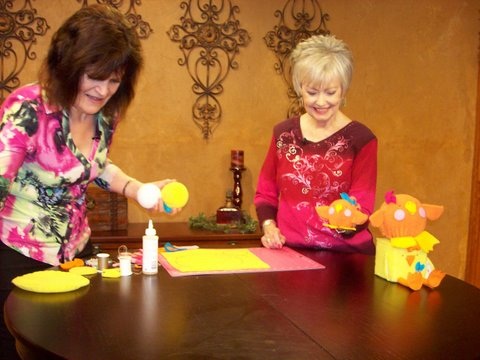
It is the first Monday of the month, time for the Designer Blog Hop Crafts Connection! Forty talented designers strut their stuff and offer some surprises as you hop along! We are celebrating interNational Craft Month! With Easter just a few weeks away I am featuring the tutorial for the cute chick/duck I demoed for a segment of Creative Living with Sheryl Borden.
Sheryl is holding the baby duck in the photo that I demoed on the show. In yellow it becomes a cute chick!
Materials:
3", 6" balls, 4" cube of MakeitFun STYROFOAM ™ Brand Foam
1/6 yard yellow fleece
1/3 yard orange fleece
9" x 12" pieces of Canary (yellow), Papaya (orange) scraps of Fuchsia, Seashell Pink, Caribbean Surf ( teal) Xotic Felt by National Nonwovens
6" fabric scrap
1 chenille stem
1 skein black, pink embroidery floss
6 black, 12 colored head quilt pins
Aleene's Fabric Fusion™
Upholstery thread
Embroidery Needle
5", 8" Westcott Brand® Titanium Steel Scissors
(Ruler, measuring tape, pencil, circle templates for large duck 12", small 8")

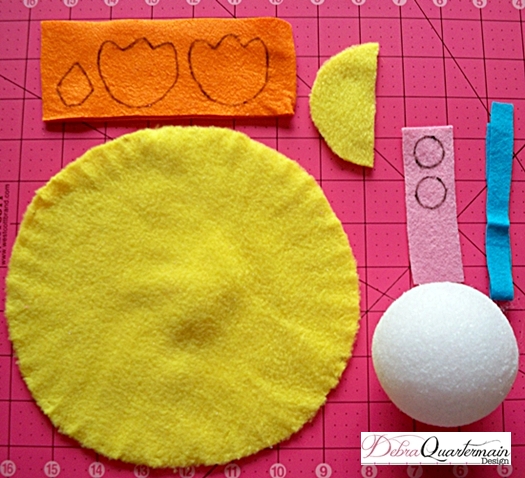
- Making the Ducks: For both the 3" and 6" ducks construction is exactly the same. The pattern pieces included are for both sizes. Any variations will be indicated in instructions. For the 3" duck cut a 3" and 8" fleece circle. For the 6" duck cut two 3" and one 12" circles. Cut two of each cheeks, beaks and four of each foot from felt. Cut ½" by 9" strip of felt for bows.
.
- With upholstery thread anchor thread at edge of the large circle. Sew a small basting stitch around the complete circle.
- Pull stitches slightly. Place circle over ball pulling stitches tightly. Circle should stretch to close. (On larger duck if this does not happen, a small circle can be glued on bottom to finish the body.) Secure thread and cut.
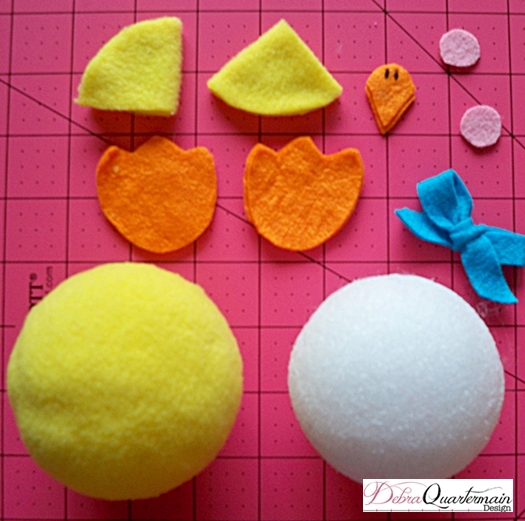
- For small duck cut 3" circle in half. Fold in half again wrong sides together and glue. For large duck fold each 3" circle in half wrong sides together and glue. Glue wings to sides of body as shown in photo.
- Glue beak pieces together angling top one slightly higher than lower beak. Make two small stitches at top of beak. (These stitching details are optional; they can also be recreated with a fabric marker.) Glue beaks to center of face slightly above wing line.
- Insert two black head pins as eyes. Adjust until you are pleased with location. Remove and dip in glue, reinsert pushing in to indent in face slightly.
- Sew around cheek circles with pink floss if desired or use fabric marker or add just as is. Glue to face of duck under eyes. Refer to photo for placement.
- Place feet together in pairs, reverse one pair. Glue together. Outline in black floss with a small stitch as an option. Glue feet to bottom of bird. Tie bow from felt strip, pin or glue to head.
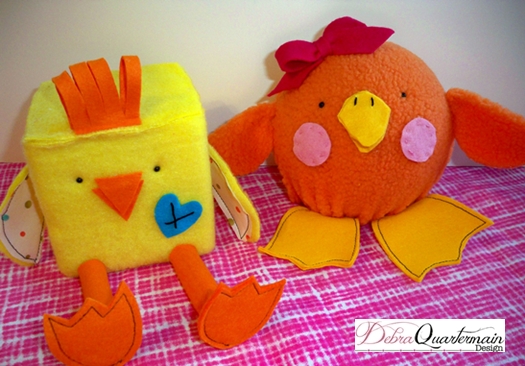
- Making the Chicken: Use the ruler to cut a 4" by 16" strip of fleece. Cut two 4" squares of fleece and one 3" circle. Cut one 1 ½" by 3" topknot piece, two beaks, two 3" by 3" strips and four feet from orange felt. Cut one 3" circle from fabric scrap. Cut one heart from teal.
- Begin at one edge of cube and glue long fleece strip. Wrap fleece piece around cube bringing it back to the edge to meet. Glue in place. Glue each 4" square on the opposite two remaining sides along edges. Press fleece seams together, add more glue if needed.
- Cut 3" fleece and fabric circles in half for wings. Glue or sew with black around edges. Pin or glue in place on either side of chicken. (Approximately at 3" mark.)
- Cut chenille stem in two 3" pieces. Roll an orange strip around each leg and glue. Place feet in pairs reversing one set. Glue or topstitch in black around edges. Glue to end of each leg. Glue to edge of body.
- Glue beak pieces together with top one slightly above lower beak. Glue to face. Insert two black head pin eyes. Add glue to ends and reinsert indenting slightly.
- Fold topknot in half, cut through from fold to 1/4 " from ends. Glue to top of head. Stitch through heart with black floss. (Optional or use fabric marker.) Glue heart to body.
Have fun hopping! Leave a comment here to enter your name for a fabulous pair of Westcott Brand® Extreme EdgeTitanium Steel Scissors!
Saturday, March 03 2012
It is interNational Craft Month! I am celebrating this month with lots of crafty goodiness! Several workshops and classes coming up locally for all ages. Creativity is a gift we all have, it is as necessary to life as breathing when the hands and mind are involved in making art we relax, unwind and find a special joy!
I am offering workshops for all ages from Mom & Me 5+age, Tweens & Teens 10+, to adult classes. With an easy step by step approach, fun tools, techniques and products come experiment and explore your own unique creativity. No experience needed just a desire to play! Coming up next Saturday, March 10th, Make a Sock Monkey or Kitty Workshop for ages 10-Adult. Full schedule on my Class Page. Happy crafting!
Friday, March 02 2012
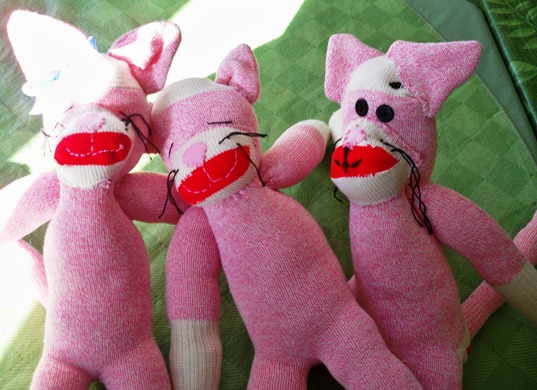
It is Fowl Friday with Fran & Freda! Freda is very upset, we just found out Debra is bringing more felines into the worl! She apparently forgot to tell us she was teaching a workshop and showing people how to make their very own feline! Where is her loyalty!
Not only more felines but pink ones! Debra has a thing for pink and she has just gone too far, an intervention is needed! This is what we have to put up with, she told us it was a so called "Sock Monkey" workshop, there was certainly Monkey Business going on as several feline just appeared out of thin air!
They look so innocent pretending to sleep in the sunshine, we aren't fooled even Freda knows to keep an eye on her tail feathers! Now if we could only convince Debra to do a "Sock Alligator" workshop and then we would see those cheshire grins disappear! Follow the Fowl!
|


