|
the CEO! Creative Eternal Optimist! Blog
|  |
Monday, July 09 2012
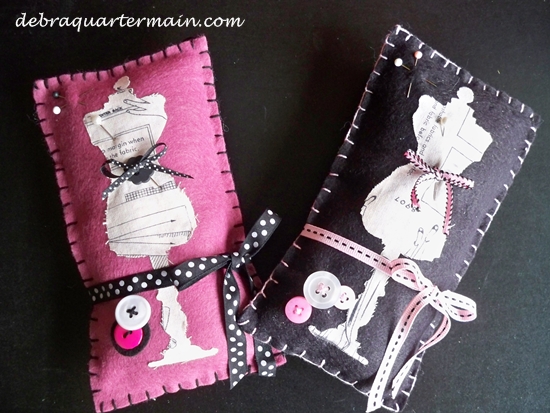
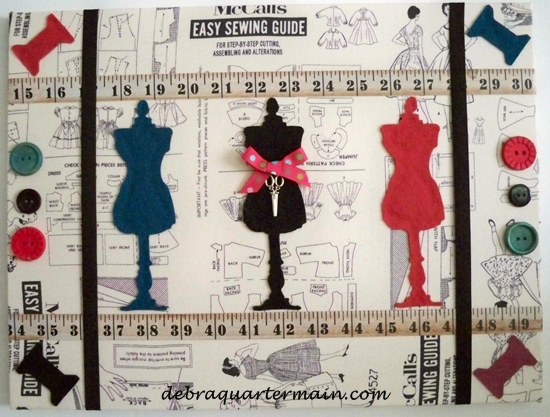
Continuing with my playing with dress forms. Dress forms have been around since the Middle Ages. In the Middle Ages the aristocrats had dress maker forms which were the exact measurements so they did not have to be bothered with fittings.
Miniature versions were made wearing the fashion designed for the aristocrat which could then be sent off to a family member or esteemed friend to be recreated.
During the industrial revolution the dress form became very popular and today for designers as well as serious home sewers in indispensable tool allowing for design draping and fitting of garments.
I have designed a pin cushion using talented Tim Holtz's dress form die for Sizzix. Using wool felt from National Nonwovens which will keep pins and needles both sharp and together.
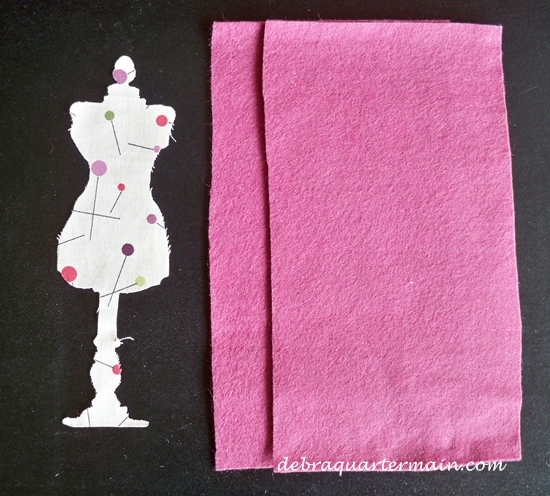
Cut two pieces of wool felt 3 1/2" x 6" and cut dress form die from fabric.
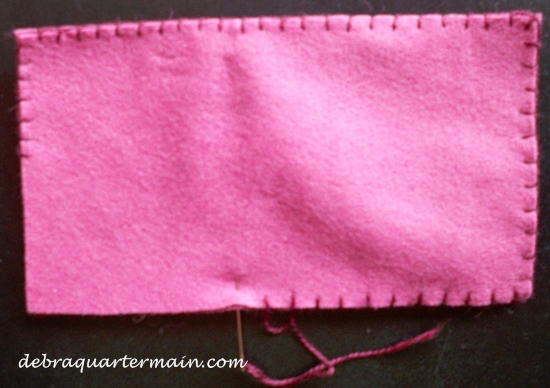
Blanket stitch around all four sides leaving opening, stuff lightly and finish blanket stitching closed. Use fabric glue to adhere dress form, embelish with ribbons and buttons. Enjoy!
Sew Inspired! 
Friday, July 06 2012
 Well it is about time for Fowl Friday, remember me I am Fran! Debra has practically forgotten our existence, well not entirely she does feed us and keeps the nest tidy but! ....we are surrounded once again by boxes, a big flurry of activity with another moving day coming up! Apparently the new place is some sort of historic home on the river, ugh water, hopefully we won't have any water sports in our future. Well it is about time for Fowl Friday, remember me I am Fran! Debra has practically forgotten our existence, well not entirely she does feed us and keeps the nest tidy but! ....we are surrounded once again by boxes, a big flurry of activity with another moving day coming up! Apparently the new place is some sort of historic home on the river, ugh water, hopefully we won't have any water sports in our future.
Freda has tried water skiing and it wasn't pretty, first the bikini of choice well let's just say itsy bitsy does not work with Freda's figure. Strings can be problematic too lets just say once again Freda did a lot of dangling in very awkward revealing poses!
Debra is a romantic, flowy dresses, lace and lately Victorian crazed especially dresses and dress forms. Her favorite Sizzix die at the moment Tim Holtz's dress form die for Sizzix. Wonder if they ever wear out?
Our biggest fear is the tiny lace outfits we see being fashioned, not sure but they look fowl sized! Yikes! Follow the Fowl!
Friday, June 15 2012
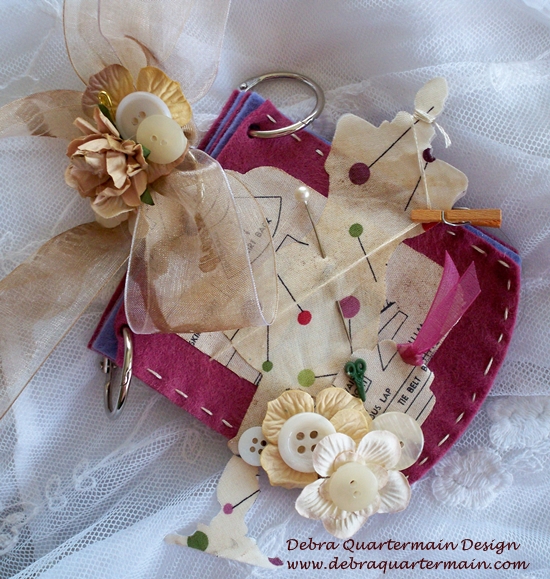
I have a love of the Victorian era and long ago most of my crafting was in that style. The steam punk trend which melds the style of the era both in the sentimental and mechanical is fascinating. This needle book I have designed is based on the popular vintage of a small book used to hold needles.
In the beginning needles were very scarce, in fact even well off households had only one which was cared for, kept sharp and rust free using a pin cushion filled with emery dust. Poorer households often shared a needle between several families.
Using Sizzix dies, wool felt from National Nonwovens which is ideal for holding needles and keeping them sharp plus the inspiration of a pin fabric I had in my stash my little book now graces my antique sewing basket.
Tuesday, March 27 2012
 Talented designer friend Eileen Hull is hosting a spring linky party with a great giveaway! My project from my archives features the Sizzix Scoreboard TM Teacup Die by Eileen Hull. Several designers are using more of Eileen's dies to create fabulous fun projects! Hop around and enjoy, be inspired! Talented designer friend Eileen Hull is hosting a spring linky party with a great giveaway! My project from my archives features the Sizzix Scoreboard TM Teacup Die by Eileen Hull. Several designers are using more of Eileen's dies to create fabulous fun projects! Hop around and enjoy, be inspired!
My design incorporates my love of fabric and needle felting, my inspiration the Alice in Wonderland movie.
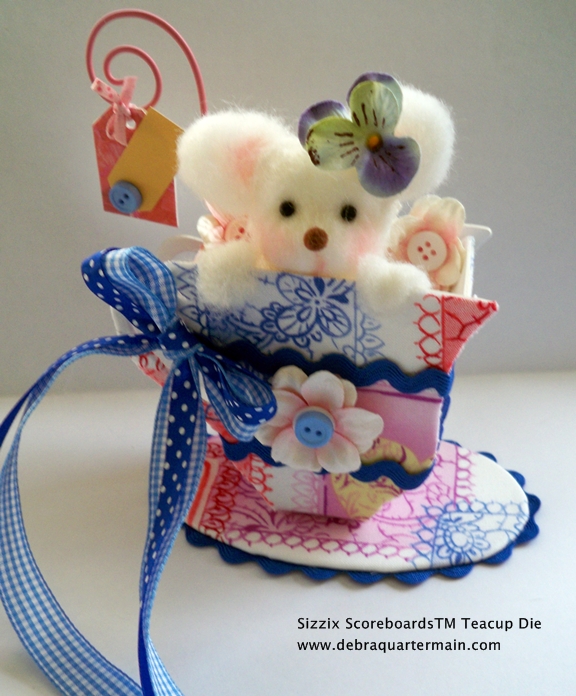
Materials: Teacup die, 12" x 18" piece of print fabric, HeatnBond Iron-on Adhesive, 1 1/2", 2" balls STYROFOAM TM, Natural Wool Wisps by National Nonwovens, 1/2 yd each of 1/2" blue check ribbon, 1/4" blue dot ribbon, 8" of 1/8" pink polka dot ribbon, 1 yd blue rickrack, 3 button flowers, 1 pansy flower from Prima, 2 blue buttons, yellow & pink paper scraps, pink wire, 2 black quilt pins, brown pompom, blush, needle felt tool, foam pad, sharp scissors, iron & board, mini iron, pencil, toothpick, Beacon's Fabri-Tac and Zip Dry glues.
How to:
1. Fuse HeatnBond to fabric piece following manufacturer's instructions. Place teacup die pieces on wrong side of fused fabric leaving 1/2"-2" space around each piece. Fuse pieces. Cut carefully around each piece leaving a 1/4" border, clip around curves. (For handle omit border) Use mini iron to fuse 1/4" border over edges. Flip saucer and two cup pieces, fuse fabric to back of pieces. Cut along edge of cup pieces.
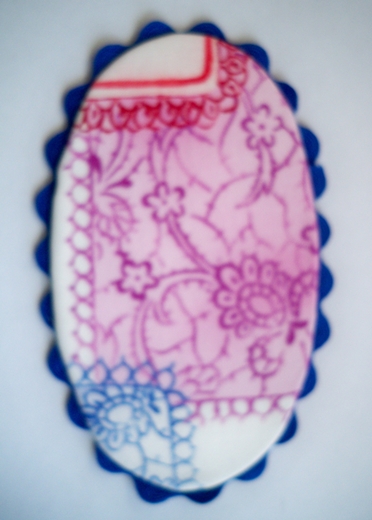
2. Score and assemble cup together. Glue. Glue rickrack around edge of the saucer.
3. Use fingers to indent eye sockets for mouse on 1 1/2" ball. Cover ball with wool and needle felt. Cover second ball with wool, needle felt. Insert second ball into cup and glue.
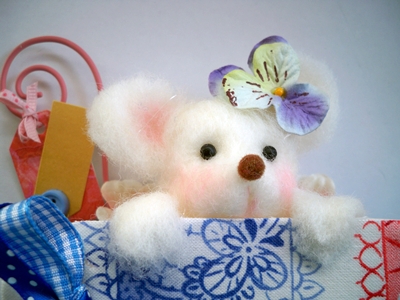
4. Needle felt a 4" square of wool on foam pad. Cut out two 1" ovals for ears, two 1/2" by 1 1/2" for paws rounding ends. Blush ear centers, cheeks. Insert eyes and glue on nose. Needle felt under nose for mouth center, blush. Needle felt ears to top of head.
5. Wrap and glue rickrack around cup. Glue flower to center front adding blue button. Tie ribbons together and glue to handle.
6. Insert toothpick into mouse head and insert into ball in cup pushing together. Glue paws over edge of cup. Glue pansy to ear. Glue flowers behind mouse.
7. Cover die tag with pink paper. Cut smaller tag 1/2" by 1" from yellow. Glue to pink tag. Glue blue button in place on tag. Tie to pink tail wire. (Tail was a dollar store find, a photo holder, I cut off wires) Insert tail into mouse foam body in tea cup.
Enjoy the Spring Linky party and be inspired to create some fresh spring accents! 
Monday, March 26 2012
Easter is only a couple weeks away and even though my girls are grown now, we still have our traditional easter egg hunt. I enjoy always each year too finding a stray egg that was missed. One year as I hid the eggs our little dog followed behind me eating several candy eggs before I caught her! OOps I meant when the Easter Bunny was hiding the eggs!
This year I am counting the days till Easter weekend, I haven't seen my youngest since Christmas so can hardly wait until she is home and the three of us are together. My daughters are such a joy! My oldest daughter has just bought her first home, so exciting and she is moving in June.
This year if you are looking for inspiration to craft some eggs to fill a basket or two Crafts 'n Coffee is having an Eggstravaganza and giveaway so hop on over! I have experience with hopping seems my bunny designs have multiplied over the years! I will be sharing some of my favorites. Full instructions for the Jester Bunny at http://www.creativehomeartsclub.com/projects/articletype/articleview/articleid/670/spring-jester-bunny
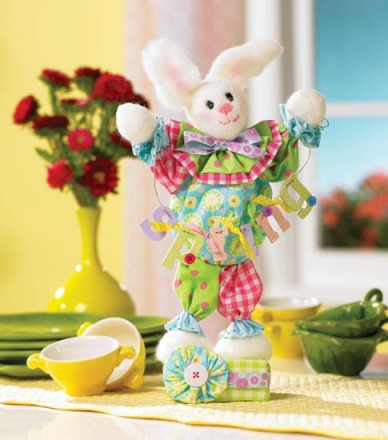
Designer friend Eileen Hull who designs dies for Sizzix is hosting a linky Spring Party and giveaway. Eileen's dies are wonderfully versatile allowing you to create layered textured accents and elements from a variety of materials. Check out the inspired creativity! 
Monday, November 07 2011
November is a busy month for the Designer Crafts Connection Blog Hop! We hop the first Monday of every month but this month we have TWO hop dates, today with ideas for Fall/Thanksgiving Decorating and on the 15th with a very cool Flip Pal Mobile Scanner Hop! Also we have even more exciting give aways with the Sizzix Fresh Vintage Blog Hop involving many of our DCC members. Details below.
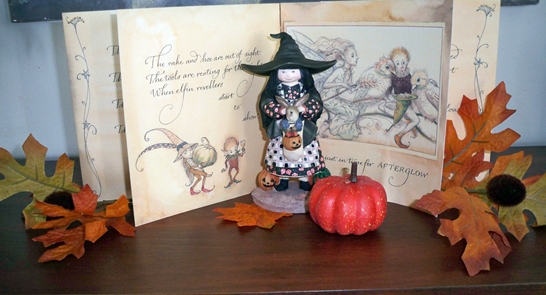
Here in Canada we have already celebrated Thanksgiving but I wanted to share some easy decorating ideas for this special holiday. Many of us are both short on time and space when it comes to decorating for a holiday or event. For my mantle this year I used a lovely illustrated book opened to pages with elf and fairies carrying pumpkins and gourds. Choose a child's storybook, artwork or vintage cards, add some silk leaves and pumpkins or gourds. I have a special figure which reminds me of my daughter Kate dressing up for Halloween. I add silk leaves here and there surrounding candle sticks, books for a simple touch of fall festivity. I sprinkle them down the center of the table.
 Visit our NEW: Designer Craft Connections Facebook Page for details on our November 7th and 15th great give aways! Be part of the in crowd. LIKE our NEW Designer Craft Connections Page on Facebook so you will learn about our challenges, giveaways, and announcements. Make sure to share our Designer Craft Connections Page with your Facebook friends so they can join in the fun.
Happy creating! Debra
Monday, October 24 2011
It was a whirlwind weekend filled with creativity. Creativity is defined as
the ability to transcend traditional ideas, rules, patterns, relationships, or the like, and to create meaningful new ideas, forms, methods, interpretations, etc.; originality, progressiveness, or imagination: (Dictionary.com)
From the Roller Derby Fashion Parade at my daughter's game, my other daughter's delightful and delicious cupcakes and the kids crafty camp afternoon creativity was overflowing. Fishnets to tutus and every combination of animal print possible the Roller Derby gals and many fans were rocking some wild style! I "tricked out" a Capitol City Roller's T with glitter, gems and a new off the shoulder neckline and a "Derby Mom" logo on the back.
My kitchen hosted a full day of yummy and fragrant aromas as "The Enchanted Cupcake by Kate" baked up delicious speciality cupcakes, Chocolate Bliss, Vanilla Dream and Lemon Locks. The delicate frosting looked like roses as Kate piped a mix of two colors together.
Sunday afternoon was more t shirt and costume fun with my kid's crafty camp. They are delightful and there was paint and glitter everywhere. I showed them how to stamp, stencil and screen print with fabric paints. The screen printing was their favorite. Using a piece of sheer curtain fabric under plastic or adhesive stencils securely taped down worked really well. A line of paint was added across top of stencil and pulled across stencil with a credit card. This was their favorite technique. Their enthusiasm and confidence in their design approach is wonderful. I am always re-inspired after a day with the kids.
Now a new week begins and more crafty goodness is coming up. Fresh Vintage Blog Hop with more new dies by Eileen Hull for Sizzix on Tuesday and Thursday. Thursday I have another creative class, sewing up some whimsical holiday ornaments. I have the best students, class is always fun and full of wonderful designs. The more my students create the more ideas flow for something else. Last week they created some pretty holiday cards, the tree themed ones very festive with a whimsical touch!
What I have learned is creativity is like a muscle, the more you use it the stronger it becomes. Slumps, blocks happen but just diving in with something simple like a few markers and a journal, just playing for awhile will be very beneficial to mind, body and spirit. How do you handle a creative slump, just leave a comment with some of your ideas for kick starting creativity. Debra, Inspiring the JOY of Creativity!
Tuesday, October 18 2011
Today and Thursday and for the following couple weeks until November 3rd, the Fresh Vintage Blog Hop continues with a new die line by Eileen Hull for Sizzix. One of my favorite dies from the collection is the dimensional bird. Sharon Currier of Crafts n Coffee designed the cutest wedding cake with the birds as a bride and groom topper. Want some inspiration, check out the creations by the industry's top designers! Follow the JOY of Creativity always! Debra
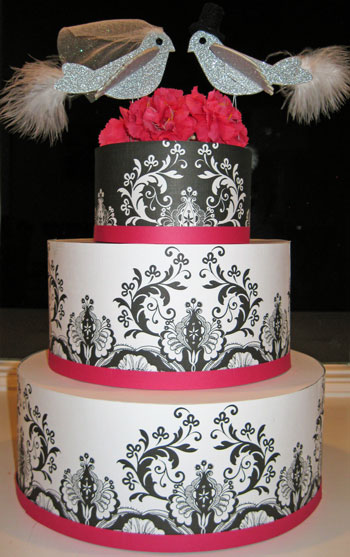
(photo courtesy of Crafts n Coffee)
Wednesday, October 12 2011
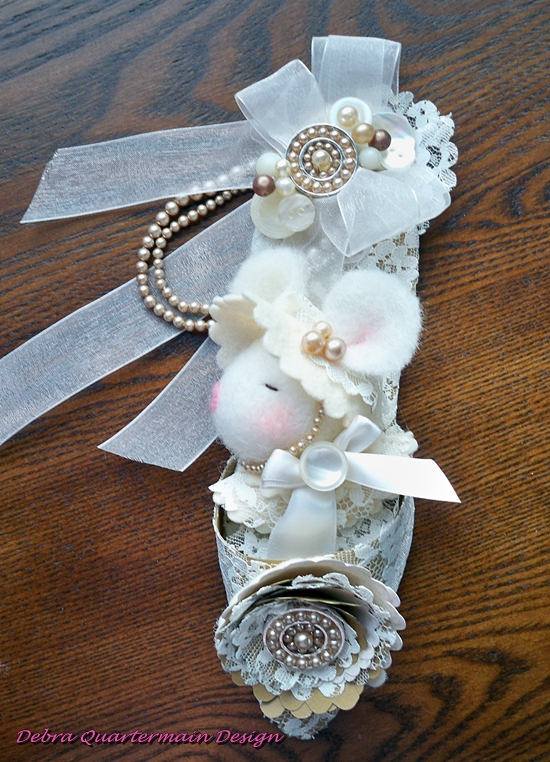
Vintage Slipper with Wee Mousekin
Along with the Wrapped Flower Die Eileen sent me some doughnut Katiedid components by the very talented Katie Hacker to use in my design. I wanted to incorporate also one of my very favorite techniques in the design as well, needle felting wee creatures. I was inspired by some lace I found in my stash and a bag of broken pearl necklaces I picked up at the flea market this past weekend. The pearls are a range of gorgeous vintage hues. Not being a jewelry designer Katiedid components were great as I could glue broken pieces of pearl necklace into the doughnut components. The slipper is a version of the fun shoe I made at a Make and Take at Summer CHA at the Tombow booth with designer friend Marie Browning.
Eileen asked us to think outside the box with using the die in other ways, to show how versatile the die is. I used it to create a flower, layers of paper, lace and felt. I also used the pieces to make the double layer hat, collar and dress for my wee Mousekin. The scalloped pieces were perfect for the outfit.
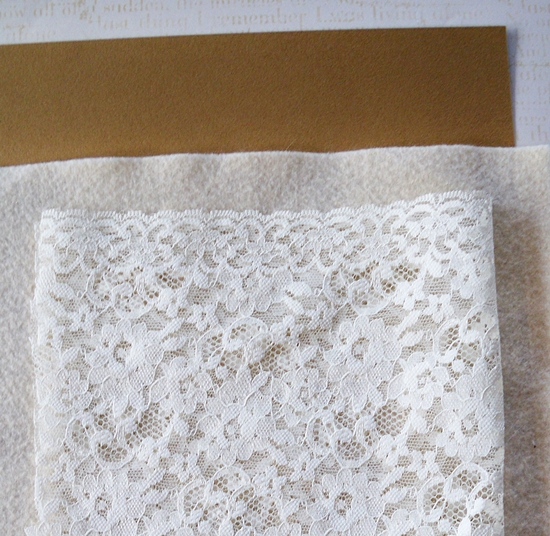 Making the slipper, tan cardstock covered with lace.
Create the flower as shown in die instructions. Add pearl filled Katiedid doughnut to center of flower. Flower is glued to show front.
Finish decorating slipper with ribbons, buttons, pearls and second component. Add a rolled note as second option to give as a gift. Create mouse by following Needle Felting techniques here. Layer flower lace and felt flower pieces to make hat and dress. Add pearls and ribbon.
Tuesday, October 11 2011
Today the Sizzix Fresh Vintage Blog Hop, check out all the fabuous designs by talented designers using Eileen Hull's new die collection! I join the hop Thursday.
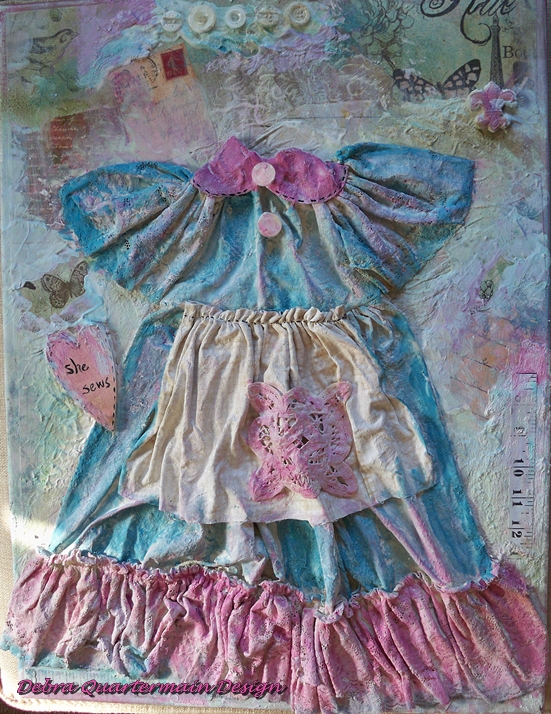
I have decided to try a new technique at least once a week. I have loved Sue Pelletier's beautiful collage work incorporating dresses and plaster. I purchased a plaster of paris children's handprint kit. The tray was perfect for mixing the plaster in making it thinner than the instructions called for. I mixed it into a gravy thickness (is Thanksgiving here in Canada so gravy has been simmering here!) to dip in my little dress.
First I prepared and collaged the canvas leaving it to dry. I sewed up a little dress front with some muslin and lace. It did not need to have closures or back with being applied to the canvas. I sewed a tiny apron to add along with lace sleeves and collar.
I mixed up half of the plaster and dipped in the dress applying it to the flat canvas arranging the folds. I then dipped and added the sleeves, collar and apron.
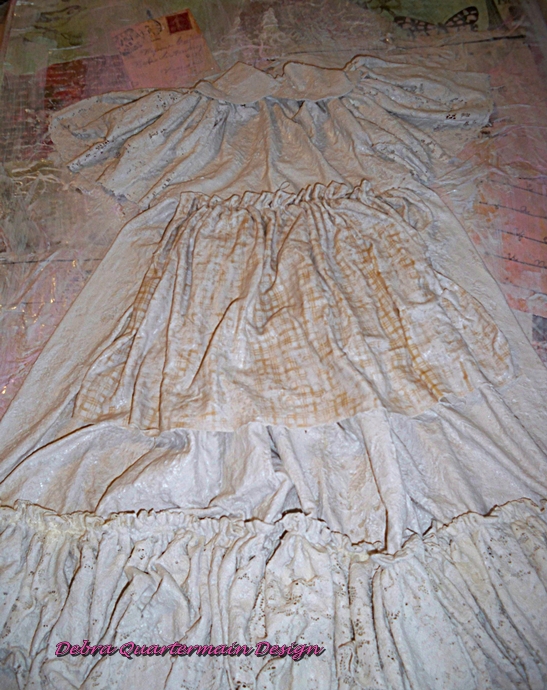
Then I just had fun mixing up shades of thinned acrylics and painting the dress. I added more plaster to the canvas adding buttons and measuring tape sections with a heart that says simply "she sews" because that is what I do. Preserving a sewing project this way felt special. It is still drying and I will seal it to hang on my studio wall. Try plastering a doll outfit or baby dress, add some photos or momentos, even the handprint. Make a memory! Keep creating Debra!
Monday, October 10 2011
Happy Monday! A very full creative week ahead! This Tuesday and Thursday the Fresh Vintage Blog Hop is on with another group of talented designers. I am taking part in Thursday's Hop with a new flower die designed by Eileen Hull for Sizzix. These hops are so inspiring and have really stretched my creative design skills.
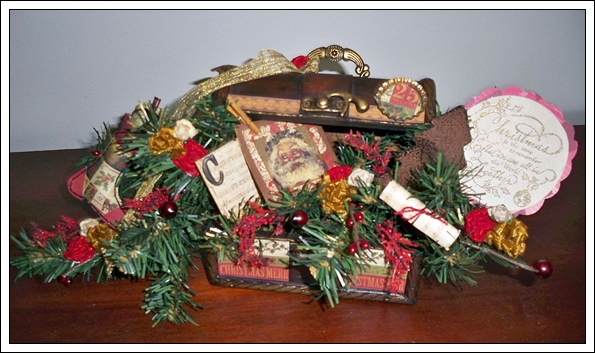
This Thursday the 13th I begin my Holiday Crafting Classes locally, the details are here. The classes run four weeks with each week filled with different techniques and finished project. The first class is a vintage trunk centerpiece with antiquing, embossing, inking, flower making and paper sewing techniques. There are still spaces available, email debra@debraquartermain.com.
Creativity is beneficial to our health and well being, it is both relaxing and rewarding plus in my classes get a jump on Christmas decorating and gift giving! It is an experience shared with others all involved in the creative process. There is something remarkable that happens as you take raw materials and transform them, it is about the whole process, the journey ending with a piece that is both beautiful and meaningful. Each person finds their voice, their style and in the applied techniques, fun exploration find their own unique creativiity! Anything is possible. Remember to always follow the Joy of Creativity, Debra!
Thursday, September 29 2011
September is National of should I say InterNational Sewing Month. I could not imagine my life without sewing or actually remember any time I was not sewing. Some of my earliest memories are of sewing next to my mother in the summer on our front porch. I had a tiny machine and I made doll clothes from the scraps she had. My mom like so many mothers at the time sewed most of all of our clothes. I remember the summer sewing because my mom also worked outside the home as a teacher so the summer was when she had freer time to sew.
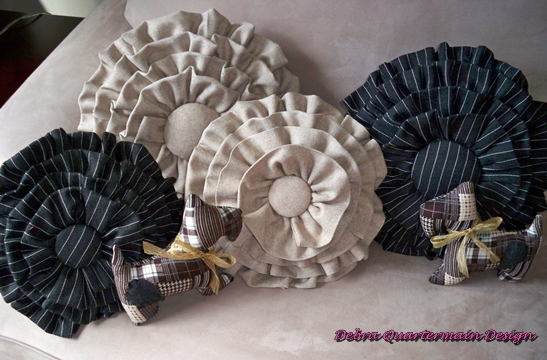
I am taking part in a couple craft shows this fall, the first one this weekend Saturday and Sunday at the Capital Exhibit Center in Fredericton. I have had such fun just designing fabric items for the show. I have been working with soft wools and plaids making posie pillows and small pillow animals. I went back in my patterns to a Scottie Dog which appeared in my first book "Nursery Decor". Popped out a pig and of course added a black cat!
Come by if you are in the area, for the virtual world Monday October 3rd the DCC hops again with out October Pink Challenge sponsored by Westcott Brand scissors. We have been sent some fabulous Duck Brand tapes to work with (hot pink zebra print!) and Velcro Brand closures. Westcott non stick scissors make working with these products so easy! A new round of amazing designs from the Fresh Vintage Sizzix Blog Hop today. My talented designer friend Eileen Hull keeps coming out with beautiful die collections for Sizzix. Happy Creating Everyone! Debra
Tuesday, September 27 2011
Today begins the reveal of the new line of Sizzix Fresh Vintage Dies by talented designer friend Eileen Hull. Sixty wonderful designers are involved in the hop for the next six weeks, every Tuesday and Thursday a group of about ten designers will be showcasing their designs. I join in on the fun in mid October.
This is one seriously, amazing creative and innovative international group of professional designers. Be inspired and hop along! Next Monday the DCC blog hop is live with the Westcott Brand Challenge!
Coming up this weekend is a local fall craft show at the Capital Exhibit Center, Fredericton, NB. I will be there promoting my local workshops, my work and some fun fall things.
Happy International Sewing Month! Keep creating & following the JOY! Debra
Wednesday, September 21 2011
October is going to be a very creative month, two blog hops, the Designer Crafts Connection and Sizzix Fresh Vintage with the talented designer friend Eileen Hull's new die collection. She is having a linky love party right now for all the participating designers. Check it out with the pretty hop button to the right!
I am revisiting one of my favorite designs from the last Sizzix hop, I combined my love of needle felting whimsical characters with the Sizzix Scoreboards TM Teacup Die. Combining what mediums we most often work in with new ones keeps one on creative toes! Be Inspired...Be Creative! Debra, CEO!

Wednesday, December 15 2010
This is week seven, the final week of the Sizzix Triple Play Blog Hop! The featured die Treat Bag Toppers, Bigz XL Scoreboards Die #656774 is designed by the talented Eileen Hull. More exciting news from the talented triple trio!
I used one of the treat bag toppers along with some ribbons, embellishments and gold paint to create a festive gift bag. It looks good on the tree as well as an ornament!
Happy Holidays! Follow the Joy! Debra, CEO!
Wednesday, December 08 2010
It is week 6 of the Sizzix Triple Play Blog Hop! This week's featured die is the Album, Brackets, Bigz XL Die #656053 by Brenda Pinnick used with Big Shot or Big Shot Pro.
Just hop along with the button on the right to see this die in the hands of sixty talented designers!
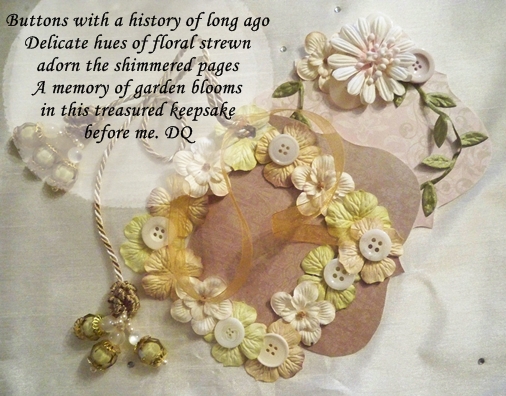
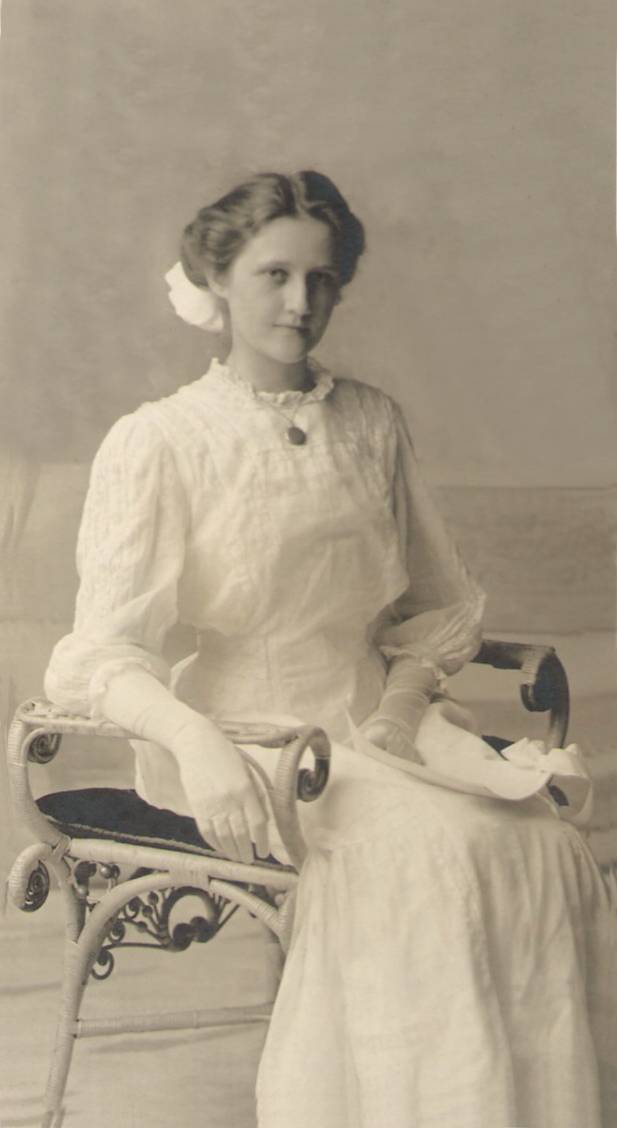
Although most of my designs are winter inspired this time of year for this die I found the shapes spoke to me more of something romantic and flowery. I adhered papers to the pages, glued flowers and buttons to the frame. I added ribbons and tassels to complete this floral inspired remembrance. I see my grandmother seated at her desk creating something very simiiar to keep cherished momentos among the pages.
Thursday, December 02 2010
Drum roll please! It is week #5 of the Sizzix Triple Play Blog Hop with Karen Burniston's Gift Card Holder. This was for me the most challenging as I am not primarily a paper designer so I decided to not to use it in a card. I love winter and snowflakes so I decided to create a Snowflake gift of Joy. The diecur piece fit perfectly over the snowflake. Plus any excuse to use a button or two or three..
I painted the cardstock diecut adding glitter while wet. Embellished with buttons, ribbon and more glitter. The Gift Card Holder, 3D Pop-Up, Bigz XL Die #656740 by Karen Burniston is used with Big Shot or Big Shot Pro.
Hop along on the magic button at the right and see what 60 very talented designers create with this die! Always follow the Joy! Debra

Wednesday, November 24 2010
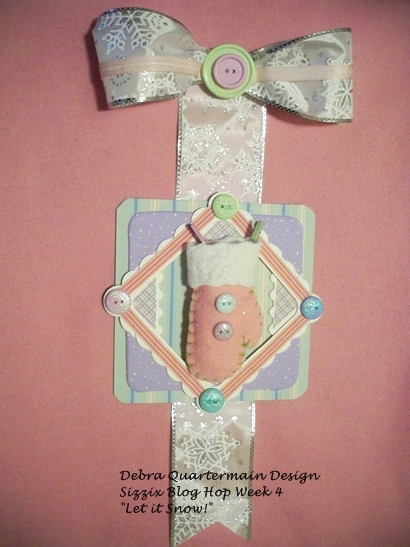
It is week four of the Sizzix Triple Play Blog Hop featuring the talented designer Eileen Hull's picture frame die, 3D Pro Scoreboards Die #656835.
Since the snow is swirling everything I make lately is winter themed. I used fabrics, ribbon and wool felt to make a winter wall hanging. It is a very versatile die with several pieces so it will be exciting to see what the rest of this wildly creative group comes up with! Happy Thanksgiving! Debra, CEO!
Thursday, November 18 2010
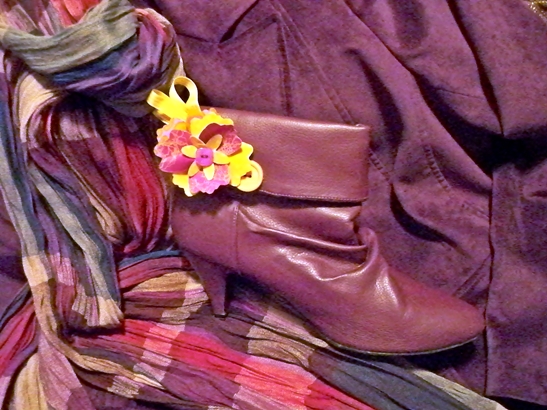
It is week 3 of the Sizzix Triple Play Blog Hop with the talented Brenda Pinnick's Flower Beauty Bloom die #655455. Brenda kindly sent samples cut from some of her wonderful fabrics. Since I just got back from a week away and off to a big four day event tomorrow I was happy to be able to whip up something fun quickly! I love boots and shoes, got these great purple boots, thinking I would make a "bootonniere"! Considering my schedule lately "These Boots were definitely made for...!" Check out the sixty talented designers in the hop, the projects are amazing!!!
Thursday, November 11 2010
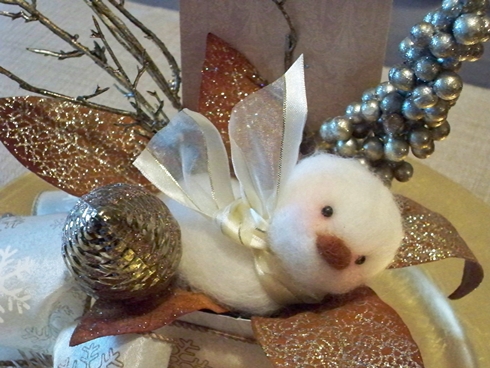
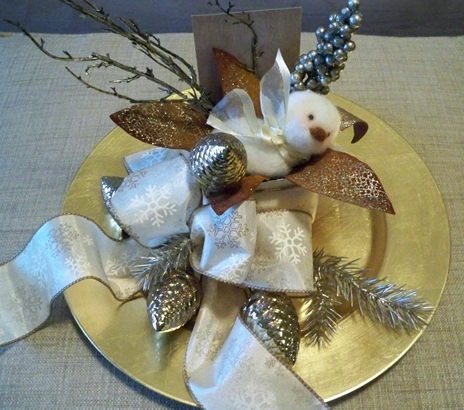
It is exciting week 2 of the Sizzix Triple Play Blog Hop featuring Karen Burniston's Twist Cube Die. The Twist Cube Die twists and pops up. I have been travelling and am not primarily a paper artist so I opted for using the cube a little differently to save myself some time with logistics. My favorite part is always the decorating well unless it is edible and then the eating is an important part of course!
After seeing what sixty talented designers did in week 1 of the hop with the 3D House, the sky is the limit! I took the cube and used decorative papers to cover all sides leaving one end open as in a gift box. I filled it with decorative vines, berries, added a needle felted bird. Set on a gold plate with more ribbon, pinecones, greenery it makes an ideal centerpiece for my table in my new place.
Thursday, November 04 2010
Today is the day, at noon EST the Sizzix Triple Play Blog Hop goes live with sixty plus designers participating! We all received die cuts from new dies designed by the talented Eileen Hull, Brenda Pinnick and Karen Burniston.
The first week, today is the House, 3D designed by Eileen. I had so much fun playing with this die. It fit together easily and there are step by step instructions to follow. Since I am a winter gal I turned mine into a snowy scene and made the fence into a chimney. I covered the pieces with decorative papers before assembling. I also used crystal glitter to cover the whole house after assembly. Since needle felting is one of my favorite techniques I added a wee snowman.
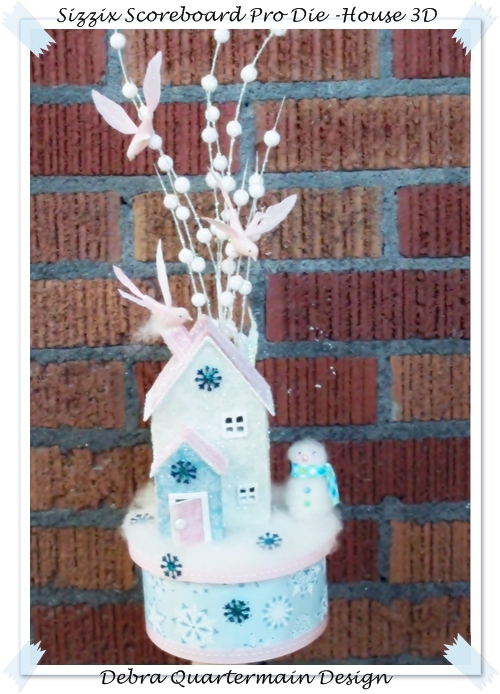
Supplies:
#65279 Sizzix Scoreboards Pro Die, House 3D
2 yards pink ribbon
Sizzix 12 x 12 Matboard
Crystal Glitter
Sizzix Big Shot Pro Die
3- 8 x 8 Decorative Papers
Natural Wool National Nonwovens
1 yard Holiday Ribbon
6" Disc, 1" Ball, Mini Egg, STYROFOAM TM
Snowflake Brads
Modge Podge
Crystal Branches
3 Pink Birds
6" Cookie Tin
Wednesday, May 12 2010
It is another round of the Sizzix Scoreboard Blog Hop! These dies are the design of designer friend Eileen Hull! This week's new die is the cake, it is so cute and in the hands of several talented designer friends the ideas for this project are endless! Being a sewer and always looking for storage, I made mine a cute little sewing basket with a spool of thread for a cake stand.
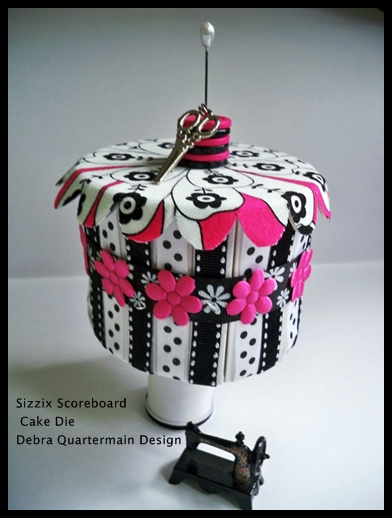
To make my cake!
You will need:
6" fabric scrap for top
Double adhesive sheet
Double sided tape
3 yds of two co-ordinating ribbons
1/2 yd flower ribbon
18 flower appliques
3 pink, 3 black buttons
1 white spool of thread
1 quilter's pin
Beacon's Fabri-tac Glue
Scissors charm
1. Cake Top: Affix fabric to cake top with adhesive sheet. Trim scallops. Bend scallops down. Glue buttons together alternating colors and lining up holes. Glue to top of cake, insert charm over pin and pin into buttons.
2. Cake Sides: Cut strips of both ribbons 1" longer than cake sides. Overlap ribbon 1/2" at bottom and top of each section and glue in place alternating patterns. Score and bend sections. Affix three sections together into a circle. Affix to cake bottom.
3. Finishing cake: Glue flower ribbon around center of cake. Glue appliques on ribbon alternating sections. Put cake top on. Place on cake stand and enjoy!
Check out all of the talented designers in the blog hop! Eileen has all their links listed on her blog! Follow the JOY! Debra, CEO!
Monday, January 18 2010
It has been fun taking part in the Sizzix Scoreboard Blog Hop especially with designer friend Eileen Hull's brand new line to be launched at CHA! We got to play with the new die shapes, so versatile! The last one is the gift box, when Eileen sent out the samples, she thoughtfully included some buttons in my package knowing my love of sewing and all things related!
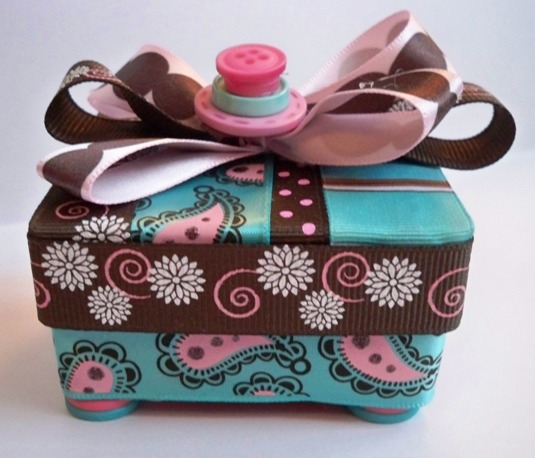
It turned out very cute and so easy my pretty little button box. Use scraps of ribbon and glue overlapping across bottom and top of box. Cover sides with a strip of ribbon gluing it all the way around. Make four loops and stack on top of box. Glue buttons together in pairs to make four sets of legs. Glue four buttons together and glue to center of ribbon loops. This pretty little box matches our booth colors in the L&D section of the CHA show, #2639. It will be handy to keep tacks, pins etc in, useful and pretty, what more can you ask for! Follow the JOY! Debra, CEO!
Wednesday, December 09 2009
One of my very talented designer friends Eileen Hull creates magic with matboard. She has a new line of dies coming out with Sizzix that cut some very cool shapes from matboard or cardboard. Every week a group of designers create a project using a particular shape. This week's is the Business Card Holder. I used iron on suede to cover mine and added black brads to hold it together. I added a ribbon handle as I wanted a purse look and letter brads to match my business cards. Now I have something fun and useful to take my cards in! There are several other dies in the series. Check out Eileen's blog to see all the projects and to learn more about these wonderful new dies from Sizzix designed by Eileen!

Keep Creating! Follow the JOY! Debra
|