|
the CEO! Creative Eternal Optimist! Blog
|  |
Monday, November 05 2012
The first Monday of every month the Designer Crafts Connection hops with thirty of the Craft industry's top designers. We are all professional designers, members of the CHA designer section. (Craft & Hobby Association)
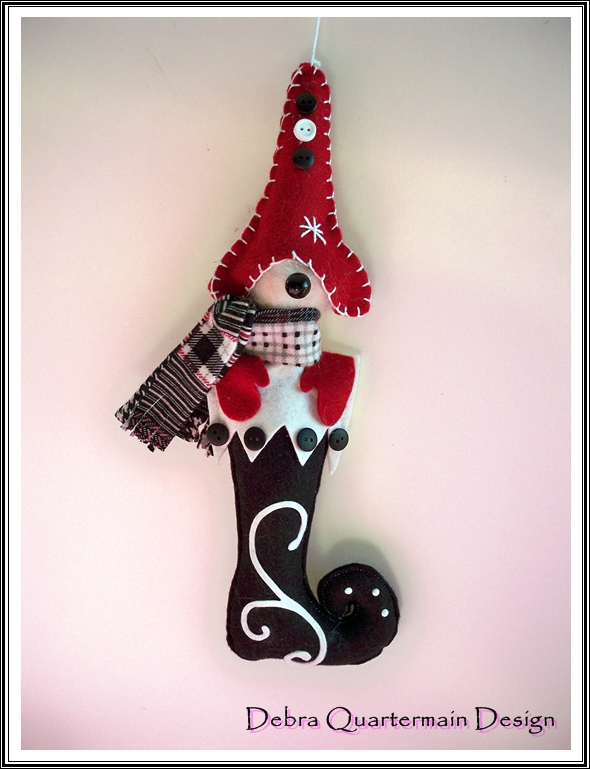
This month's theme is thank you gifts. November marks the beginning of the holiday season, invitations to holiday parties, gatherings, gift exchanges. My favorite thank you gifts to give are handmade ornaments. I design and create new ones each year. One of my favorite designs is this whimsical elf popping out of a stocking. I create them in different color combinations to match the gift recepient's holiday decor.
The elf's head is a needle felted 1 1/2" Styrofoam brand foam ball and the stocking is made National Nonwoven's wool felt. The scroll design on the stocking die cut with the Sizzix Big Shot. It cuts felt beautifully. Bead and button embellishments complete the ornament.
Be inspired with the projects offered by the other members of this talented designer group, just hop along with the DCC button in the side bar! 
Friday, October 26 2012

I enjoy my students, they are so creative and with a little direction they run with their own ideas. Once they get the technique I provide them with lots of color and material choices. One of my students wanted to needle felt owl ornaments for her new young stepsisters.
Since the girls both love pink and purple she decided to reverse the colors with one being more pink and the other more purple. They turned out so cute and will be sweet cherished gift, their first Christmas together as a blended family.
Creativity is a gift in itself, taking the time to craft a gift is special. Making something special for someone you love, in the act of creating love is woven in and so there is no greater gift than that.
It is the season to create with love! Always! 
Tuesday, September 04 2012
I have been neglecting my blog since I moved, upsizing and embarking on new ventures in a historic home has been a delgihtful hectic adventure so far. I love the place more each day.
However now the fall begins and new resolve to get back into my virtual routine. Last week I travelled to Cleveland to film a segment of Quilting Arts with host Pokey Bolton. It was a wonderful experience and everyone was so nice. Pokey is amazing shooting segment after segment with different guests with only a quick run through. Her knowledge of techniques and products was very impressive!
I admit to being more nervous with this taping as I had to handle everything not with "kid gloves" but rubber ones! I had practiced but it was slightly clumsy still and slightly messy.
The segment will air sometime in winter 2013.With being away again on the weekend I missed the Designer Craft Connection Blog Hop, the theme was crafting with vintage items. With sewing close to my heart and a love of pin cushions Michelle Frae Cummings vintage pin cushion with trim was a favorite. She shares a tutorial, quick and easy to make! http://faeriedustdreams-michelle.blogspot.ca/2012/09/designer-crafts-challenge-creating-with.html
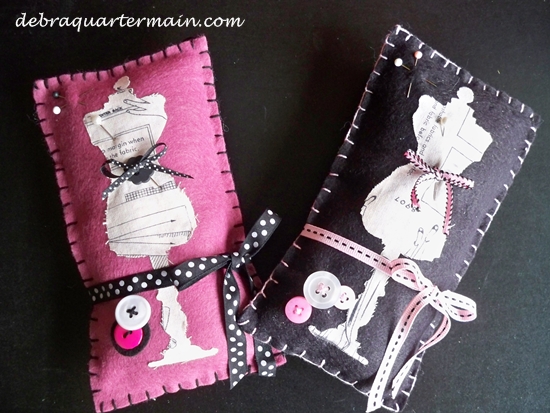
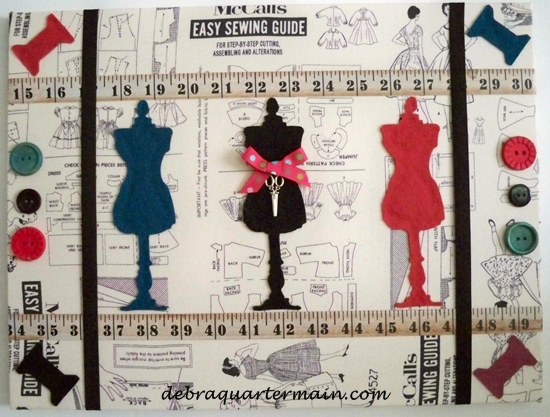
With pins being so highly valued and precious, places to keep them were equally important. Many a creative seamstress sewed up a pin book or the iconic tomato pin cushion to keep the needle safe, sharp and rust free. I like dress forms almost as much as pin cushions so I created a dress form pin cushion!
How do you llike to keep your pins and needles safe or off the floor! 
Monday, July 09 2012
Continuing with my playing with dress forms. Dress forms have been around since the Middle Ages. In the Middle Ages the aristocrats had dress maker forms which were the exact measurements so they did not have to be bothered with fittings.
Miniature versions were made wearing the fashion designed for the aristocrat which could then be sent off to a family member or esteemed friend to be recreated.
During the industrial revolution the dress form became very popular and today for designers as well as serious home sewers in indispensable tool allowing for design draping and fitting of garments.
I have designed a pin cushion using talented Tim Holtz's dress form die for Sizzix. Using wool felt from National Nonwovens which will keep pins and needles both sharp and together.
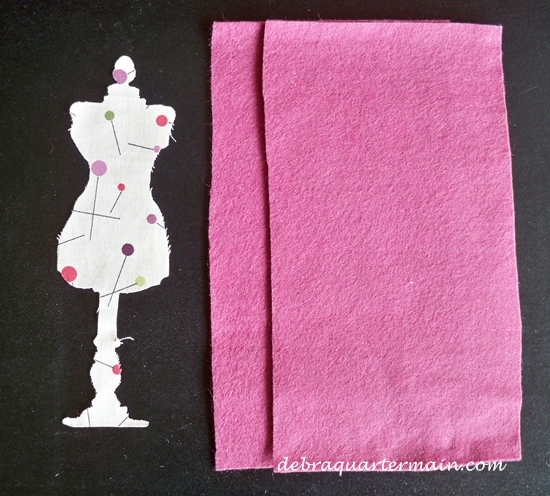
Cut two pieces of wool felt 3 1/2" x 6" and cut dress form die from fabric.
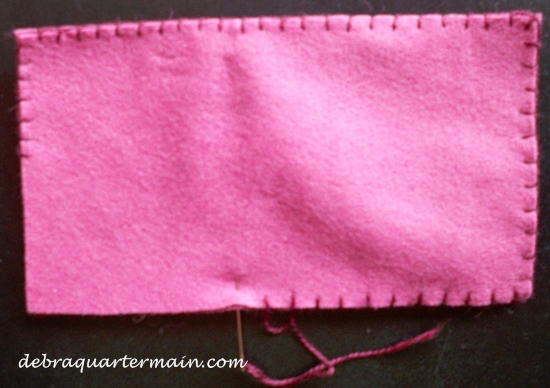
Blanket stitch around all four sides leaving opening, stuff lightly and finish blanket stitching closed. Use fabric glue to adhere dress form, embelish with ribbons and buttons. Enjoy!
Sew Inspired! 
Friday, July 06 2012
 Well it is about time for Fowl Friday, remember me I am Fran! Debra has practically forgotten our existence, well not entirely she does feed us and keeps the nest tidy but! ....we are surrounded once again by boxes, a big flurry of activity with another moving day coming up! Apparently the new place is some sort of historic home on the river, ugh water, hopefully we won't have any water sports in our future. Well it is about time for Fowl Friday, remember me I am Fran! Debra has practically forgotten our existence, well not entirely she does feed us and keeps the nest tidy but! ....we are surrounded once again by boxes, a big flurry of activity with another moving day coming up! Apparently the new place is some sort of historic home on the river, ugh water, hopefully we won't have any water sports in our future.
Freda has tried water skiing and it wasn't pretty, first the bikini of choice well let's just say itsy bitsy does not work with Freda's figure. Strings can be problematic too lets just say once again Freda did a lot of dangling in very awkward revealing poses!
Debra is a romantic, flowy dresses, lace and lately Victorian crazed especially dresses and dress forms. Her favorite Sizzix die at the moment Tim Holtz's dress form die for Sizzix. Wonder if they ever wear out?
Our biggest fear is the tiny lace outfits we see being fashioned, not sure but they look fowl sized! Yikes! Follow the Fowl!
Friday, June 08 2012
The birds are singing about a great giveaway for the DCC Designer's Blog Hop. Hop on over to Julie McGuffee's blog to get the details and have some fun! Happy Friday!
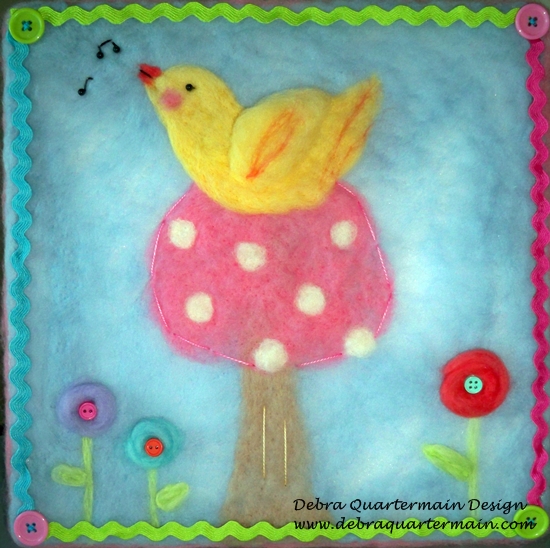
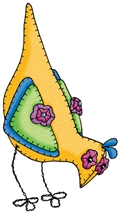
Happy Spring! The birds do sing from the treetops with JOY! This one of my favorite pieces, the technique needle felting is fun, easy and relaxing.
Delicious vibrant wools from National Nonwovens, pen needle tool from Clover, a sheet of STYROFOAM Brand foam, Wrights ricrac and buttons from Blumenthal Lansing.
Creating with JOY, never forget to just create for the sheer pleasure, the relaxation of hand, heart and mind engaged in creating! Follow the JOY always! 
Wednesday, May 16 2012
Yesterday was the unofficial opening of our new Art & Craft Co-operative, Artful Persuasion in downtown Fredericton, 79 York Street. We have 26 local artists and craftsmen who have come together in a year round store front. You can find us on facebook and like us too! https://www.facebook.com/#!/artfulpersuasion Our Grand Opening is June 1st!!!
The benefits of such a co-operative are numerous beginning with it requiring only a day a month from each member to work in the store. Led by three experienced artisans who have organized large groups before we have everyone pooling strengths and resources. I am doing window display and will help out with the blog when we get it up and running.
I am enjoying working more locally, I love my city and connecting with the artistic community here. Our creative setting is filled with hand crafted items plus yummy chocolates and cupcakes.
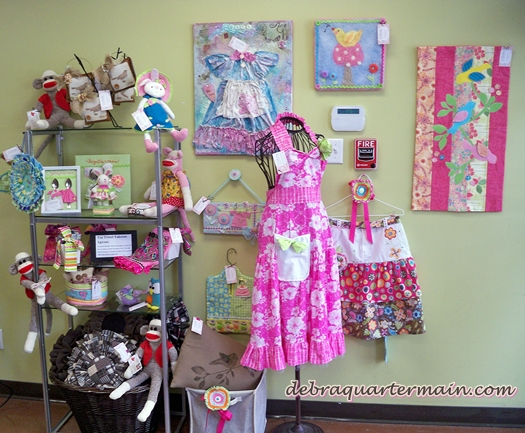
It has a special energy one which draws you in to wander the displays and savor color, texture and craftsmanship. Inspired artistry beckons from the original art pieces on the walls, jewelry sparkles beneath the lights, natural is celebrated, soaps, candles drawn from nature's herbs and bees. Here is my display in the shop! If you are local please come by and enjoy! 
Monday, March 05 2012
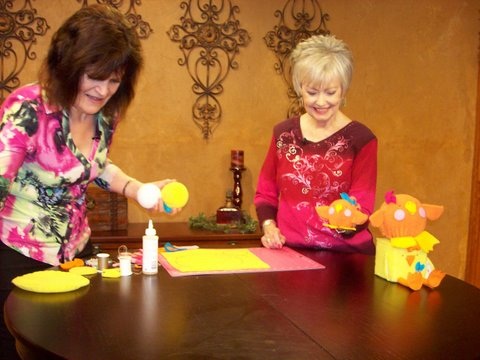
It is the first Monday of the month, time for the Designer Blog Hop Crafts Connection! Forty talented designers strut their stuff and offer some surprises as you hop along! We are celebrating interNational Craft Month! With Easter just a few weeks away I am featuring the tutorial for the cute chick/duck I demoed for a segment of Creative Living with Sheryl Borden.
Sheryl is holding the baby duck in the photo that I demoed on the show. In yellow it becomes a cute chick!
Materials:
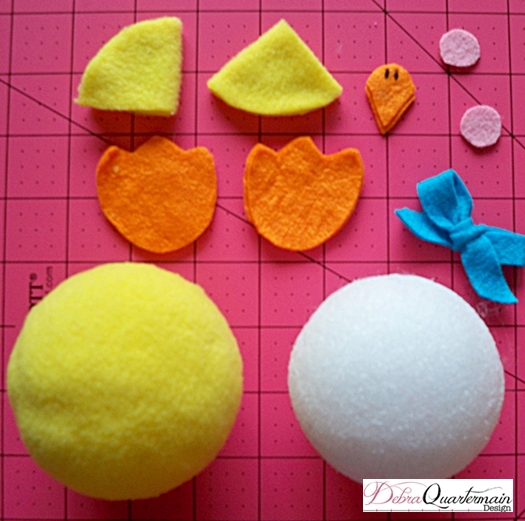
3", 6" balls, 4" cube of MakeitFun STYROFOAM ™ Brand Foam
1/6 yard yellow fleece
1/3 yard orange fleece
9" x 12" pieces of Canary (yellow), Papaya (orange) scraps of Fuchsia, Seashell Pink, Caribbean Surf ( teal) Xotic Felt by National Nonwovens
6" fabric scrap
1 chenille stem
1 skein black, pink embroidery floss
6 black, 12 colored head quilt pins
Aleene's Fabric Fusion™
Upholstery thread
Embroidery Needle
5", 8" Westcott Brand® Titanium Steel Scissors
(Ruler, measuring tape, pencil, circle templates for large duck 12", small 8")

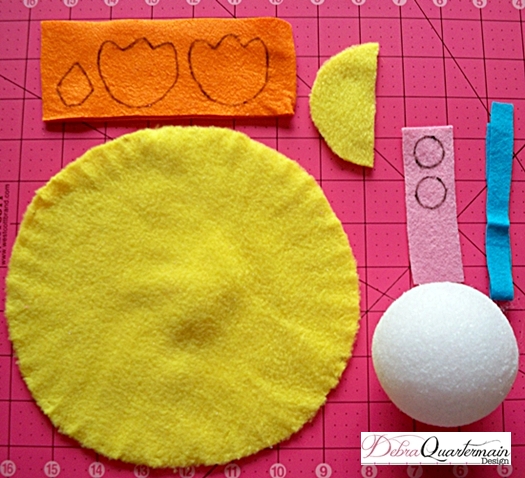
- Making the Ducks: For both the 3" and 6" ducks construction is exactly the same. The pattern pieces included are for both sizes. Any variations will be indicated in instructions. For the 3" duck cut a 3" and 8" fleece circle. For the 6" duck cut two 3" and one 12" circles. Cut two of each cheeks, beaks and four of each foot from felt. Cut ½" by 9" strip of felt for bows.
.
- With upholstery thread anchor thread at edge of the large circle. Sew a small basting stitch around the complete circle.
- Pull stitches slightly. Place circle over ball pulling stitches tightly. Circle should stretch to close. (On larger duck if this does not happen, a small circle can be glued on bottom to finish the body.) Secure thread and cut.
- For small duck cut 3" circle in half. Fold in half again wrong sides together and glue. For large duck fold each 3" circle in half wrong sides together and glue. Glue wings to sides of body as shown in photo.
- Glue beak pieces together angling top one slightly higher than lower beak. Make two small stitches at top of beak. (These stitching details are optional; they can also be recreated with a fabric marker.) Glue beaks to center of face slightly above wing line.
- Insert two black head pins as eyes. Adjust until you are pleased with location. Remove and dip in glue, reinsert pushing in to indent in face slightly.
- Sew around cheek circles with pink floss if desired or use fabric marker or add just as is. Glue to face of duck under eyes. Refer to photo for placement.
- Place feet together in pairs, reverse one pair. Glue together. Outline in black floss with a small stitch as an option. Glue feet to bottom of bird. Tie bow from felt strip, pin or glue to head.
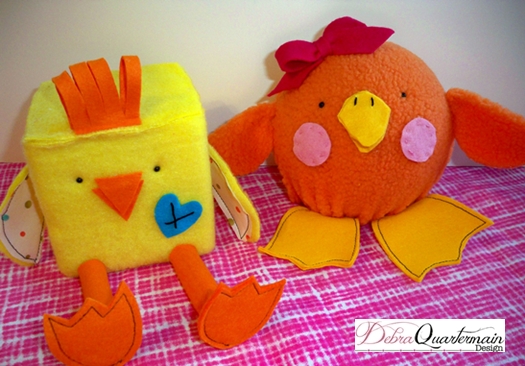
- Making the Chicken: Use the ruler to cut a 4" by 16" strip of fleece. Cut two 4" squares of fleece and one 3" circle. Cut one 1 ½" by 3" topknot piece, two beaks, two 3" by 3" strips and four feet from orange felt. Cut one 3" circle from fabric scrap. Cut one heart from teal.
- Begin at one edge of cube and glue long fleece strip. Wrap fleece piece around cube bringing it back to the edge to meet. Glue in place. Glue each 4" square on the opposite two remaining sides along edges. Press fleece seams together, add more glue if needed.
- Cut 3" fleece and fabric circles in half for wings. Glue or sew with black around edges. Pin or glue in place on either side of chicken. (Approximately at 3" mark.)
- Cut chenille stem in two 3" pieces. Roll an orange strip around each leg and glue. Place feet in pairs reversing one set. Glue or topstitch in black around edges. Glue to end of each leg. Glue to edge of body.
- Glue beak pieces together with top one slightly above lower beak. Glue to face. Insert two black head pin eyes. Add glue to ends and reinsert indenting slightly.
- Fold topknot in half, cut through from fold to 1/4 " from ends. Glue to top of head. Stitch through heart with black floss. (Optional or use fabric marker.) Glue heart to body.
Have fun hopping! Leave a comment here to enter your name for a fabulous pair of Westcott Brand® Extreme EdgeTitanium Steel Scissors! 
Saturday, March 03 2012
It is interNational Craft Month! I am celebrating this month with lots of crafty goodiness! Several workshops and classes coming up locally for all ages. Creativity is a gift we all have, it is as necessary to life as breathing when the hands and mind are involved in making art we relax, unwind and find a special joy!
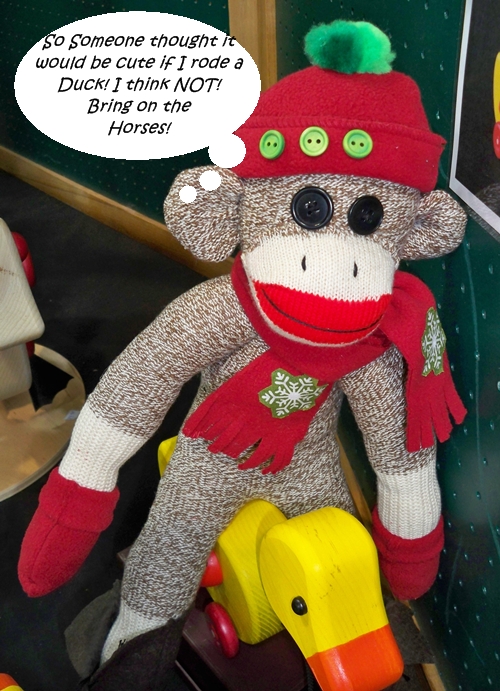
I am offering workshops for all ages from Mom & Me 5+age, Tweens & Teens 10+, to adult classes. With an easy step by step approach, fun tools, techniques and products come experiment and explore your own unique creativity. No experience needed just a desire to play! Coming up next Saturday, March 10th, Make a Sock Monkey or Kitty Workshop for ages 10-Adult. Full schedule on my Class Page. Happy crafting!
|


