#
Debra Quartermain Design
Latest Posts
Categories

 the CEO! Creative Eternal Optimist! Blog 
Saturday, May 04 2013


This is an exciting week for one of my very talented designer friends, Ann Butler, her new stamp line with Unity is being released. These stamps are so versatile and cute! Flowers, stripes, diamonds, dots, leaves and much more, I loved being able to combine the stamps and create patterns.


For the release of this new product there is a 50% off coupon deal offered by Unity for anyone ordering the stamps between Thursday May 2, - Monday May 6 at midnight CST....the coupon code is Unity5.

So now for some wonderful ideas to use the stamps, Ann has put together a group of designers for a blog hop showcasing her new Unity stamp line. I am very pleased to be part of the hop!

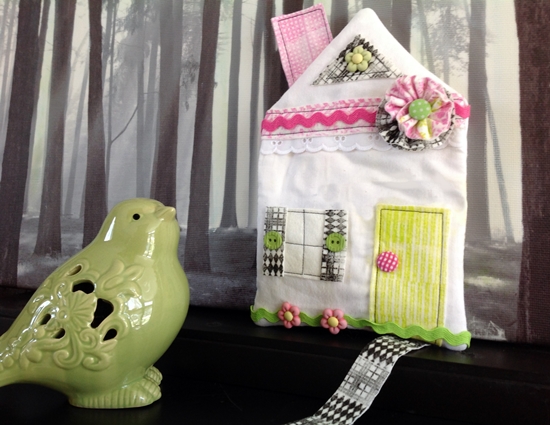
With the variety of patterns to choose from I wanted to use several in my design so I chose to make a whimsical cottage in the woods! A fun easy project ideal for using up scraps of fabrics, felt and trims.

How to!
You will need:
Ann Butler Unity Stamps 1" Leaves all Over, Diamonds & Plaid and Stripes. Dots. Hearts.
ColorBox Crafter's Stamp Pads, Sweet Pea, Limon, Night
Buttons Galore Buttons and Brads
8" x 26" white cotton fabric piece, quilt batt piece
9" x 12" Xotic Pina Colada  National Nonwovens Felt
9" lace
9" each of pink, green rickrack
Fabri-tac by Beacon Adhesives

Cutting matt, scissors Westcott Brand, pins, ironing board, iron, ruler, sewing machine, thread, needle.


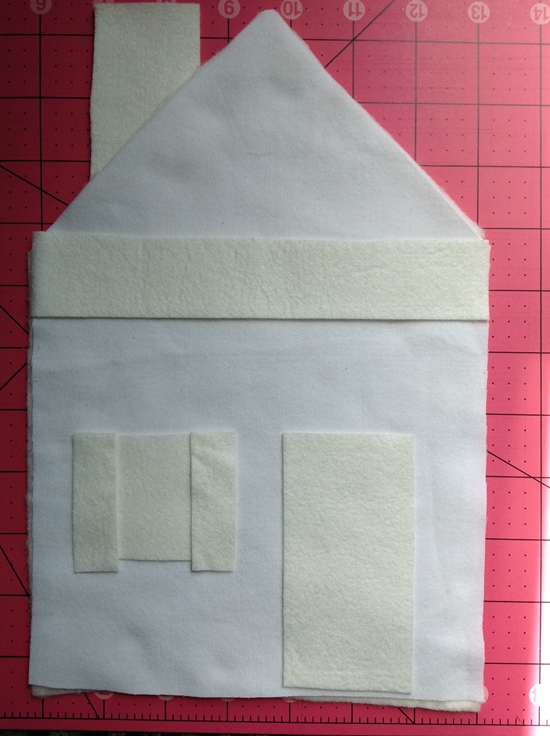
Step 1: Prepare cottage, cut two pieces of the fabric 7" by 11". Fold top corners in to meet at center making roof line. Press along those lines and cut. Cut two house pieces from quilt batt. Cut from felt a door 2" by 5", window 2 1/2" square, two chimney pieces, 2" by 3". 1" by 9" roof trim and 4" by 12" strip for flower and shutters, roof piece. 1" by 6" piece for flower.


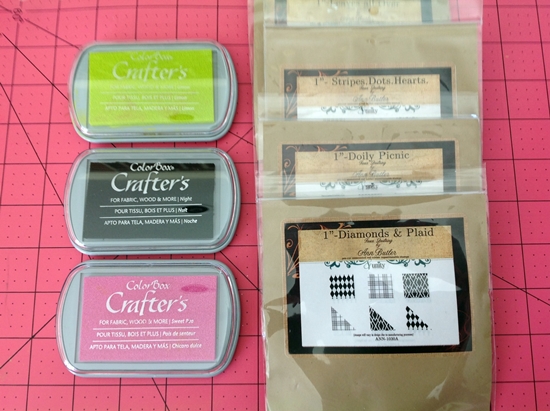
Step 2: Choose Stamps and color combinations. I alternated diamond and plaid with black ink for the shutters, flower and roof window. What I liked about the stamps too for smaller projects is after stamping you can trim the piece to size using the stamp line. Press very firmly when stamping.


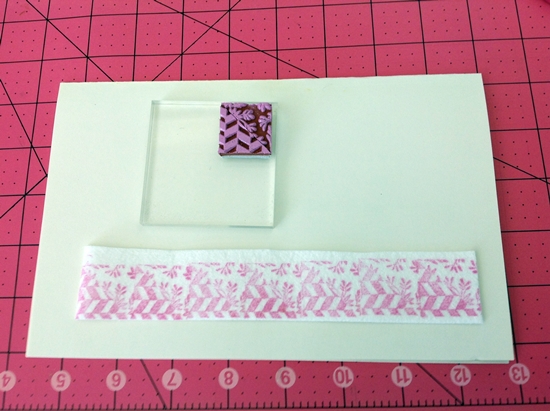
Step 3: For the roof trim I used the half leaf all over and graphic geometric together stamping along the felt piece, I trimmed it after. Finish stamping all pieces. Let dry. Stamping on felt requires a little longer drying time and needs to be heat set with an iron.

Step 4: Cut roof window 2" triangle. Place windows, door, lace, roof trim in place on cottage front. Topstitch. Place chimney pieces together and topstitch.

Step 5: Layer fabric cottages right sides together, add quilt batt piece to back. Insert chimney into place. Sew around house leaving opening at center bottom. Trim seams, clip corners turn right sides out.

Step 6: Cut shutters 2" by 3" and glue in place. Embellish with buttons and brads, rickrack.

Step 7: Cut one flower strip 1 1/2" by 9". Baste along edge, pull stitches tight. Baste along second flower piece edge 1" by 6"  pull stitches tight. Glue on top of each other and insert button or brad in center, glue to cottage.

Step 8: Stuff cottage lightly, sew opening shut.

Now onto the amazing designs by a group of professional and so creative designers found with the link below!

Enjoy!


Posted by: Debra Quartermain AT 01:00 am   |  Permalink   |  18 Comments  |  Email
Friday, July 06 2012

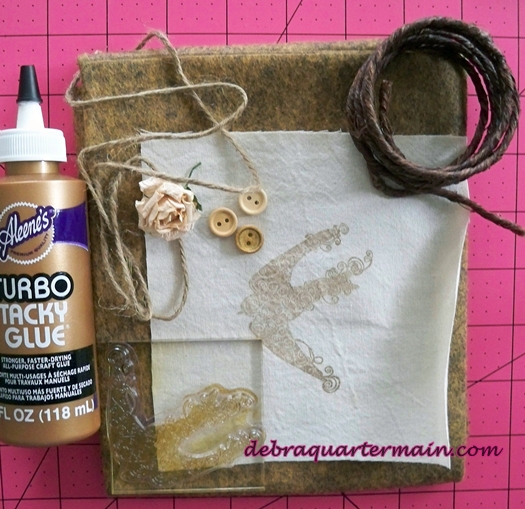
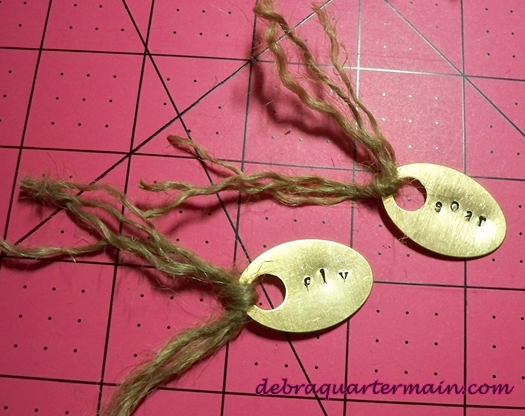
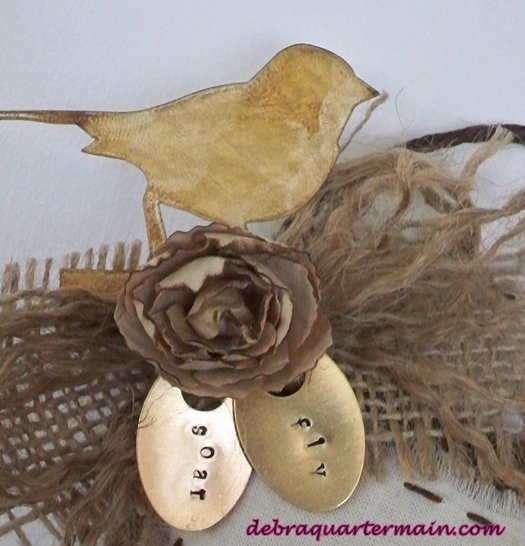
Well it is about time for Fowl Friday, remember me I am Fran! Debra has practically forgotten our existence, well not entirely she does feed us and keeps the nest tidy but! ....we are surrounded once again by boxes, a big flurry of activity with another moving day coming up! Apparently the new place is some sort of historic home on the river, ugh water, hopefully we won't have any water sports in our future.

Freda has tried water skiing and it wasn't pretty, first the bikini of choice well let's just say itsy bitsy does not work with Freda's figure. Strings can be problematic too lets just say once again Freda did a lot of dangling in very awkward revealing poses!

Debra is a romantic, flowy dresses, lace and lately Victorian crazed especially dresses and dress forms. Her favorite Sizzix die at the moment Tim Holtz's dress form die for Sizzix. Wonder if they ever wear out?

Our biggest fear is the tiny lace outfits we see being fashioned, not sure but they look fowl sized! Yikes! Follow the Fowl!

Posted by: Debra Quartermain AT 07:43 am   |  Permalink   |  1 Comment  |  Email
Saturday, May 12 2012

We are hopping with ImpressArt! The DCC Blog Connection designs with ImpressArt Metal Stamps. They are running a contest with a great giveaway from now until midnight May 21st. Details to enter on Monday! Be inspired over the weekend by the talented designers and their use of ImpressArt Metal Stamps.

I have never designed with ImpressArt Metal Stamps but found the tutorial on their website very easy to follow and it shows how exactly to use the stamps.

I was inspired by the oval discs which reminded me of eggs, thoughts of spring, my love of birds and my piece came together Bird Song. A new felt collection had also just arrived from National Nonwovens called Daydream Inspirations. The Havanna Gold was the perfect compliment for ImpressArt's discs.


You will need:
ImpressArt Alphabet Stamp Set, Newsprint, lowercase 
ImpressArt Metal Stamping Hammer
ImpressArt Stamping Blanks, 3 ovals, I large oval
ImpressArt Steel Stamping Block
ImpressArt Stamp Straight Tape

Following the directions stamp the word "create" on the larger oval, "dream, fly, soar" on the smaller ovals. Choose words which speak to you. My stamping is not in a straight line, I wanted a freer expression but I still used the guide for spacing my letters evenly. 


Here the discs are stamped and the letters antiqued with a Sharpie.


To create the pillow you will need.
6" x 12" Havanna Gold WoolFelt by National Nonwovens
4" square of unbleached cotton
3" x 6" burlap scrap
For the Birds Stamp by Fiskars
Brown Stamp Pad
12" covered wire
Paper flower
4 Brown buttons
Small Bird diecut or sticker
Brown floss, embroidery needle
1/2 yard of jute
Aleene's Turbo Tacky Glue by  ILovetoCreate
Polyester fiberfill
Westcott Brand mat and scissors


Stamp cotton with chosen bird design. Heat set. Stitch cotton to wool felt. Stitch pillow together, stuff and close opening. 
Bend one wire end andi insert through small hole in top of pillow, repeat for opposite side.


Tie loops of jute through discs. Tie burlap piece in center. Fray jute pieces and tie into bow. Glue burlap bow, jute bow to upper corner. Glue jute ends of discs to bow. Glue flower to center. Insert bird diecut and glue.

Tie small dream disc to large create disc with jute. Glue to center bottom of pillow.
Use stamp pad to antique flower and pillow front.


The Grand Prize! Enjoy the hop! Happy weekend and Mother's Day to all the great moms! 

Posted by: Debra Quartermain AT 01:16 am   |  Permalink   |  16 Comments  |  Email
Monday, January 09 2012

This month the Designer Crafts Blog Hop Connection theme is Journalling. The talented Julie McGuffee who keeps us organized is host of the show Scrapbook Soup which now can be seen online as well! It features interesting ideas, tools and products for scrapbooking and journalling. Use the button in the sidebar to hop along and see the inspired projects of our designer group!

As primarily a sewing designer I incorporate stitching into as many projects as possible. I decided to create a piece to hang in my studio, a tribute to my grandmother. I have a picture of her when she was a young woman wearing a black dress, it is a beautiful photo and I wonder from her expression what she was thinking. She was always very stylish and wore beautiful hats to church and lovely suits there and to IODE meetings, church teas and bridge club.

Often when I dress up in a classic black dress and add her pearls she left me I am reminded of how we are tied to the memories of those we love, even though they may not be here any longer, their spirit and love is always felt. Remembering my grandmother.

Posted by: Debra Quartermain AT 12:00 am   |  Permalink   |  8 Comments  |  Email
Monday, October 18 2010

Even though fabric is my first love to work with, I also enjoy beautiful papers and mixed media projects. I find when I am working with paper I think of it in fabric terms and my designs reflect that. I had the opportunity to "play" with the Xyron Creatopia TM  System recently and enjoyed trying out several of the components. The adhesive is great and I designed this cute clutch using some fun papers and two pieces of 12" cardstock. I used the Patternz emboss circle design and Cutz to cut the pieces. There are several different cutting edges which are fun to layer! Some colorful buttons finish the design.

This is a full week with several projects, events upcoming. It is hard sometimes not to feel overwhelmed at times and multi-task sometimes with disastrous results! While thinking ahead to the next project I put the iron in the fridge instead of the yogurt. It did fit neatly next to the water pitcher but....not where it usually goes! I read an article about being more mindful and giving full attention to one project at a time. That is my goal this week to give whatever I turn my attention to a full hour at a time before switching to something else. Now if I could just find where I put my favourite scissors...ideas anyone! Follow the JOY! Debra, CEO!

Posted by: Debra Quartermain, CEO! AT 12:20 am   |  Permalink   |  0 Comments  |  Email
Facebook
LinkedIn
Add to favorites
Twitter
Debra Quartermain Design

 Magical Mimi to Grandlittles, I love to create, decorate & celebrate. Sharing  joy and inspiration from our 200 year old home, Quartermain House B&B on the east coast of Canada.

" "
Facebook
LinkedIn
Add to favorites
Twitter
    Sign Guest Book  View Guest Book 

    Debra Quartermain Design
    Fredericton, NB
    Canada
    Web Design Debra Quartermain
    Illustration Deborah Peyton
    Content copyright Debra Quartermain
    Email: debraq53@gmail.com

    Design Your Own Website, Today!
    iBuilt Design Software
    Give it a try for Free