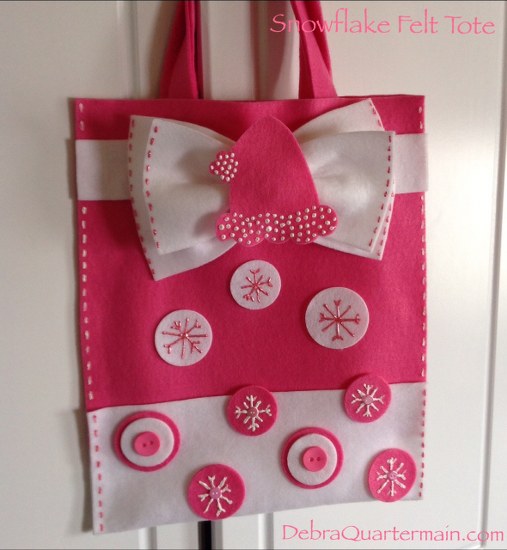
When talented designer friend Laura Kelly asked me to be part of a blog hop introducing her adorable hats, a 2015 Ellison Release Die-Cut Hats, I was so excited! She sent me a few to have fun with along with her buttons from Buttons Galore and products from iLoveToCreate. The hats I received were all cut from Kunin’s Eco-fi Plus Premium Felt. How could I resist the one in Candy Pink to create a snowflake tote to pop all those little extras in when taking baby Anna on a winter outing. The premium weight of felt makes a sweet yet sturdy tote. This is a two hour project or less using fabric glue. Sweet and simple!
You will need:
2/3 yard Kunin Eco-fi Plus Premium Felt, Candy Pink
1/3 yard Kunin Eco-fi Plus Premium Felt, White
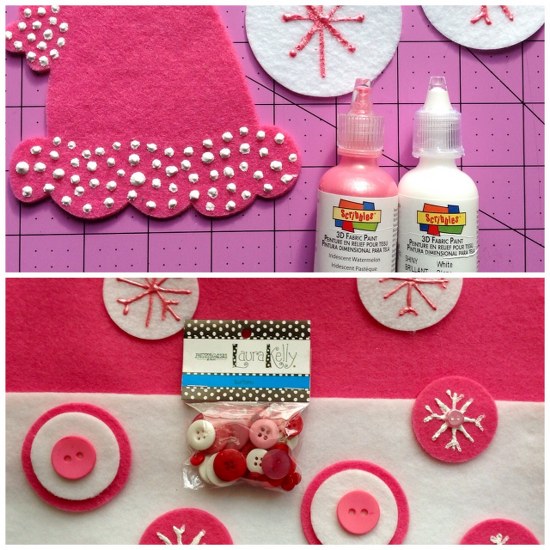
Laura Kelly pink buttons by Buttons Galore
Scribbles Fabric Paint, Pink, White by iLoveToCreate
Quick Dry Fabric Fusion by iLoveToCreate
Circle Die & Big Shot by Sizzix
Scissors, pins, cutting mat, rotary cutter
How to:
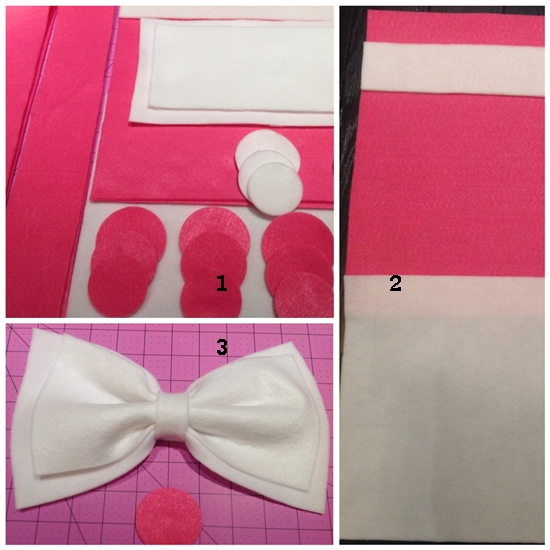
1. From pink felt cut: two 13” by 14” for back and front, two 3” by 23” for straps, fourteen pink circles in total, 2”, 2 ¼” sizes. From white felt cut one 10” bottom piece, one 2” by 14” band, 5” by 9”, 6” by 10”, 1” by 3” pieces for bow, four circles.
2. Glue white band 1 ½” down from top end of pink front piece. Glue white bottom piece to bottom end of pink front piece. Glue back pink piece opposite end of white bottom piece. Fold piece in half matching side seams. Glue side seams with a thin line of glue close to the edge.
3. Refer to photo to paint snowflakes, stitch lines on bag and bow pieces, dots on hat. Let dry. Place bow pieces on top of each other centering the smaller piece. Pleat center and wrap the small white strip around the center overlapping and gluing. Set bow aside.
4. Fold pink strap pieces in half lengthwise and glue edges. Measure in 3” from each end of tote and glue strap end to the front, repeat for second strap and glue to back.
5. Glue polka dots to bottom of bag using photo as a guide. Glue bow in place on band. Glue on hat.
This tote can also be easily sewn, wherever the instructions call for gluing, topstitch instead. Make a grown up version with a black and pink color combination. For a wee boy, make a single bow for a bowtie in blue and white and add a blue hat. Have fun making this so cute tote!
Check out all the other super cute and fun designs using Laura's new dies! Enter to win an awesome prize!
RAFFLECOPTER LINK and LINKY in Sidebar!
Laura's Winter Hat Die-Cuts from Ellison Education and Sizzix will be available in January 2015!!!
Thanks for stopping by!