It is the first Monday of the month and the Designer Crafts Connection Blog Hop is on! With Easter just a week away I wanted to design something to add to my Easter decor. I was also teaching a kid's needle felting workshop and they wanted to make a character inspired by Alice in Wonderland.
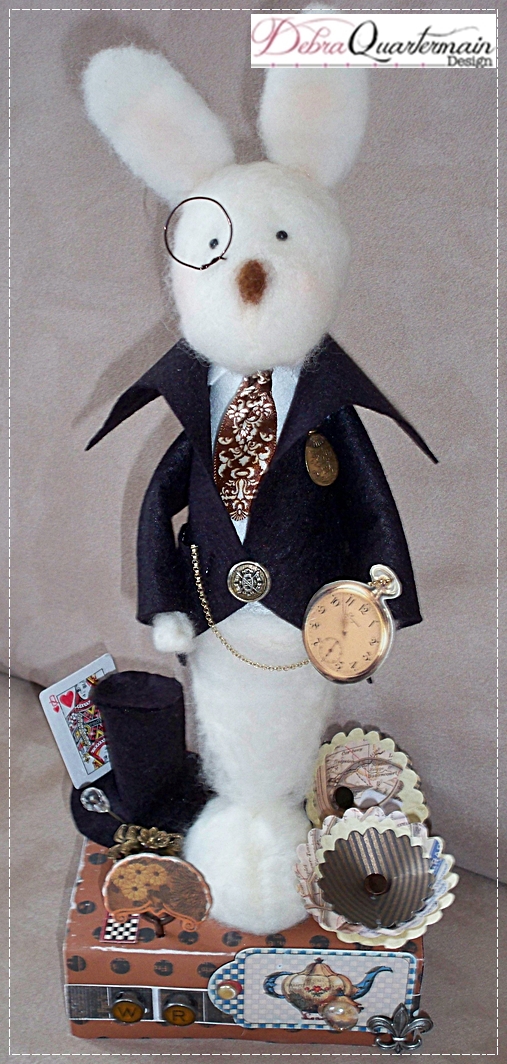
I decided on creating the White Rabbit with a dash of steam punk, (a departure from my usual cute bunnies !) The White Rabbit is a mixed media project incorporating needle felting, wool, foam, papers and embellishments.

You will need:
2 eggs, 1-7/8" x 2-1/2", 2 cones, 4", 12" sheet of STYROFOAM TM Brand Foam
.2 oz. Natural, Brown scrap of Wool Wisps by National Nonwovens
9" x 12" pieces of black and white felt by National Nonwovens
Playtimes Past Paper Collection by Graphic45
Flower, 3-D wrapped die by Eileen Hull for Sizzix, Big Shot by Sizzix
Antique Bronze Decorative Wall Hardware by Canvas Corp
Flip-Pal TM Mobile Scanner
Westcott Brand Titanium Scissors, Paper Cutter
Needle Pen Tool by Clover
Paper Adhesive, Mono Aqua, Glue Stick by Tombow
Fabric Fusion by Aleene TM, Ilovetocreate
Hot glue and gun
5" print Ribbon
6" Wire
2 black head Quilt Pins
1 white Chenille Stem
2 Wood Skewers, 3 Toothpicks
Cardstock
Ephemera
Glaze
Wire Cutters, Ruler, Pencil, Chalk, Foam base for needle felting.
1. Cut one foam egg in half for feet, cut two pieces 9" by 6" from sheet, stack and glue together for base.
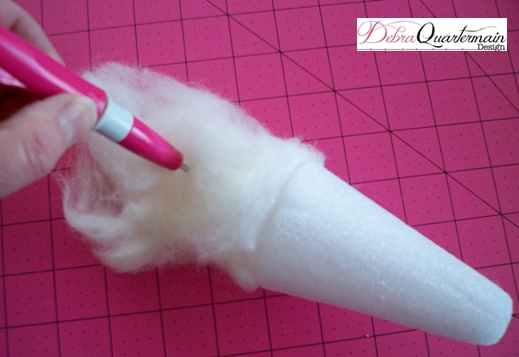
2. Insert toothpick, glue two cones together for body. Cover lower cone with natural wool and begin needle felting.

3. Cover egg for head with natural, needle felt. On foam base needle felt natural into two ovals 5" by 1 1/2" for ears, trim to desired shape. Needle felt to head. Insert pin eyes. Needle felt small nose as shown with brown scrap of wool.
4. Cover half egg for feet with natural wool, needle felt.
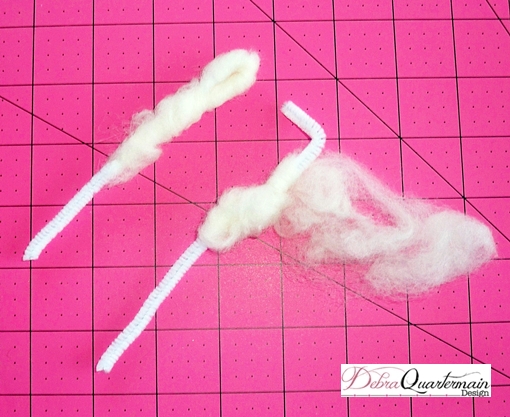
5. Pull two thin strands of wool for hands. Cut chenille stem in half. Begin wrapping wool at center of stem and wrap to end. Bend end of stem and continue wrapping back up stem. Glue ends in place.

6. Insert a toothpick into head, glue to body (bare cone is top of body) pressing pieces firmly together.
7. Cut a piece of white felt 6" by 5". Fold in center and cut notch along top edge. Fold over for collar. Wrap and glue around top of cone.
8. Cut two sleeves from black felt 2 1/2" by 3". Cut a jacket 7" square. Fold the square in half. Measure 1 1/2" on open ends, cut in on diagonal 1" to make collar. Cut from this point on diagonal 3" back to edge. Cut back in on diagonal from this point to end. Fold collar, wrap jacket for fit around rabbit body. Decide on tails of jacket from back. Remove jacket and cut tails on diagonal.
9. Wrap jacket around rabbit. Glue in place. Fold sleeves in half, glue edges. Insert chenille stems with paws extended. Glue to back of jacket. Bend.
10. Knot ribbon piece in half. Trim ends to desired shape. Glue to front of rabbit.
11. Insert skewer through feet and body leaving 3" extending.
12. Cover base with papers, insert rabbit.
13. Embellish as desired!
14. Pocket watch was scanned with Flip-Pal Mobile Scanner and printed out onto cardstock. Glued to another layer, cut out and glazed.
15. Top hat was made from a 3" felt circle for base, a 2" by 3" strip overlapped and glued. Piece of black glued to top of cylinder and then trimmed around top edge.
16. Flowers were die cut and assembled inserting nail through centers. Insert nail ends into foam base.
Enjoy!
Follow the DCC hop to see wonderful spring inspired designs and great giveaways! Happy Hopping! 