#
Debra Quartermain Design
Latest Posts
Categories

 the CEO! Creative Eternal Optimist! Blog 
Friday, November 15 2013
Holiday House Ornament!


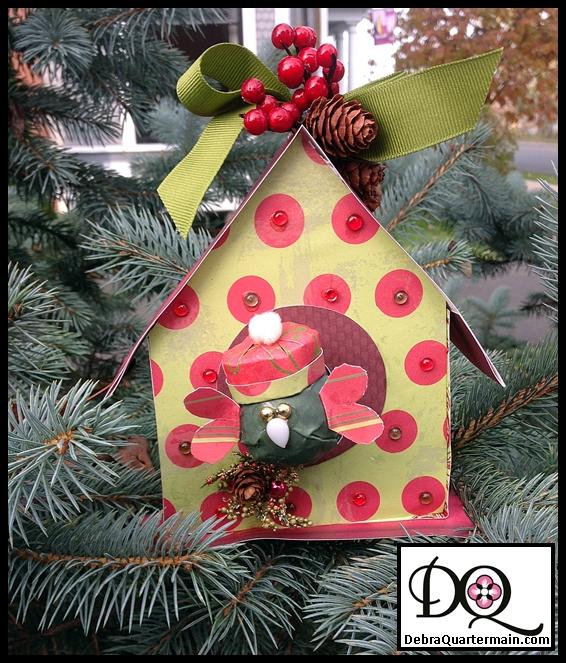
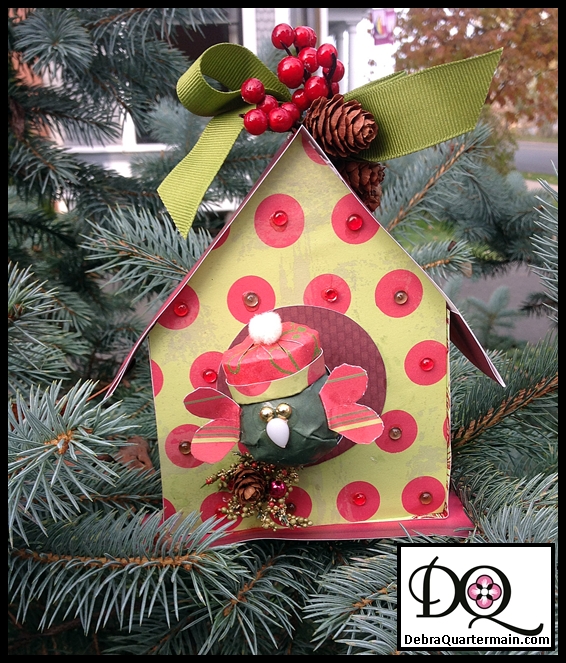
Holiday time and a special DCC blog hop featuring Robin’s Nest pretty papers, embellishments and Smoothfoam! I couldn’t resist, I love birds and in honor of the pairing on this hop, a holiday bird house with a wee birdie wearing my favorite hat, a tam! Smoothfoam makes an ideal ornament base, lightweight for hanging.
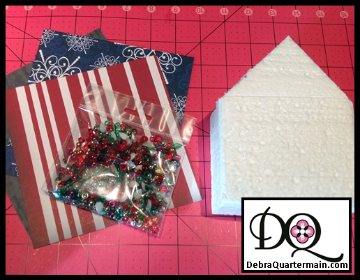
You will need:
2”x 4”x 8” block, 2” ball of SmoothFoam
2- 12” sheets from the Christmas Collection (polka dot and stripe patterns) The Robin’s Nest
1 package Jolly Dew Drops from The Robin’s Nest
½ yard of 1” Green Grossgrain ribbon
Berries, mini pinecones embellishments

Fabri-Tac
™ by Beacon
4” Westcott Brand® Titanium Steel Scissors

(3” Circle template, cutting mat, measuring tape, ruler, knife, pencil, paper cutter)

  1. Measure down 2” from end of block, draw line across. Mark center point. Measure down another 2” on either side. Draw line from that mark to center point for roof line. Repeat for opposite side. Cut along these lines. Cut a slice off bottom of ball.
  2. Use house block as a template to place on wrong side of paper and draw a front and back. Cut house pieces from polka dot. From stripe cut two roof pieces 2 1/2” by 6”. Cut two stripe side pieces 2” by 6” and a third piece for bottom. Cut a 3” circle. For little birdie cut a 3” by 6” piece of paper for body and a 1” by 5” piece for hat. Cut two 1” heart shapes for wings
  3. Glue paper to front and back of house. Glue paper circle to center of house. Glue red and green drops into center of polka dots. Glue paper pieces to sides extending to cover bottom. Fold roof pieces under 1 ½”. Center roof pieces and glue meeting at roof point with folded ends extending beyond sides. Glue bottom piece extending ½” beyond front.
  4. Tie bow for top of house. Trim ends. Glue pinecones and berries to bow.
  5. Snip both sides of birdie paper piece ½” for body. Snip one side of hat ¼”. Round both pieces some by shaping in hand. Glue large piece over ball with flat side being back of bird. Slits will allow overlapping of paper to make a quite smooth front. Glue gold drops for eyes and a white dew drop for beak. Fold end of heart under ¼”.
  6. Fold unclipped end of hat up ¼”. Overlap ends and glue. Glue slit pieces overlapping into center of hat. Glue pompom to center of hat. Glue hat on head..
  7. Glue bird to front of circle. Add some berries, pinecones under bird.

    The best thing about a blog hop is being able to just hop along and see lots of eye candy ornaments by talented designers guaranteed to spark some holiday creativity! Follow along at the Robin's Nest!


  •  


Posted by: Debra Quartermain AT 01:05 am   |  Permalink   |  22 Comments  |  Email
Comments:
Posted by Terri on 11/15/2013 - 12:39 PM
LOVE it
Posted by Marilyn on 11/15/2013 - 12:54 PM
I love this, Debra! It is sooo cute!
Posted by Madeline Arendt on 11/15/2013 - 01:08 PM
Well if that isn't the cutest darn project Debra!
Posted by Beth Watson on 11/15/2013 - 01:55 PM
ADORABLE, Debra!
Posted by Terry on 11/15/2013 - 01:58 PM
Darling! I love birds, too!
Posted by LINDA on 11/15/2013 - 05:43 PM
Very very cute,,,, I didnt see where I could become a follower :)
Posted by Bev on 11/15/2013 - 06:12 PM
really too cute and creative project
Posted by Rachel on 11/15/2013 - 06:30 PM
Very cute!! I love the luv bird :)
Posted by Robin on 11/15/2013 - 07:01 PM
I love that bird house and bird!
Posted by Debra on 11/15/2013 - 09:52 PM
Oh thank you Rachel! I love birds myself! Thank you Robin, Terri, Beth, Madeline for your kind comments! Marilyn thank you!
Posted by Barbara on 11/15/2013 - 10:53 PM
This is a darling project!!! So cute
Posted by Tonya Trantham on 11/15/2013 - 10:57 PM
How adorable!!! I love birdhouses and birds too!!! Awesome job!!!
Posted by Debra on 11/16/2013 - 10:29 AM
Thank you so much Tonya!
Posted by Tristan Robin Blakeman on 11/16/2013 - 12:49 PM
This is utterly delightful ... such thoughtful attention to details and embellishment. Love it! I may have to "steal" your idea and make one for my mother, who will squeal with delight! Thanks for the inspiration and sharing your tutorial. Happy Holiday!
Posted by Debra on 11/16/2013 - 04:34 PM
Tristan, what a lovely compliment, so glad you like my little birdie!
Posted by Barbara Moore on 11/17/2013 - 12:31 AM
What a cute little birdhouse and birdie!
Posted by Barbara on 11/17/2013 - 12:37 AM
Sweet little birdhouse and birdie!
Posted by Debra on 11/17/2013 - 01:47 AM
Thank you so much Barbara's
Posted by Carmen on 11/17/2013 - 02:08 AM
This is so adorable, Debra! That little bird has so much personality!
Posted by Michelle Frae Cummings on 11/17/2013 - 02:11 AM
Such a beautiful bird house and bird!
Posted by Barbara Rankin on 11/18/2013 - 12:35 AM
Love the bird and house. Simply adorable.
Posted by Lyneen on 11/18/2013 - 01:27 AM
How precious is your little bird and birdhouse!!! Love them!

Post comment
Name
 *
Email Address

Message
(max 750 characters)
*
* Required Fields
Note: All comments are subject to approval. Your comment will not appear until it has been approved.

Debra Quartermain Design

 Magical Mimi to Grandlittles, I love to create, decorate & celebrate. Sharing  joy and inspiration from our 200 year old home, Quartermain House B&B on the east coast of Canada.

" "
Facebook
LinkedIn
Add to favorites
Twitter
    Sign Guest Book  View Guest Book 

    Debra Quartermain Design
    Fredericton, NB
    Canada
    Web Design Debra Quartermain
    Illustration Deborah Peyton
    Content copyright Debra Quartermain
    Email: debraq53@gmail.com

    Design Your Own Website, Today!
    iBuilt Design Software
    Give it a try for Free