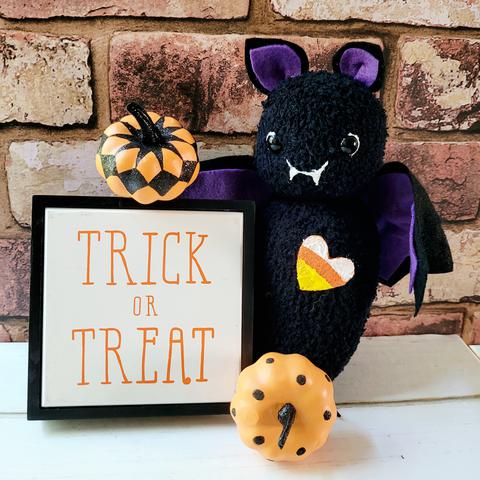
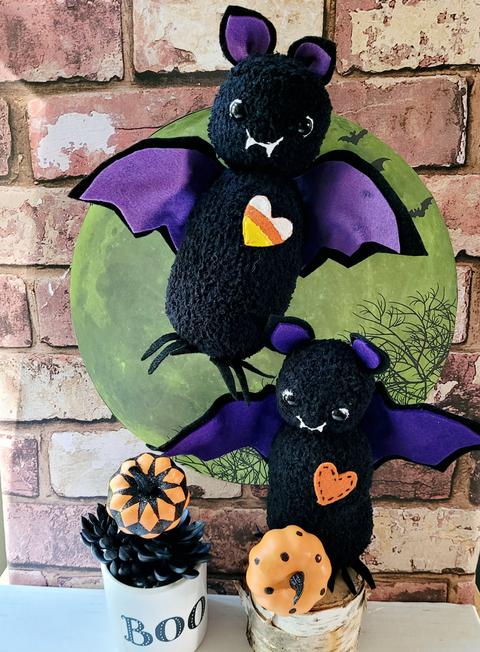
Do you love Halloween parties? I sure do especially for the grandlittles and family. They love a party craft and this No Sew Baby Bat Sock Stuffie is a fun easy craft for a group. Makes a perfect party favor to go home with. Let's get this DIY party started with a group of talented bloggers hosted by my friends at Team Creative Crafts!
You will need:
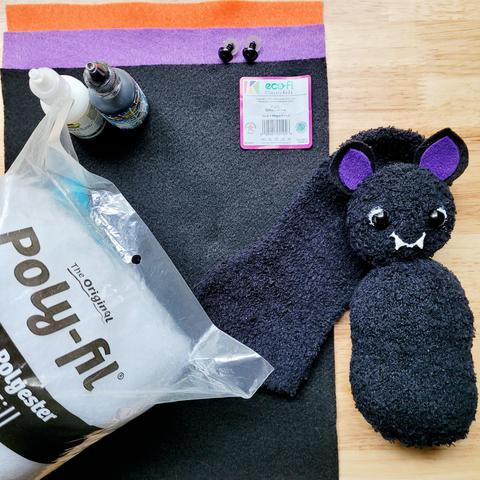
Black ankle sock (1 per bat)
9" x 12" craft cuts of Kunin Brand Classic Felt: 1 Black, 1 Purple or Violet, Orange Scrap
Fairfield World Poly-fil
1 Pair safety eyes (for young children) or wiggly eyes, buttons or paint
2 Chenille stems
Tulip Scribbles paint: white, yellow
Adhesive: Tacky Glue for the littles (with an adult or two helping, using hot glue to adhere the larger pieces like the wings)
Needle and thread or elastic, scissors Printable Bat Wing, Ear and Feet Pattern
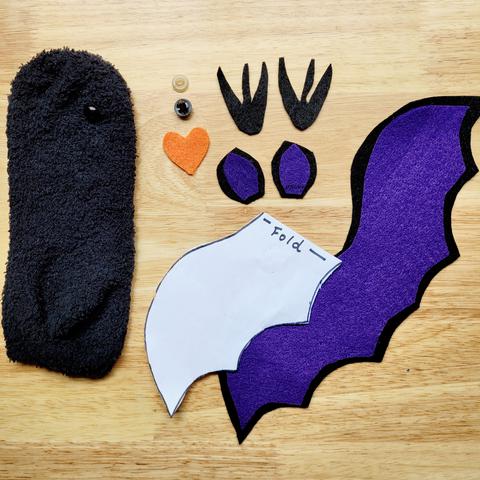
STEP 1
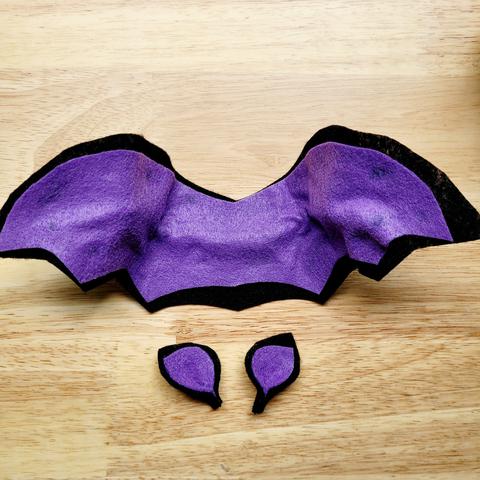
Print out pattern, cut out pieces. Cut from black; 2 feet, 1 outer wing and two ears. Cut from purple two inner ears and 1 wing. Trim these 1/8" of an inch smaller all the way around.
STEP 2
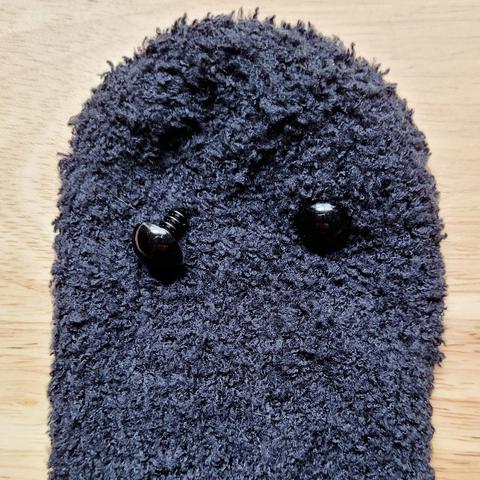
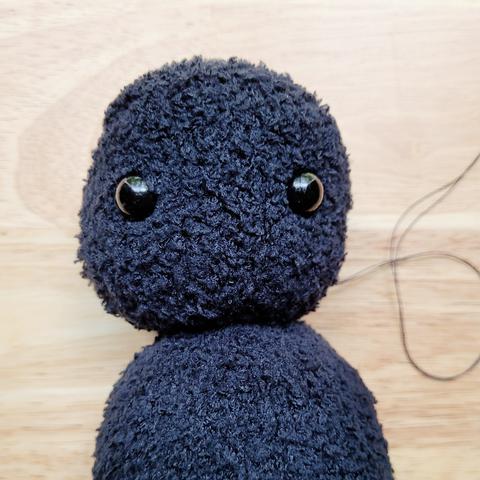
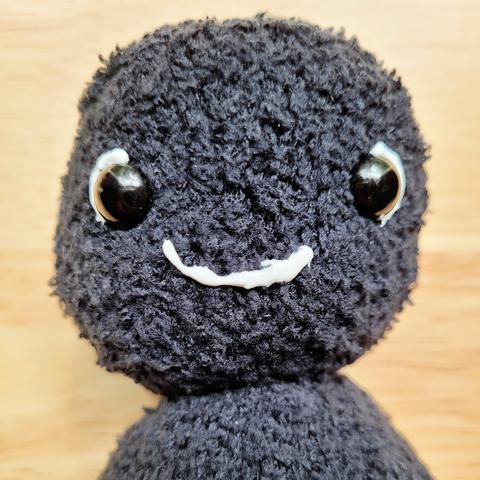
Flatten sock and use chalk to mark eye placement. (If you have a large group of younger ones, affix safety eyes before the party)
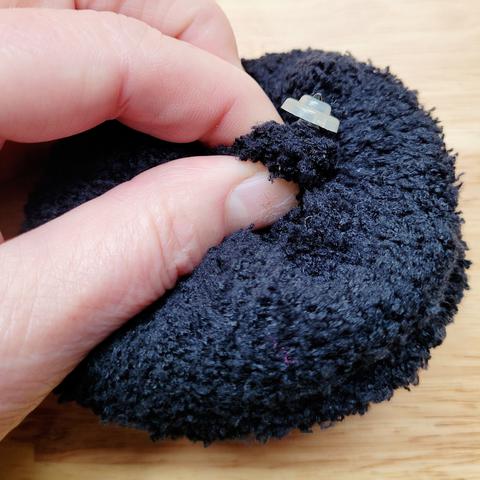
Make a tiny hole, insert eye shaft and reaching inside insert back firmly. Repeat for second eye. If using other types of eyes like buttons or wiggly eyes these can be applied near the end.
STEP 3
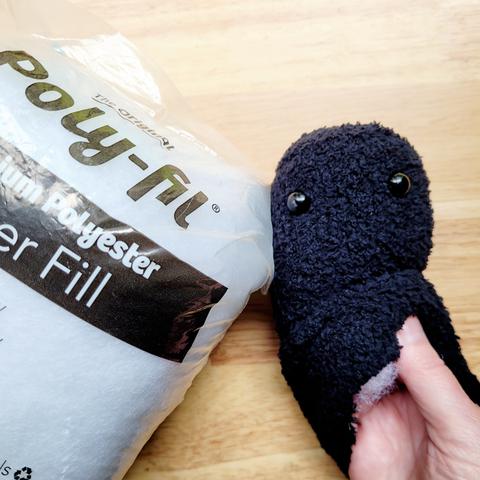
Stuff! Socks are stretchy so stuff gently or not. (I prefer Fairfield World Polyfil as it is soft and easy to work with.) Bats can be all different sizes too! (TIP: give the kids a premeasured amount of stuffing and that will keep the bat size within a certain size so the wings show.)
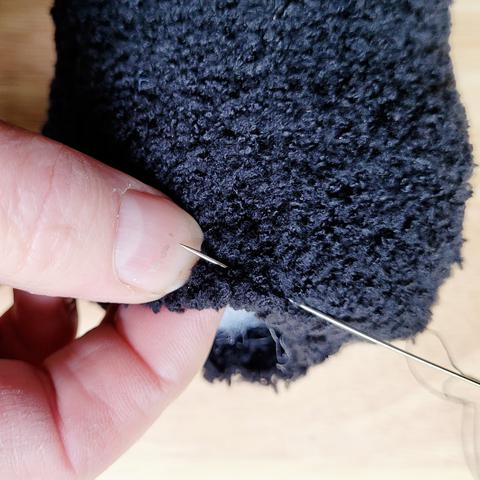
I did sew the bottom shut but black hair elastics work as well. Just tuck extra sock at bottom into center.
Place an elastic around the neck to make a cute head ball.
STEP 4
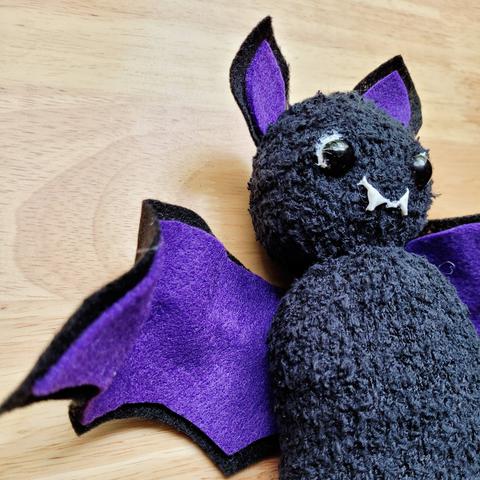
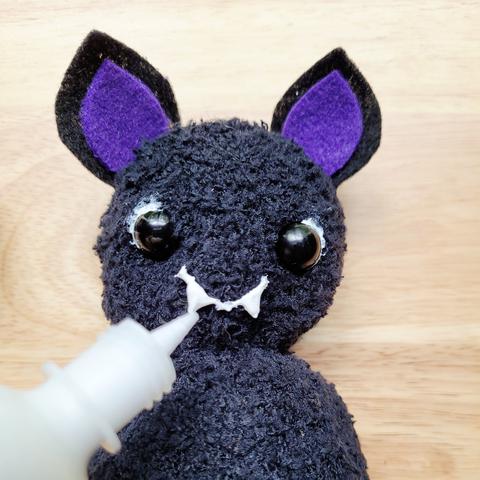
Align inner ears on outer ears and glue together. Pinch centers slightly. Glue to top of back of head as shown.
STEP 5
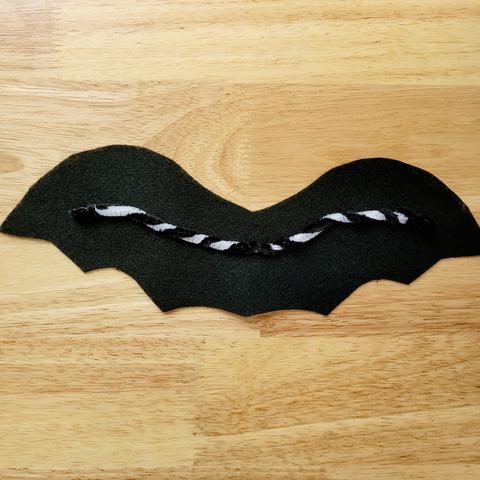
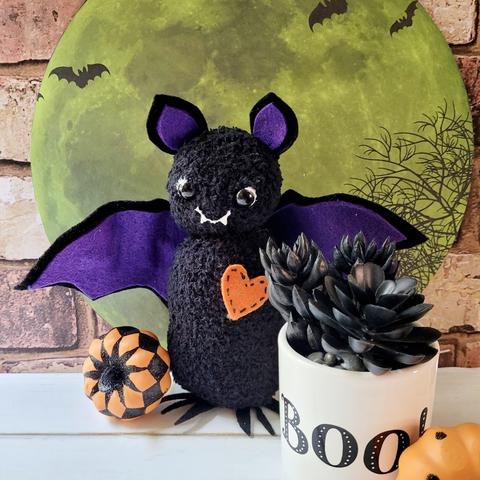
Twist two chenille stems together and glue to center of outer wing. (This will allow wings to be shaped.) Place inner wing over top and glue in place.
STEP 6
Add a line of adhesive to center of wing on inside and firmly press back of bat into the glue. Glue feet on bottom.
STEP 7
As the puffy paint needs drying time finishing the face at the end is the easiest way to finish the bats. Make a smile with the white and then add a line on each end pulling into triangles for teeth. Add a thin line around edge of the safety eyes. Like every crafty project allow for individual expression and some bats may have three eyes or teeth. Let the kids decide!
Set the bats aside to dry. Clip them upside down to a tree branch for added party decor. If drying time needs to be hastened, warm air or a hair dryer will work.
Thanks for stopping by to check out my No Sew Baby Bat Sock Stuffie! Please hop along with the button below to see all of the Halloween party inspo and enter the Rafflecopter giveaway!
Follow me on IG @debraquartermain where I am always "Making and Celebrating Heart, Home and Holidays" everyday!
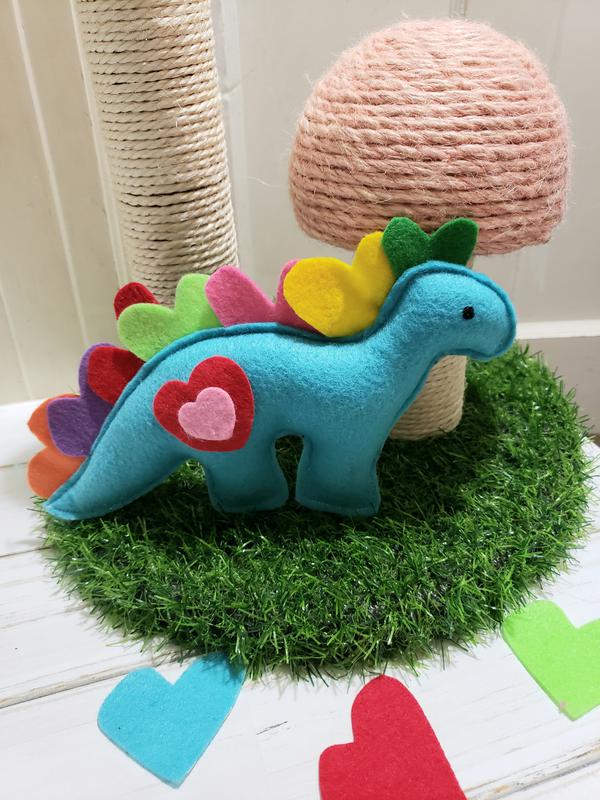
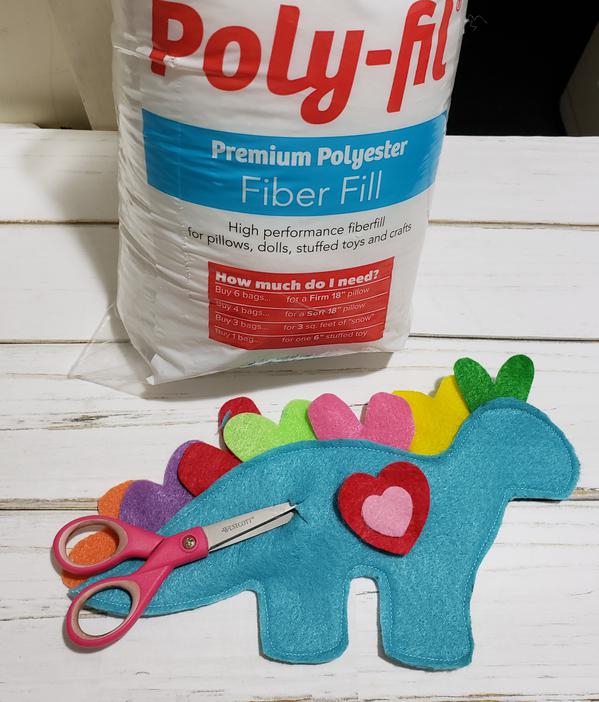
It is all about rainbows and love! Here is my magical rainbow dinosaur stuffie filled with love! This How to Make a Felt Rainbow Dinosaur Stuffie is perfect for a Back pack tag a long! It is filled with love as the rainbow plates along his back are actually hearts. He is definitely stuffed with love and Premium Poly-fil from Fairfield World.
Let's Make a Dinosaur Stuffie!
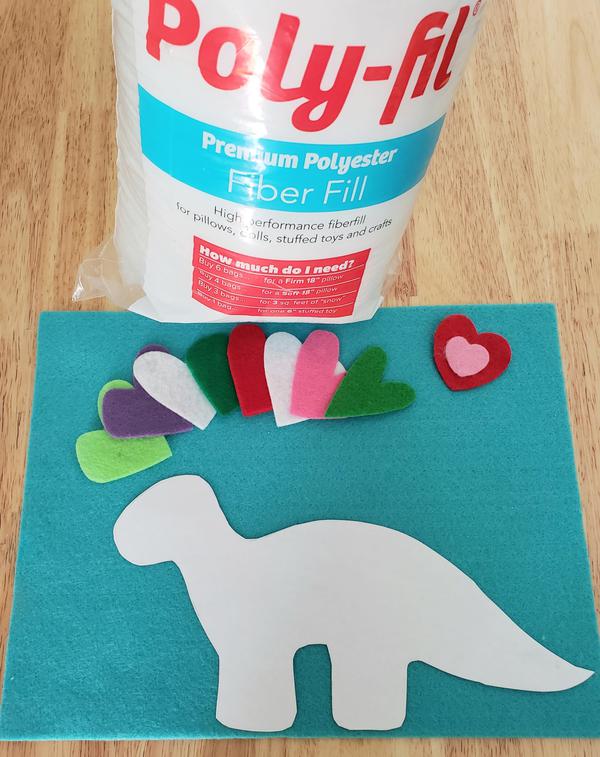
Download Dinosaur Pattern Fairfield Poly-fil
2- 9" x 12" craft cuts of Kunin Felt: Lagoon or color of your choice
Scraps of felt for hearts
Chalk, fine marker, clips or pins, sharp scissors, fabric adhesive, sewing machine and matching thread or hand sew.
STEP 1
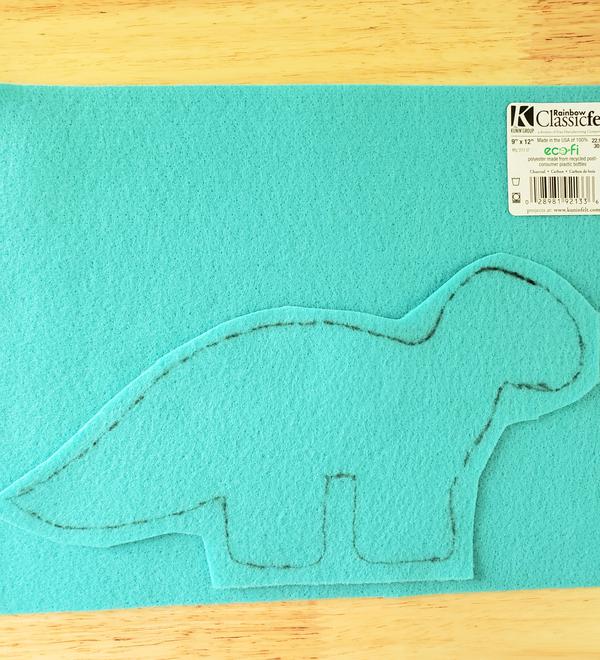
Die cut or free hand cut a variety of hearts. (I used Laura Kelly's Heart Die with Sizzix, I always cut a bunch of hearts at once as there are many projects that I like to use a heart.) Cut a smaller heart for the front. Download pattern and cut out. Trace pattern on to one piece of felt.
STEP 2
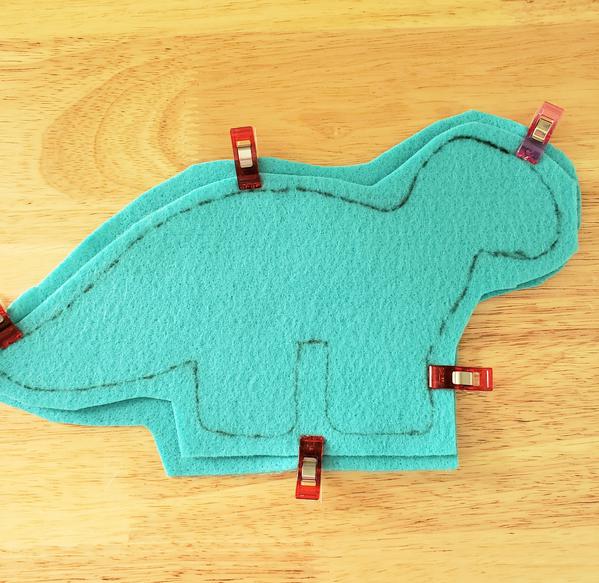
Cut around first dinosaur shape roughly. TIP: It is easier to sew small felt pieces when you have extra felt around the pattern piece. Place on second piece of felt and cut around shape roughly.
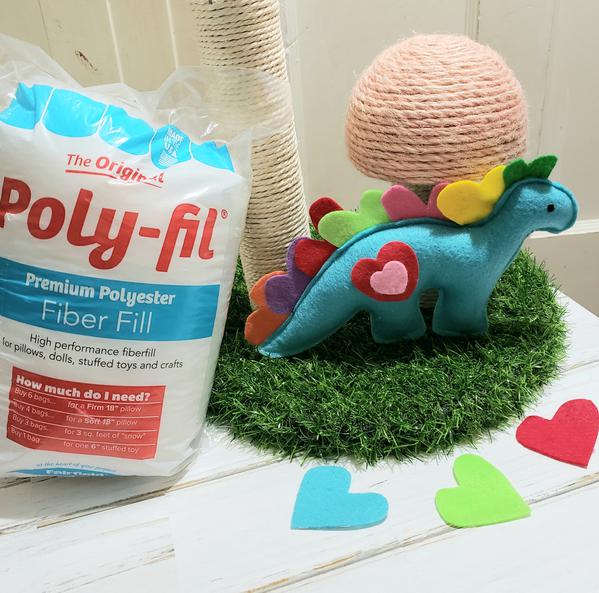
STEP 3
To add the heart plates along the back. Trim close to the pattern line and then insert hearts as shown.
STEP 4
Use sewing machine or hand stitch completely around dinosaur, 1/8" to 1/4" in from pattern line. Trim off line if you have used a black marker making sure to remove all black. (An invisible marker or chalk are good choices for drawing patterns.)
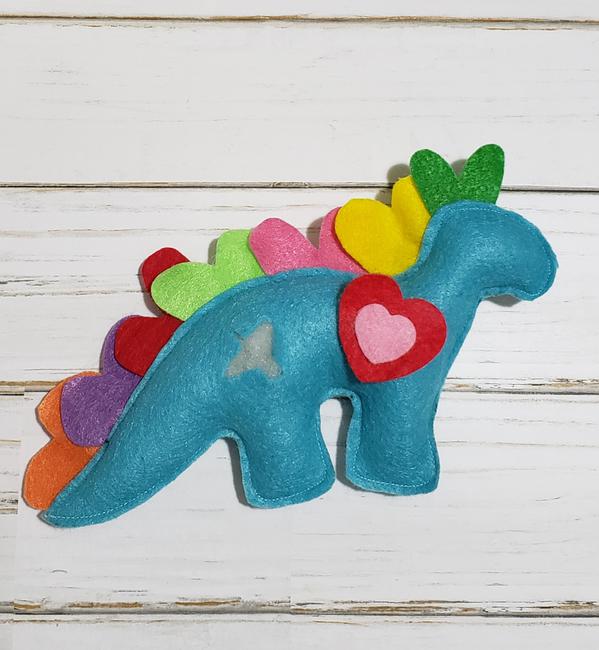
STEP 5
Many stuffie patterns suggest leaving an opening and stuffing the piece and then sewing shut. I use that method but often for smaller stuffies that have an added detail like the heart. I find this method easier. Just cut a small slit where the detail goes.
STEP 6
Stuff. Simply glue detail, the heart over the small opening. Ta Da! Your dinosaur stuffie is complete!
I hope you are inspired to Make a Felt Dinosaur Rainbow Stuffie!
Having fun sharing rainbows with Team Creative Crafts!
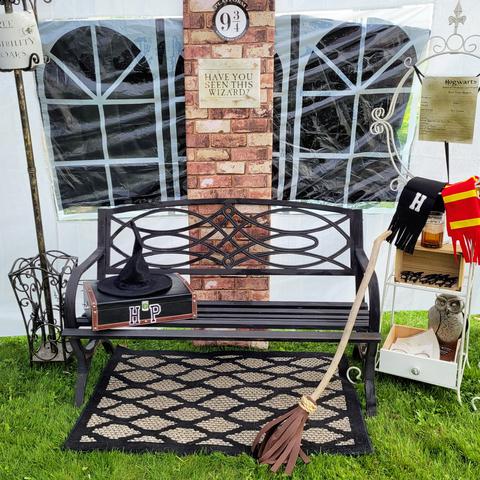
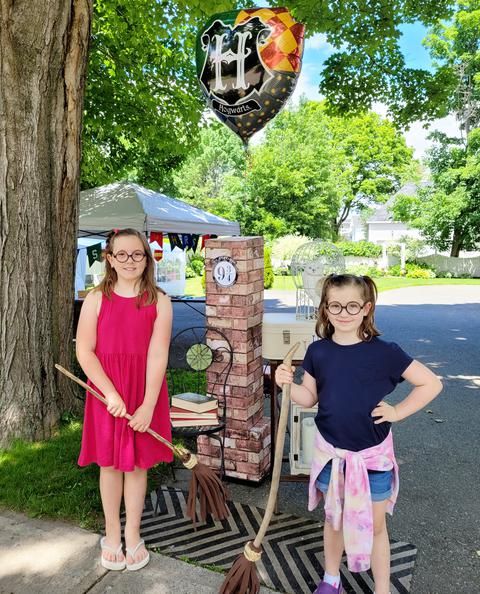
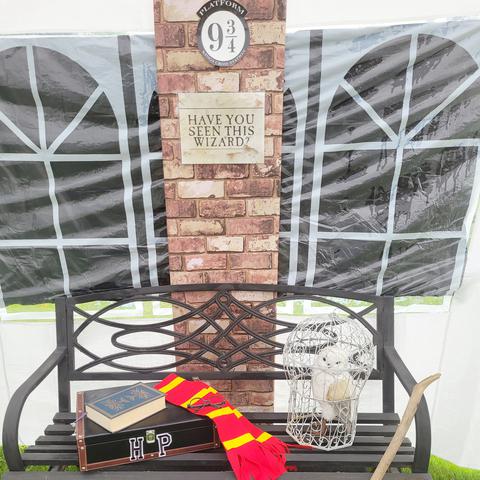
Our family loves Harry Potter and recently we had a Harry Potter themed birthday party for the grandlittle girls. The hit of the party was the DIY Harry Potter Flying Broom! I made a few and the kids were "flying" all over the yard. I am excited to share how easy they are to make and share a lot of amazing Harry Potter crafts with a group of talented bloggers put together by Team Creative Crafts!
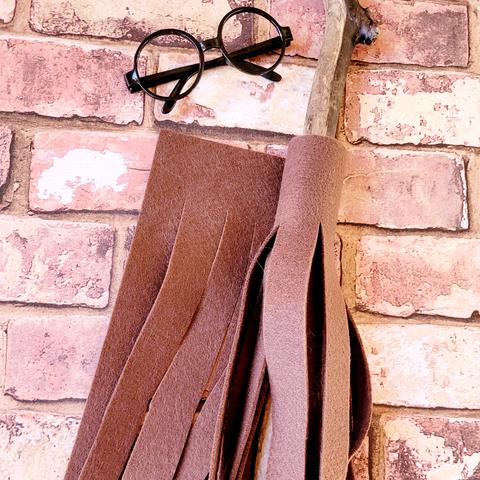
The Harry Potter themed party was held outdoors and the tent was transformed into a castle. The photo booth was filled with fun props and decor. Everyone was wearing HP glasses, adding a felt scarf and grabbing a broom!
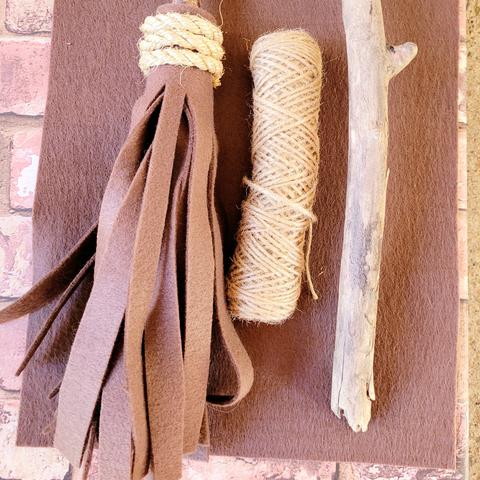
Let's make a DIY Harry Potter Flying Broom!
Kunin® Premium Felt 9” x 18" Craft Cut – Walnut
A stick or dowel-approximately 3'
Twine
Hot glue
Ruler and Scissors
Measure and cut 1/2" strips lengthwise leaving 4" uncut along top edge.
Place felt with uncut top end around stick. If you line up cut ends with stick bottom, the broom will stand nicely. Glue edge in place. Continue rolling and glue end. Glue a couple of the cut strips to stick.
Tie twine tightly around stick approximately 1"- 2" from felt edge. Wind twine until you sre happy with the look and glue.
These DIY Harry Potter Flying Brooms are so fast and easy. Kunin Felt Brand Premium is super sturdy and weather resistant so it will hold up to a lot of flying. The grandlittle girls loved them!
Using sticks gathered along the river with interesting crooks and smooth finish made the brooms even more authentic.
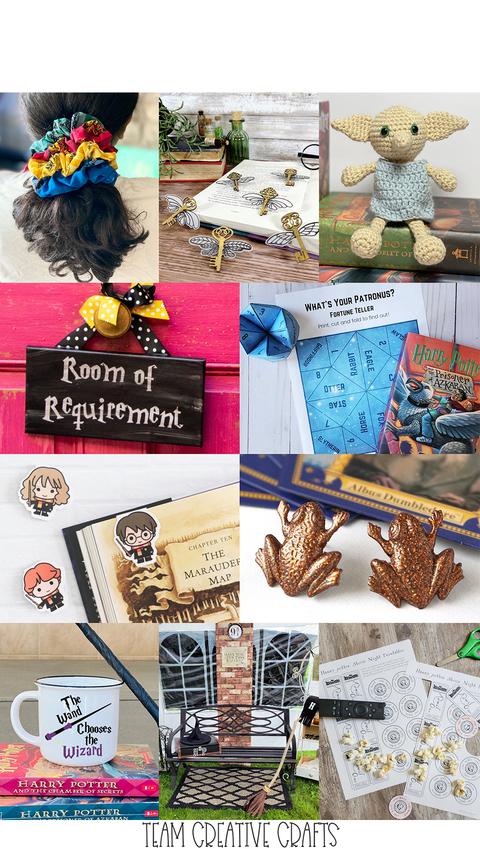
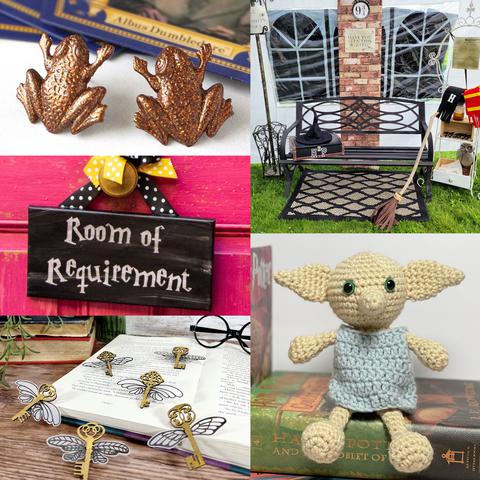
More Harry Potter Crafts with these talented Bloggers!
Laura of Me and My INKlings is sharing a Room of Requirement Sign. Located in Hogwarts Castle, it’s a room that can only be discovered by someone who is in need. Free SVG File included in tutorial.
Let Harry, Ron, and Hermione hold your place with a Magnetic Set of Bookmarks created byLaura of Laura’s Crafty Life. Click through to discover how to make them.
Show your Hogwarts House Colors with a colorful set of Harry Potter DIY Scrunchies. The full step-by-step tutorial can be found over at Smitha’s site, Smiling Colors.
Shani of Sunshine and Munchkins has created a Free Printable Patronus Fortune Teller. Let this game help you discover what your charm is based upon your happiest memories.
Download, print, and color Harry Potter Movie Night Printables featuring Hogsmeade Tickets and Gringott’s Coins that the kiddos can earn, then redeem. Designed by the clever Justine of Little Dove.
Erica from 5 Little Monsters always keeps us in stitches (LOL!) with her fabulous creations. Free this adorable Crocheted House Elf Dobby by gifting him a piece of clothing. Click through for the complete pattern.
Always remember that the Wand Chooses the Wizard with this cute Harry Potter Mug created by Chelly of We Can Make That. Get the Free SVG file on her website.
Beth of Creatively Beth is always on the lookout for cute Dollar Tree crafts, including these magical Harry Potter Flying Keys. Easy to create with the free printable wing pattern sheet.
These yummy Chocolate Frog Earrings look good enough to eat, but don’t because they are made out of resin. Lindsay from Artsy Fartsy Mama has the complete tutorial over on her blog.
Thanks for coming by, enjoy all the HP craftiness and there are awesome HP themed give aways too from Laura Kelly Designs and Team Creative Crafts. Rafflecopter entry on my Home page here.
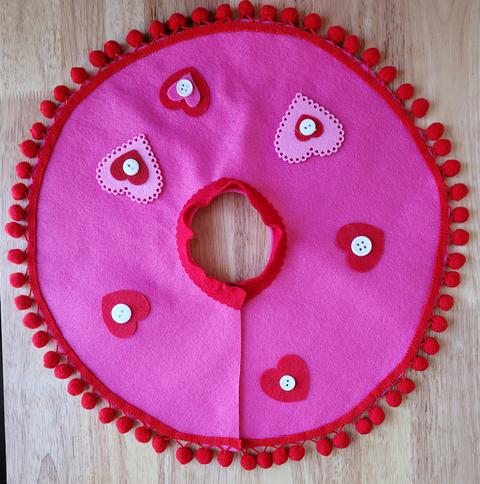
My grandlittle girls love the 18" dolls and yes so do I. We also are makers. So we had lots of creative fun making the No Sew DIY 18" Doll Felt Poodle Skirt. Such an easy project to decorate and personalize. The skirt is a basic circle but look how super cute these turned out! Great project for any doll lover. It can be resized to fit a smaller doll. Just cut a smaller circle.
A little history about the skirt which I wore as a young girl too! In 1947 the poodle skirt or circle skirt was created by a singer and actress Julie Lynn Charlot, she had limited funds, her own unique sense of style and the holiday season had arrived. Her mother owned a factory that used felt. Without any sewing experience Juli DIYed herself a felt skirt with a pair of scissors. She cut a large circle, cut out the center for her waist and glued on some decorations. It was a hit at the party and began her going into business manufacturing the skirts. The iconic "poodle" design came later.
Let's make the Skirt:
(1/2 yard of felt will make 2 skirts) Kunin Felt Brand Classic or Premiumfelt:
(Available at most major retailers and online)
Candy Pink, Lagoon and Red
20" x 1" piece of felt for waistband
9" x 12" craftcuts Kunin Felt Brand in complimentary colors
1 1/4 yards of trim for each skirt, ric rac, pom pom, fringe (Trims by the Yard has a great selection)
Assorted Buttons
1 Hook and Loop Circle or Snap
Circle Template 15" (I used a lampshade)
Adhesive, scissors, ruler, pencil; Optional pinking shears, flower diecuts
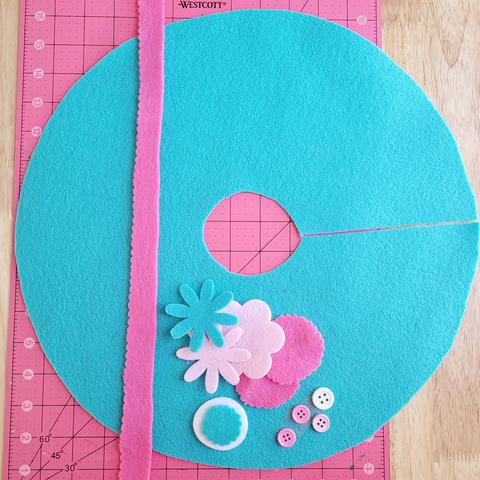
STEP 1:
Draw a 15" circle on the felt. Cut. Fold in half and cut to center. Cut a 2.5" to 3" circle out of center. (Depending on brand of doll, the waist varies slightly, please measure doll.) Cut an 18" by 1" waistband, plain or with decorative scissors.
-
STEP 2:
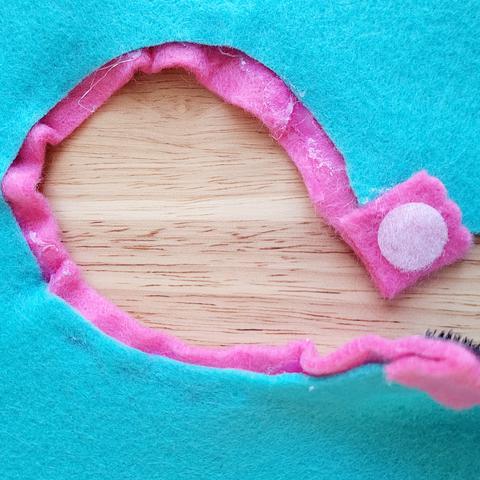
Leave 1 1/2" beyond the circle waist and glue waistband as shown. Slightly pleat as you go. For younger children this step can be done ahead and hot glue works great for this step. Trim the opposite end at 1 1/2" beyond waist. Try on doll. Fold the extended ends under to overlap. Remove from doll.
STEP 3:
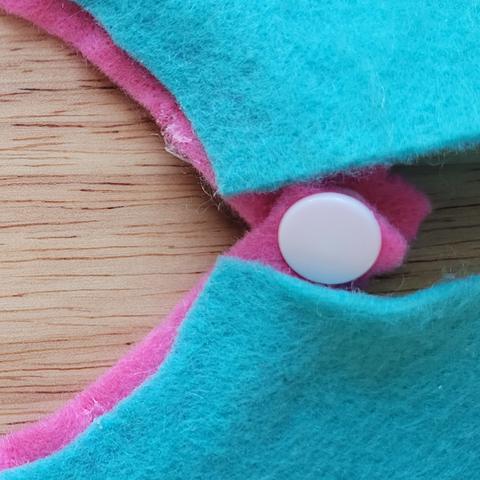
Glue the folded ends under. Adhere hook and loop to either side of ends. You can also use a snap tool as shown below. (For younger children the hook and loop would be easier. (Also note my first skirt has some messy excess glue on back. I trimmed some off carefully. It is not visible from the front so do not be too concerned with the back of waistband.)
Another fun fact and still true today. "The skirt proved most popular with teenage girls, and in 1952 mail-order catalogs dedicated to poodle skirts were made. Known as the "first teenage fashion trend ", these skirts were perfect for dancing. It could also be said that the skirt's ability to be customized led to its success with teenagers, as it reflected individual personalities."
STEP 4:
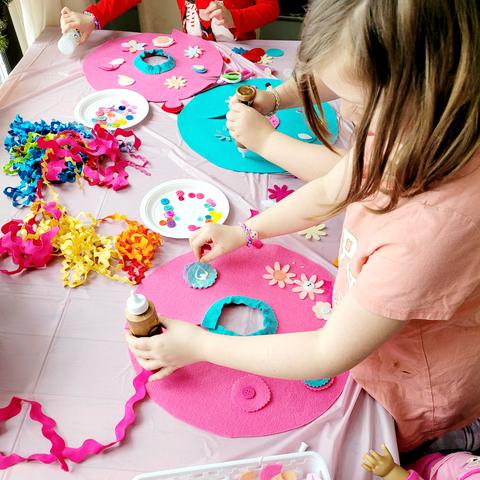
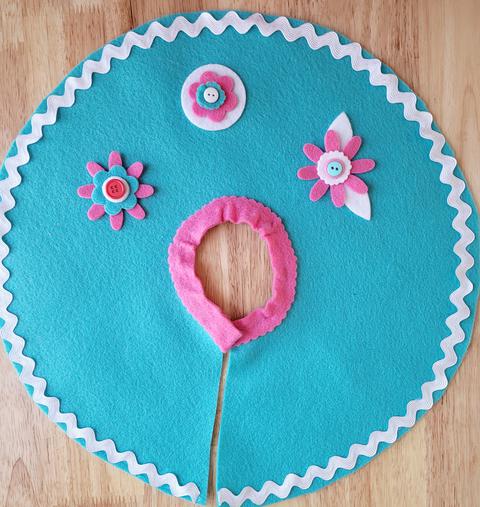
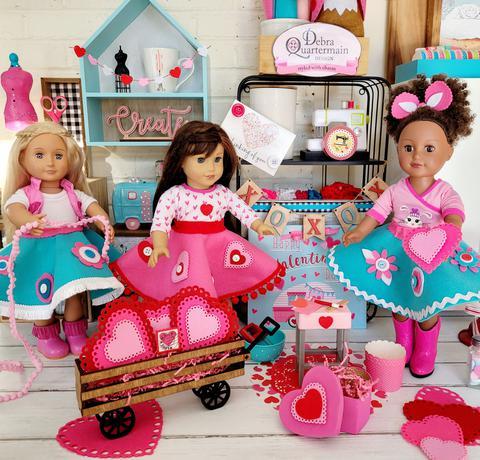
The best part, decorating! Trims, felt flowers, buttons and felt scraps were placed on the table, scissors and adhesive. Tacky glues will take a few minutes to dry. As you can see the girls had a lot of fun and each very creative in their styling of their skirt.
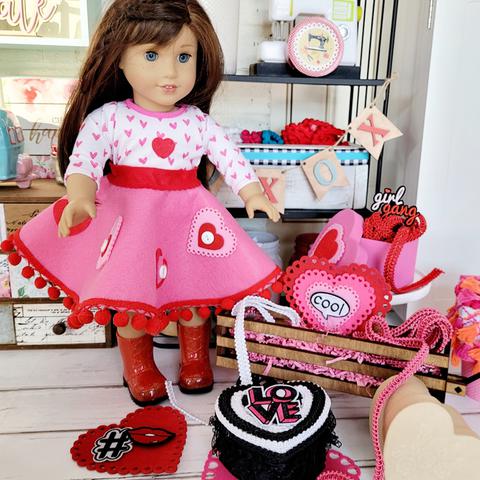
This is a great project to decorate as it can be laid flat. Of course with Valentine's Day around the corner there is a Valentine version too.
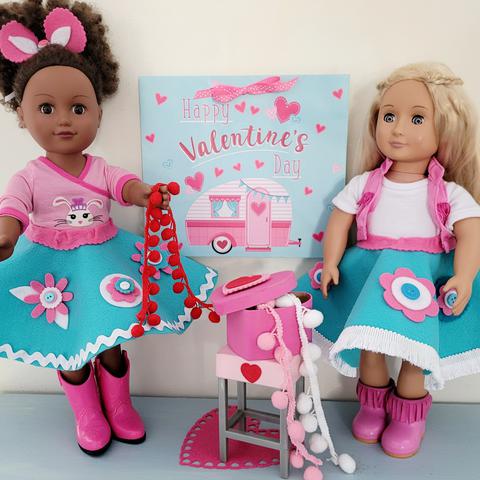
Each skirt is unique. The dolls are going to need a skirt for every holiday.
The skirts are simple to put on and off and fun to style. These dolls are accessorized from the wardrobe stash. Those boots!
There is a lot of Valentine activity happening! Such fun crafting with the grandlittle girls and putting together some kits to go out to some other little girls too!
Have fun making this No Sew DIY Felt Poodle Skirt. Great to share and pop in the mail to a special someone!
If you want to follow this Magical Mimi on IG @debraquartermain.
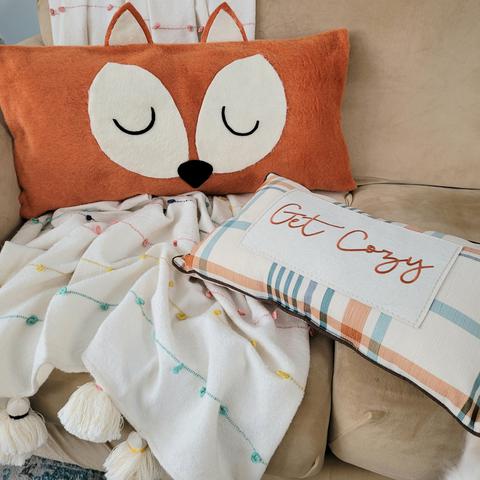
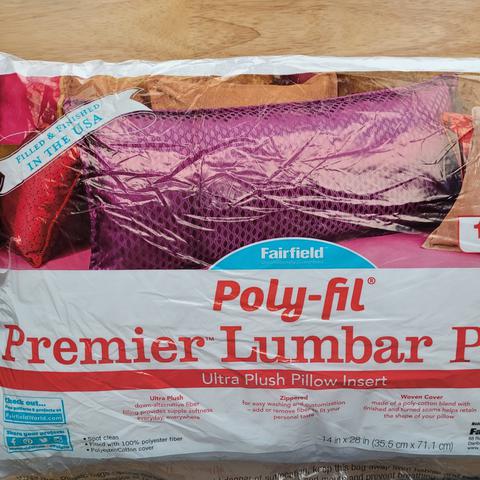
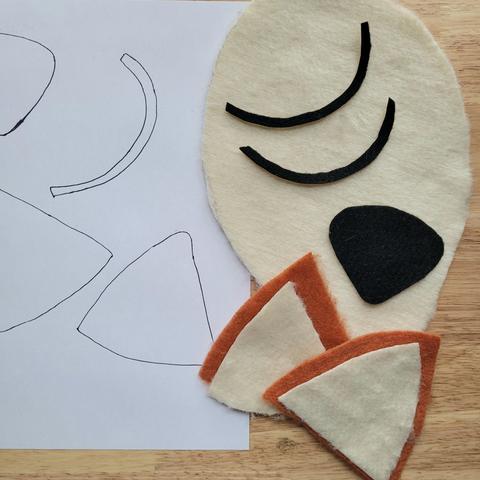
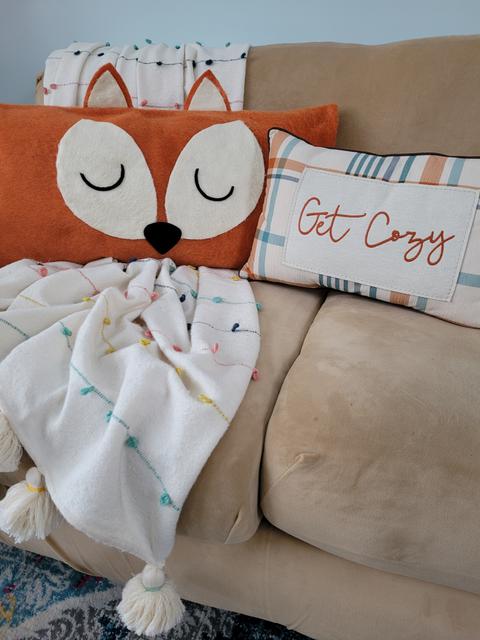
Who doesn't love a Pillow Party and I am so pleased to be part of Fairfield World's 2021 Pillow Party featuring the Lumbar Pillow. What is a pillow party without creative blogger friends joining in! There is a Giveaway too! A $100 JOANN Gift Card and 10 lbs of Poly-fil from Fairfield World. Rafflecopter entry above. Meet my Foxy Slumber Lumbar Plush Pillow! The cover is super cozy plush and the Lumbar pillow inside makes it so comfortable! (Design and comments are mine, I received product to review. ) co=host for the Pillow Party is Laura Kelly!
This is such an easy pillow cover to make, an envelope pillow style which can be sewn or glued with a fabric adhesive. You will need: Pattern Premier Lumbar Pillow Insert by Fairfield World 1 yard of Kunin Plush Felt: Pumpkin or Honey, Cashmere Tan
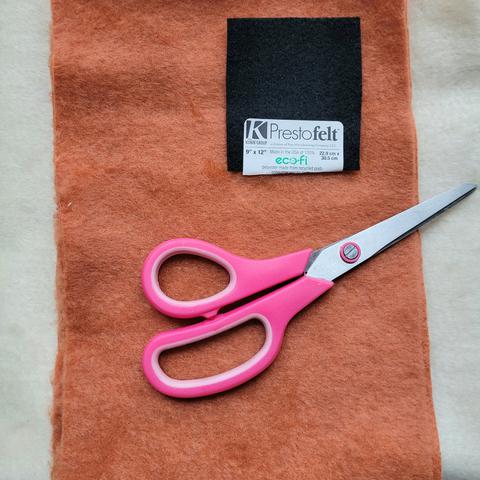
1/4 yard of Kunin Plush: Antique White or White
9" x 12" craft cut Kunin Classic or PrestoFelt: 1 Black
Fabric Adhesive
Scissors, paper plate, measuring tape, sewing machine optional, paper
STEP 1:
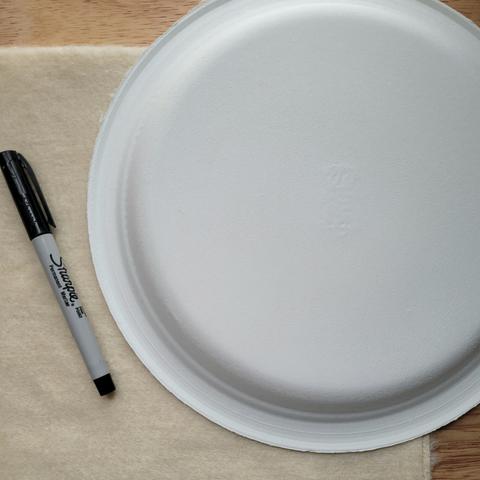
Cut pillow piece 28" by 36". From second piece of plush folded, place paper plate along fabric as shown. It should be in about 8" from edge. Draw along plate curve.
STEP 2:
Lift plate up and move so upper curve is as shown. Draw along outer edge of plate. Lift plate again. The width of the curved drawn piece should be about 7". With plush left folded. Cut just inside drawn lines making the two oval face pieces.
STEP 3:
Print out pattern and cut out pattern pieces as shown, two innner ears, two outer ears, two sleeping eyes, one nose.
STEP 4:
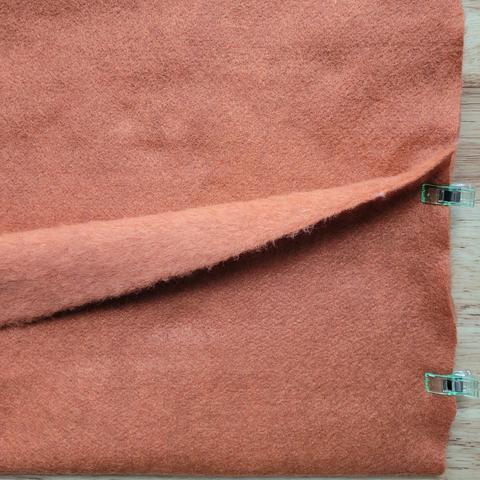
Along the 28" of plush felt glue or sew a 1" hem. Fold plush felt piece wrong side out overlapping the two long ends with the folded finished edge on the inside. The pillow should measure 14" by 28". Clip sides. Sew or glue along short sides. TIP: When gluing lift the inner edges to glue both layers down. Leave clamps until dried thoroughly.
STEP 5:
Turn pillow right side out. Smooth and flip over. Make sure plush nap is smooth and in a downward direction for front.
STEP 6:
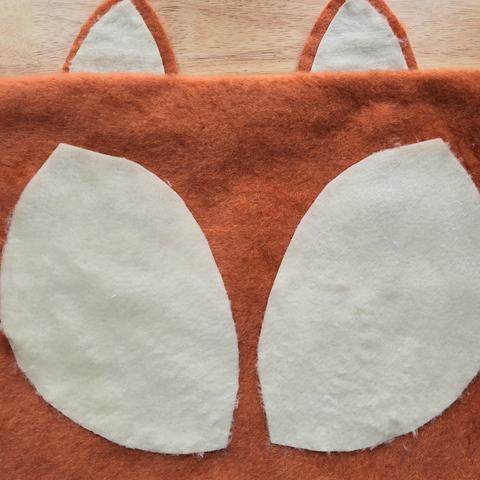
Glue ear pieces together, center equally from each outside edge with 4" between them. Glue face pieces in place as shown.
STEP 6:
Adhere nose and sleeping eyes. If using PrestoFelt, you just have to peel off backing. It is easy to use for small pieces as the pattern can be drawn on paper backing.
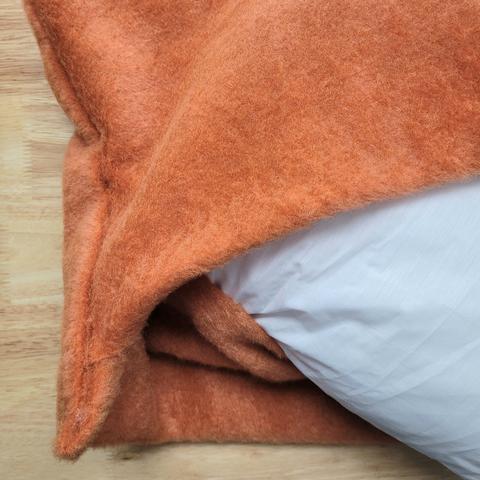
STEP 7:
Adjust Lumbar Pillow Insert by simply unzipping and removing some poly-fil if desired or try pillow out first and adjust later. Insert pillow easily into plush envelope back.
Cuddle up with with your Foxy Slumber Lumbar Plush Pillow, a warm throw, hot beverage and GET COZY! Enjoy relaxing and checking out all of the wonderful pillow ideas, enter the Give Away and then maybe take a nap. ZZZZZ
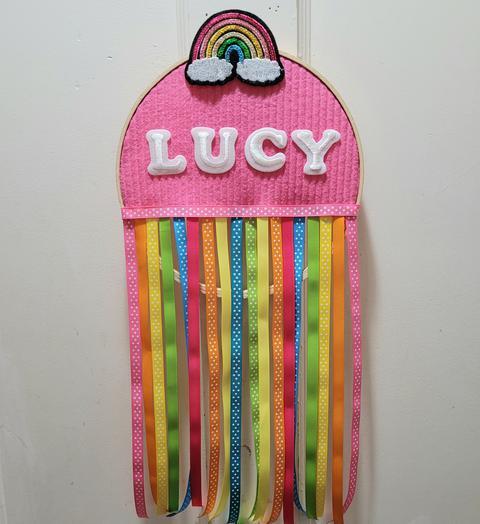
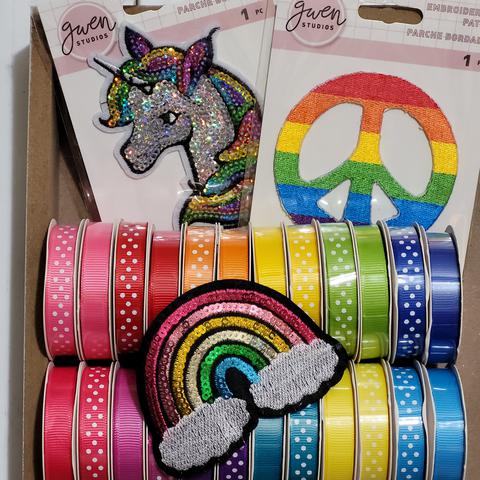
Making gifts for my grandlittle girls is the best. What better gift than a Rainbow Patch and Ribbon Hoop Door Hanger for a girl who loves rainbows! This fun, vibrant Solid and Polka Dot Collection of Ribbons from Gwen Studios is the perfect collection for the project! Available at Walmart. They also have cute patches, I decided it had to be the Rainbow for Lucy! (Sponsorship by Gwen Studios, project and opinions are my own.)
There are 24 spools in the Solid and Polka Dot Collection with 2 yards on each spool. This makes for a great selection in creating any kind of rainbow project. Grosgrain ribbon is my favorite, for its weight and quality. It hangs nicely. The unicorn or mermaid patch would have worked well too but it had to be a rainbow!
This project takes about an hour and requires very few supplies.
You will need:
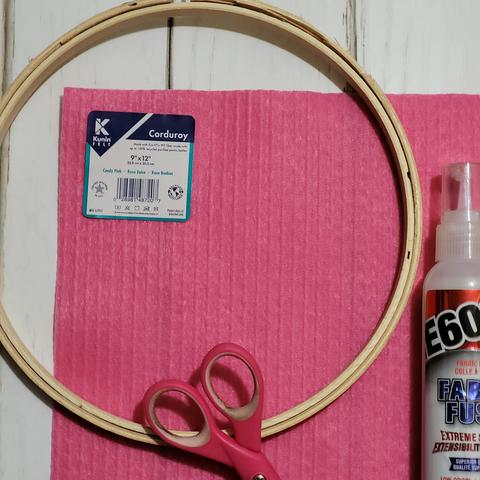
8" Hoop
9" x 12" craft cut Kunin Corduroy or Classicfelt; choice of color (I used Candy Pink)
Fabric Adhesive
Measuring tape, scissors
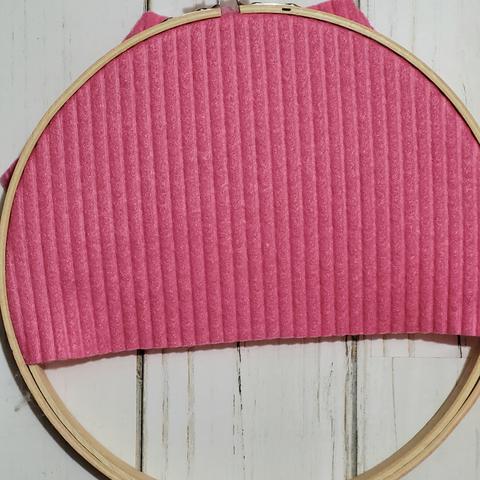
STEP 1
Cut felt piece in half and insert into hoop. Pulling tight, screw in place. Trim off excess on back. Add glue to keep secure.
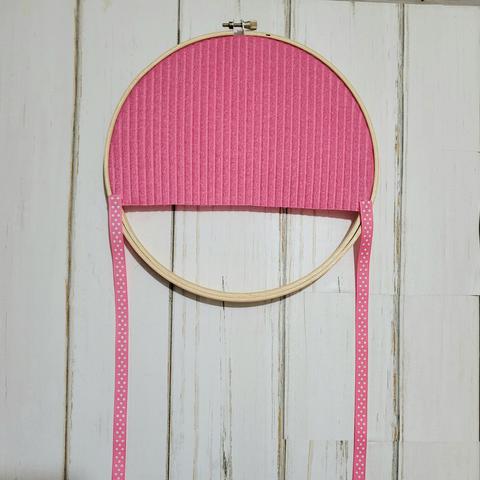
STEP 2
Cut 12" ribbon lengths. I decided to follow the colors in the rainbow patch alternating pin dot and solid. For an overall pleasing composition beginning with the pink and duplicating both sides, working towards the middle.
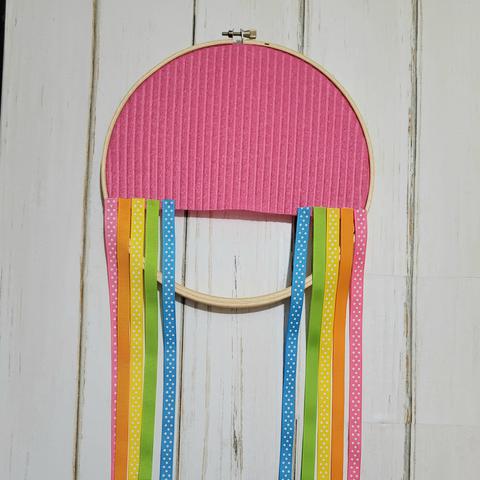
STEP 3
Keep adding ribbon lengths, gluing along the center side by side.
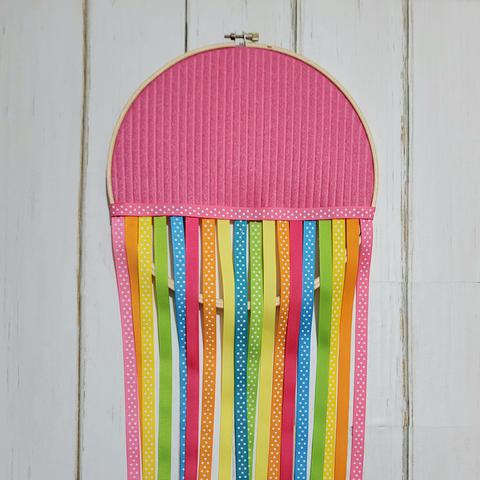
STEP 4
To cover the raw edges of the ribbon along the hoop, add a length of the pink ribbon extending around side to back edge. Adhere in place. Add the rainbow patch at top of hoop. I added some patch letters I had. You could die cut letters as well.
Such a quick and easy project, Rainbow Patch and Ribbon Hoop Door Hanger. Easy to personalize with the variety of colors in Gwen Studios Solid and Pindot Ribbon collection. Kunin felt comes in a wide variety of colors so this is a project for anyone little, tween or teen on your holiday or anytime gift list!
Thank you for visiting!
Lets connect on IG @debraquartermain
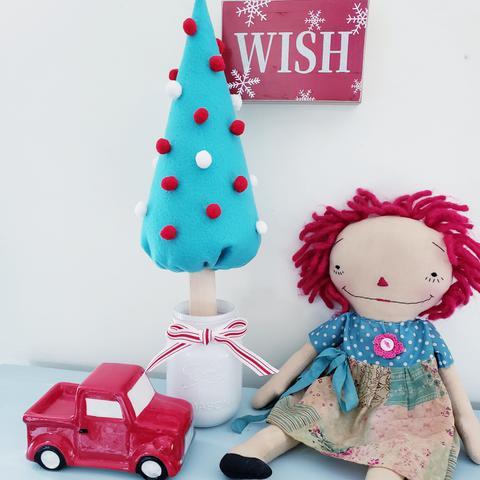
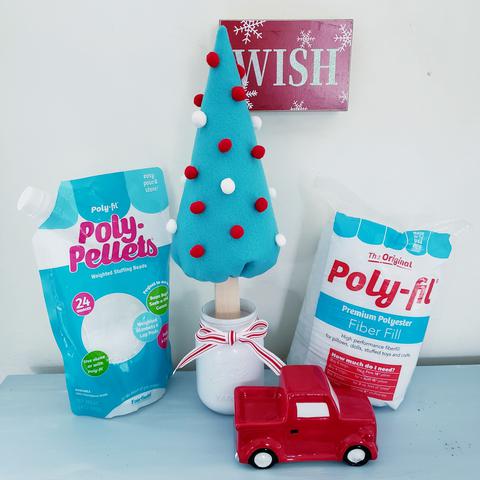
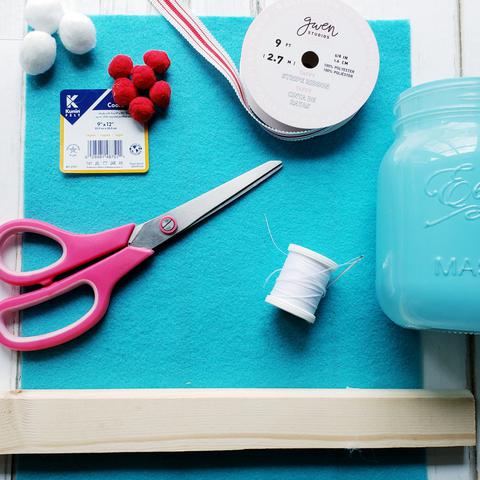
Have you been seeing those cute felt pom pom trees everywhere like I have? I was inspired by a couple I saw at Pottery Barn. The trees are so easy to make! Join me for How to make felt pom pom trees! My favorite kind of project, easy and can be a no sew project too! Perfect in any color to match an individual style or to give as a gift. Inside every successful project the best poly-fil by Fairfield World. (This project is sponsored by Fairfield World but all comments and opinions are my own.)
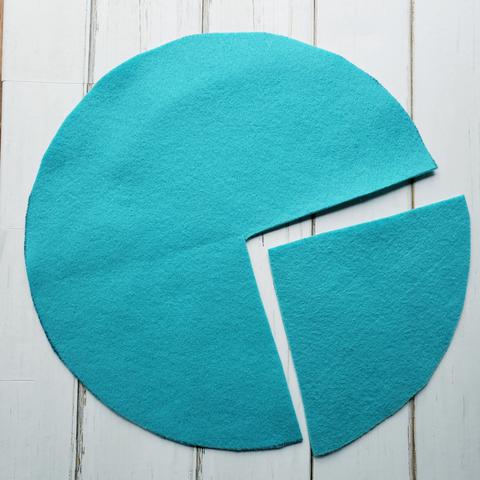
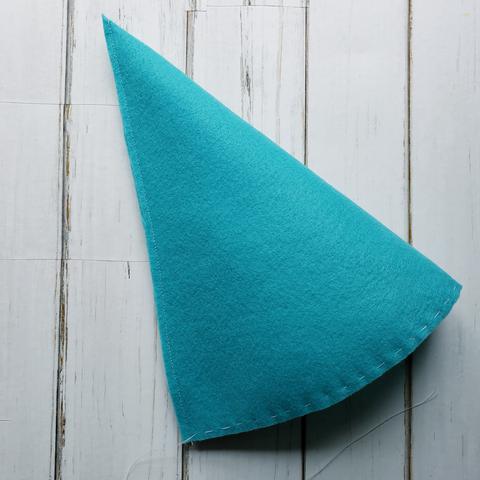
These trees can be made easily in any size. The finished Lagoon Blue tree is 10" tall excluding trunk. The tree pattern is simply a quarter circle. You can use a string and pin anchor to create a circle or use a template like a round table top, plate or charger. A 25" circle will make four 10" trees. The Candy Pink tree was created by using a Lagoon quarter as a pattern and adding 2" on all three sides making a 14" tree.
Match up the two striaght sides and sew. This can be machine, hand sewn or glued. If using an adhesive clamp and make sure it is dried thoroughly. Hand stitch a running stitch around bottom of tree. Turn tree leaving seam on inside. If adhered it does not need to be turned.
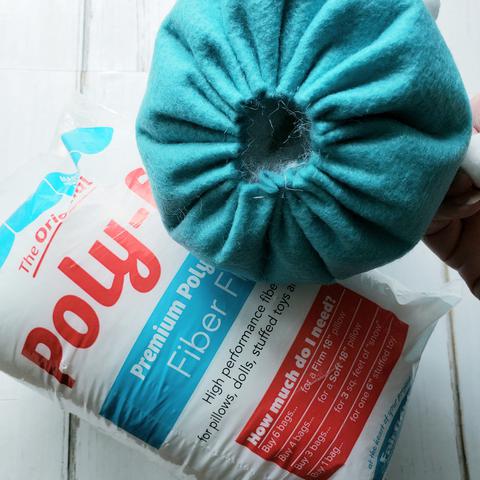
Make sure point is pushed out and stuff tree firmly keeping shape. Pull stitches tight leaving space for trunk.
Adhere pom poms. Insert trunk. ( I did not adhere trunk inside tree as it would make easier storage to remove tree top or change out tree color for year round decor. If adhering to a piece of board. Affix trunks to board first. A small nail through bottom or I tried a new to me adhesive Rapid Fuse. It worked quickly and a solid fuse.
For gift giving, fill a mason jar with poly pellets, add a festive bow and tag. Insert tree. Making these trees is so quick and easy, you can easily have a forest very quickly!
Hope you are inspired by How to Make Felt Pom Pom Trees! I love easy projects that can be used year round and also given as a handmade special gift.
Making creative Magic!
IG @debraquartermain
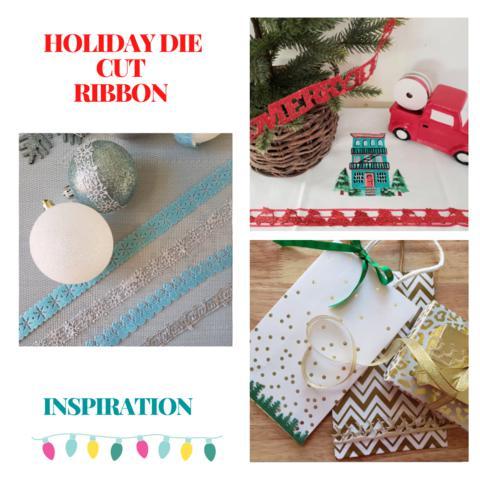
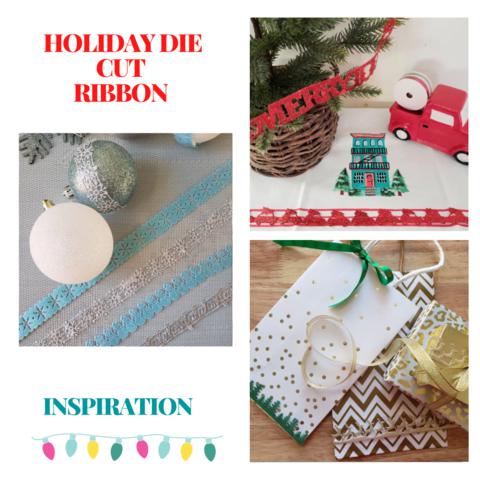
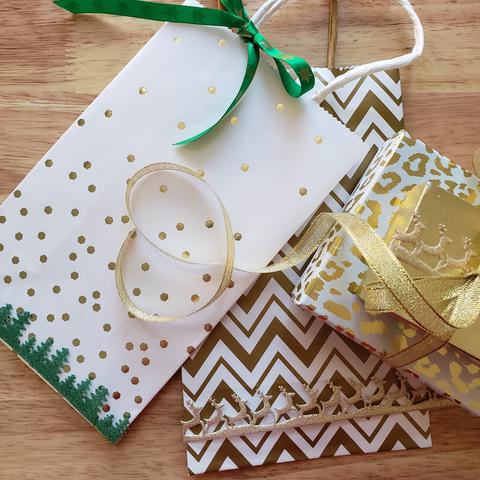
I love ribbons and these Holiday Die Cut Ribbons by Gwen Studios have delightful, darling designs, bright festive colors and intricate cut patterns. These pretty ribbons are perfect for creating a signature look for multiple holiday projects. Here are few quick and easy ideas for inspiration. What would you do with this ribbon collection, all available at Walmart.com. (Ideas and content are my own, I received compensation and product for this post.)
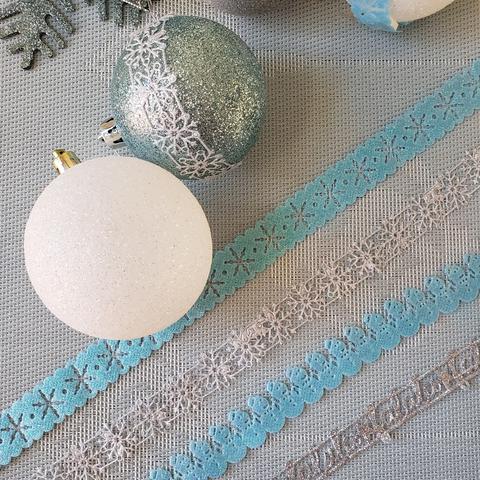
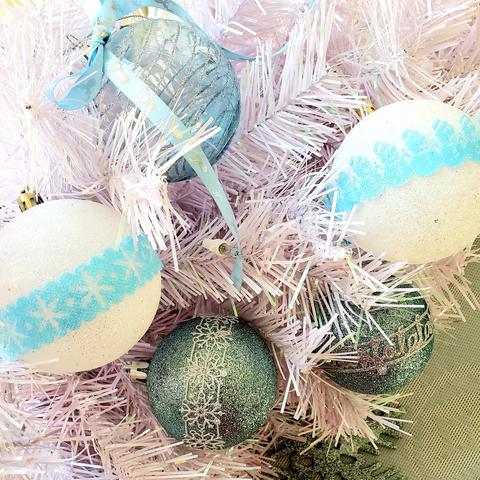
If you cannot decide between traditional red and green or enjoy a different color palette for the holidays, the Gwen Studio Holiday Die Cut Collection comes in several colors and patterns. The Snowmen Ribbon and the Snowflake Ribbon can be easily added to plain ornaments by simply using an adhesive to attach to the ornament.
Several ornaments were simply wrapped with the ribbon, cut to overlap a 1/4" and glued in place.
What is not to love about this MERRY Ribbon! Simply drape around a tiny tree. Add ribbon to a holiday tea towel. (You know the ones no one is supposed to use but just look at.) Make them extra special!
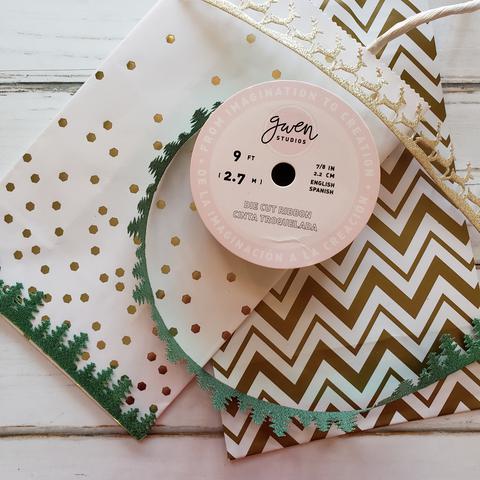
If you use a lot of gift bags the ribbons can quickly make an ordinary bag special by simply adding trim as a border. This Reindeer Ribbon in gold is one of my favorites. The Trees make a great border! Gwen Studios also has several other ribbons which complement the Holiday Die Cut collection.
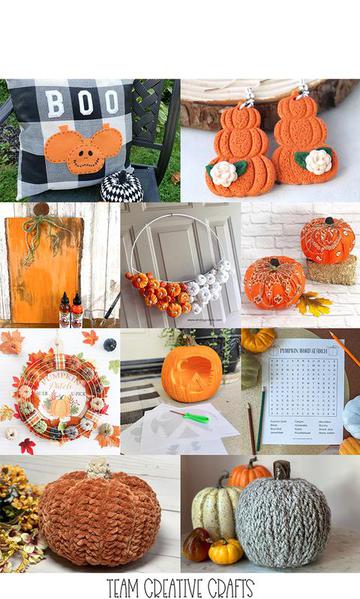
One of my favourite pumpkin easy DIY projects. Hopping with Team Creative Crafts, link on Home Page. Sharing everything PUMPKIN!
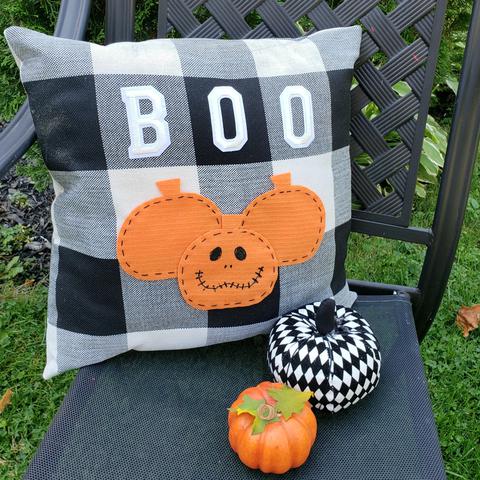
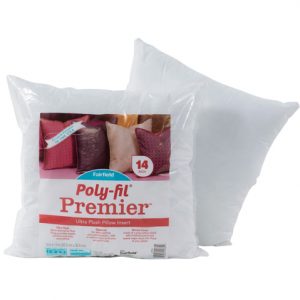
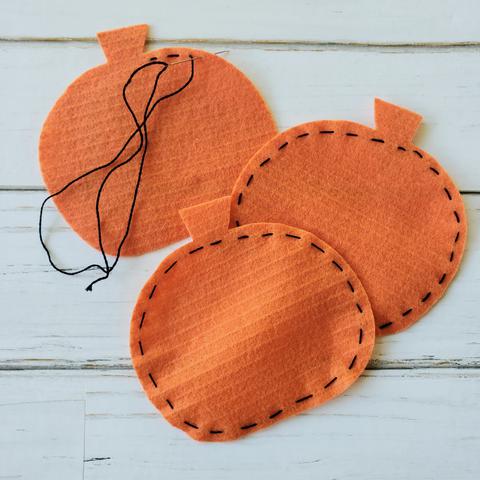
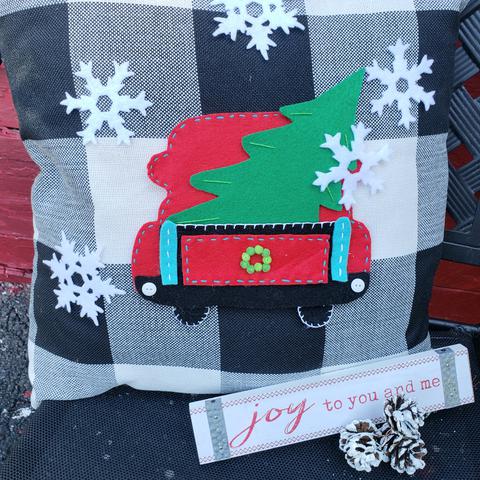
Are you like me and decorate for every season and holiday? How about these DIY Fast and Easy Pumpkin Pillows. You can decorate both sides and then just flip them over for a different season or holiday! The best part you can use pillow forms and purchased pillow covers. Just decorate with felt appliques. (This post is sponsored by Fairfield World but designs and comments are my own.)
I am a big fan of Buffalo Plaid and with a red and white house with black accents it is the perfect choice for my front porch and chairs. Inexpensive pillow covers come in a variety of patterns, these buffalo plaid ones were found on Amazon.
Hand sew a simple running stitch as shown around the edge of each pumpkin shape.
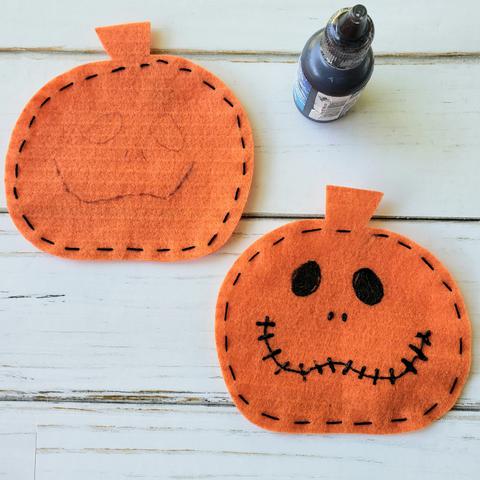
Step 2:
Using the photo as a guide, draw a pumpkin face with a pencil. Fill in with dimensional fabric paint.
Step 3:
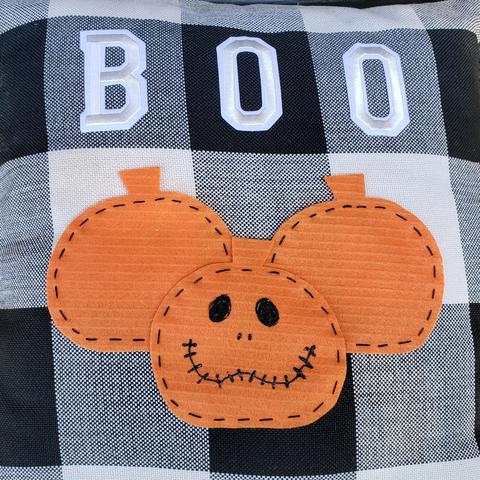
Add BOO applique letters to pillow, these letters have a sticky backing and can be easily removed. Pumpkins can be adhered with hook and loop fasteners on the pillow to be removed to add another seasonal design.
By creating a couple sets of pumpkins you can vary them to add plain pumpkins for a fall look to a pilow or pillows and simply create a Halloween vibe by adding letters to the pumpkins. The piilow covers can be decorated on both sides, making it super easy to just flip over from fall to Halloween or any holiday!
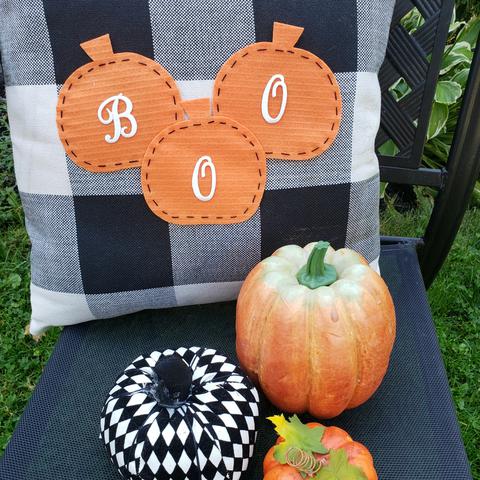
These pillows are perfect for fall decor!
Easily add another season to the reverse side of the pillows. This set of pillow covers had four in it. Decorating for all the seasons! Find the pattern for this cute Holiday truck here.
Seasonal and holiday decorating can be achieved easily with just a few touches and pillows are one of the best ways to create the feel. Being able to repurpose and item from one season into another even better! These seasonal pillows can be used all year round. The pillow inserts from Fairfield world are a high quality and durable, they will last through many, many seasons.
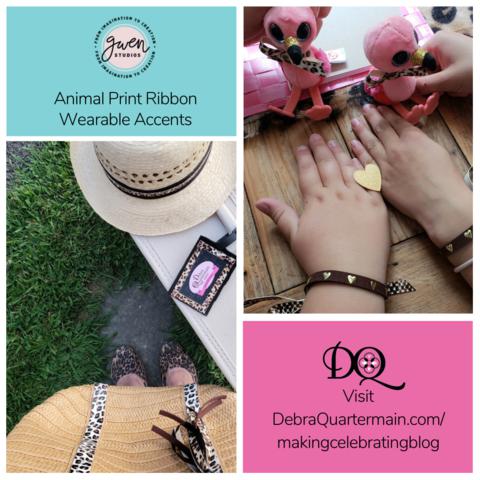
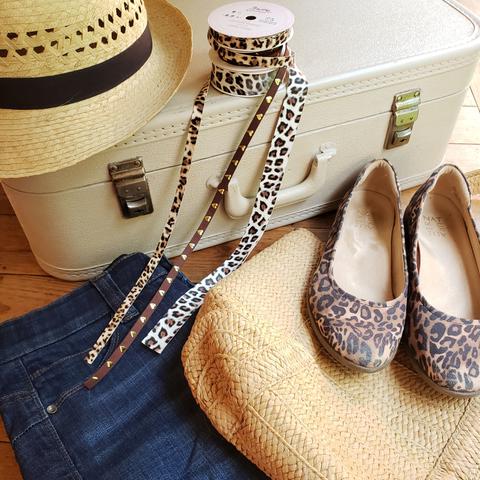
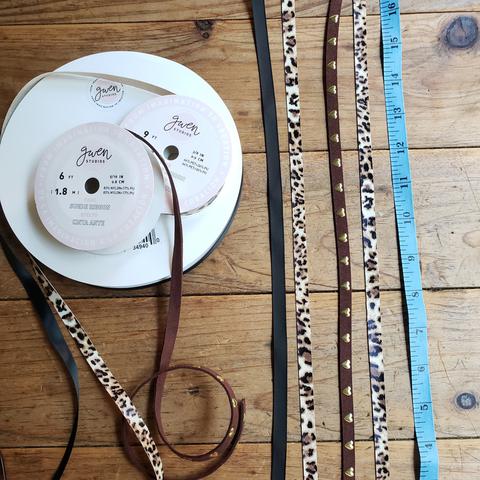
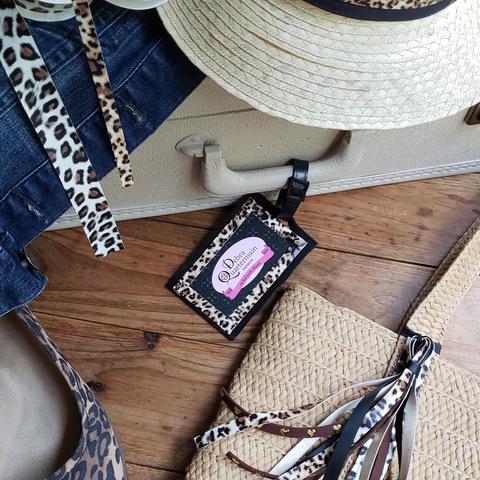
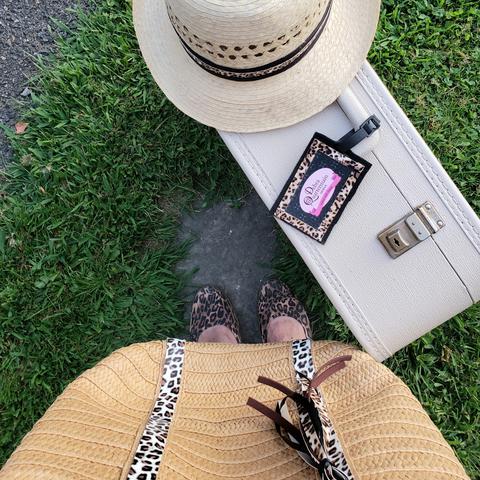
If you know me at all, animal print is a favorite accent of mine to wear. A hint of fall in the air forget the pumpkin spice I bring out my animal print flats and scarf paired up with denim and a cozy cardigan. You can only imagine my delight when I received a box from Gwen Studios with their gorgeous faux leather animal print ribbons. I was so excited to create some Animal Print Ribbon Wearable Accents for my wardrobe and put together a special Fall Friends Flamingle party for my grandlittle girls and their BFF's! The Gwen Studio Ribbons are available at Walmart. (I received product for this post but the content is my own.)
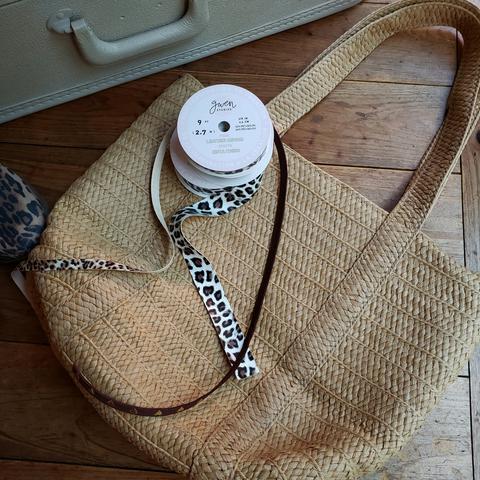
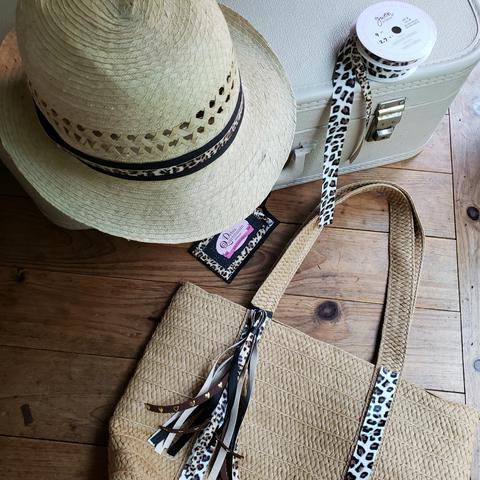
We have a little road trip planned to scenic Prince Edward Island in September. Animal print flats and my favorite jeans are ready. I have a very cute straw bag and hat to take which just have to have an accent of animal print ribbon. The Gwen Studios faux leather ribbons are available in several patterns and different widths. I used the 7/8" for my bag. The ribbon adhered easily with a quality fabric adhesive. I simply glued along the stitched strap line on either side of bag.
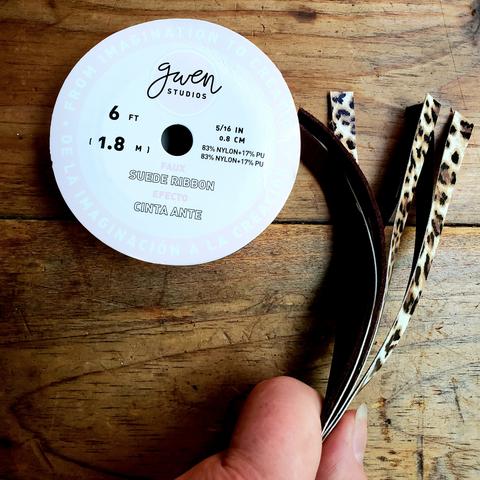
For an added decorative stylish element I made a tassel to tie on to my bag. I had also received, a suede ribbon with embossed hearts and a black grosgrain ribbon.
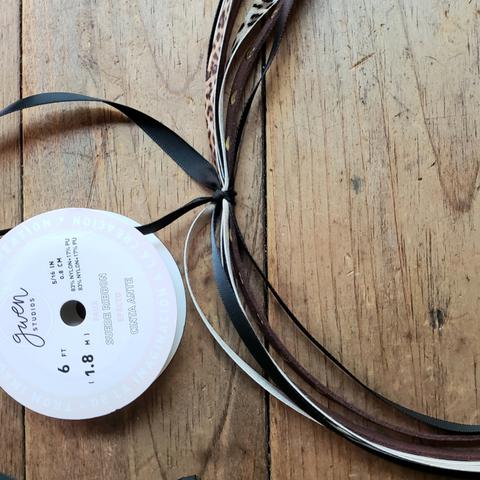
To make the Tassel:
1 yard each of four 3/8" Gwen Studio ribbons
1 extra yard for finishing. (I used the black grosgrain.)
1. Cut two 18" lengths of the four ribbons.
2. Alternate the ribbons and stack.
3. Tie the ribbons together tightly in the center using 18" of the extra ribbon piece.
4. Fold ribbons in half. Measure down about 2" and tie tightly to finish the tassel.
Simply tie tassel to bag. I used the fabric adhesive to glue a band around the center of my hat.
My vintage suitcase was feeling left out so my plain black luggage tag got a border of ribbon too. Simply glued on.
How cute is this look! The tassel can be untied and added to a different bag or belt.
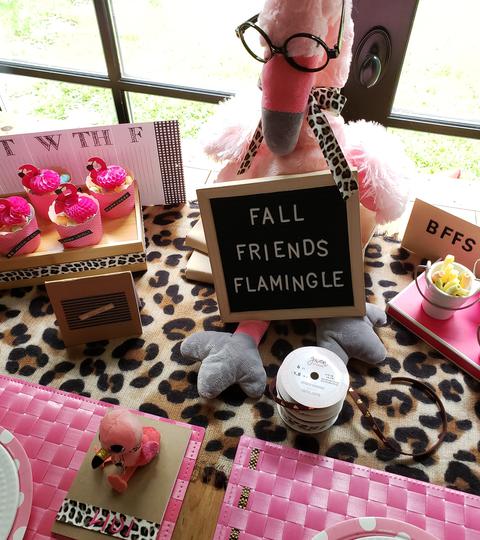
I have one grandlittle girl who is a big animal print fan. She has flats, legging and a cardigan too! She has been known to wear them all at once and can sure pull that look off! Having little celebrations and surprises is always a fun thing to do for this Mimi aka (magicmakermimi). So I had a four little flamingo stuffies and a large one, the girls have besties moving back into town. I decided to add some animal print ribbon from Gwen Studios and throw a Fall Friends Flamingle party celebrating BFF's and back to school!
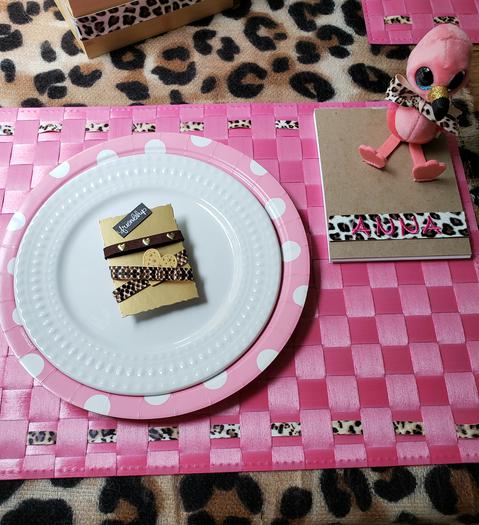
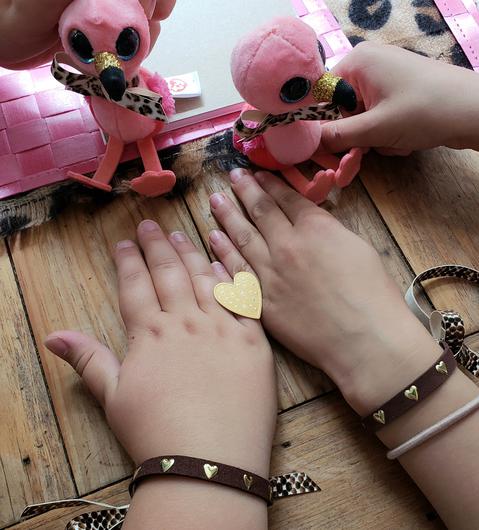
Everything for the party was upcycled and in my crafty stash. I just added the Gwen Studio ribbons. The placemats had ribbon woven along the ends. Two different ribbons adhered together to tie on for Friendship bracelets. Notebooks accented with ribbon and their name in monogram pink letters. The tiny flamingo stuffies also had ribbon bows added.
My grandlittle girl and her bestie. She added the heart to the photo. They have been friends since babies and their Moms friends since they were in Junior high. They loved the party, cupcakes and giggles!
All packed and ready with my Animal Print Ribbon Wearable Accents with Gwen Studios Faux Leather Ribbons! The ribbons are available at Walmart. I hope you have been inspired to add some Animal Print Accents to a wearable or accessory for a unique on trend detail!
We are blog hopping with the Designers Craft Connection. Get ready to walk on the wild side with all kinds of Faux Leather Animal Print Ribbon inspiration with Gwen Studios!
Thank you for stopping by!
Find me on IG @debraquartermain
Magical Mimi to Grandlittles, I love to create, decorate & celebrate. Sharing joy and inspiration from our 200 year old home, Quartermain House B&B on the east coast of Canada.


 -
-