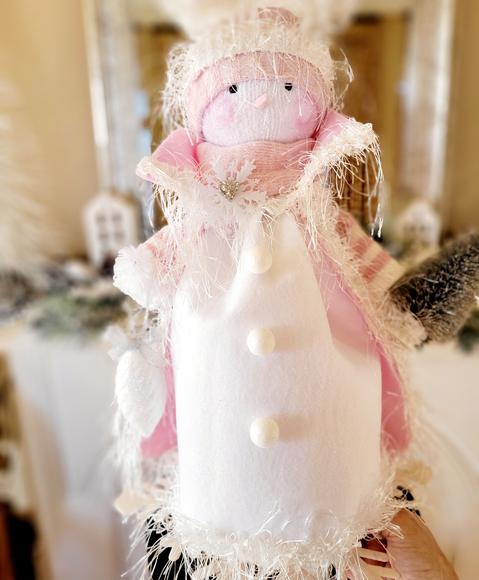
Living in a winter wonderland for five months of the year, been building snowmen all my life. Love designing them too so here is my No Sew Felt Sparkles Snowman or Snowbelle I created for the Team Creative Crafts final blog hop of the year. Want to build a snowman there are so many great ideas to choose from!
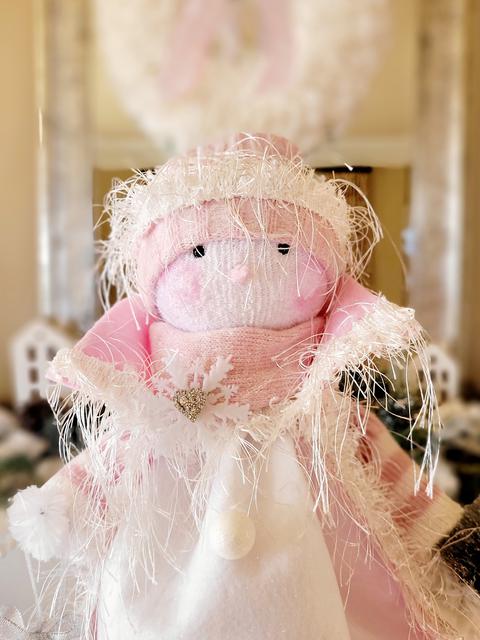
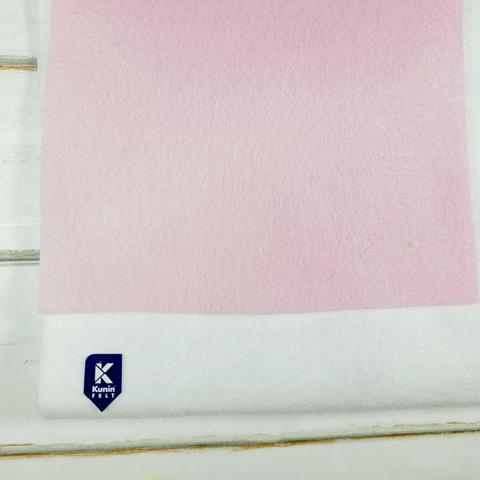
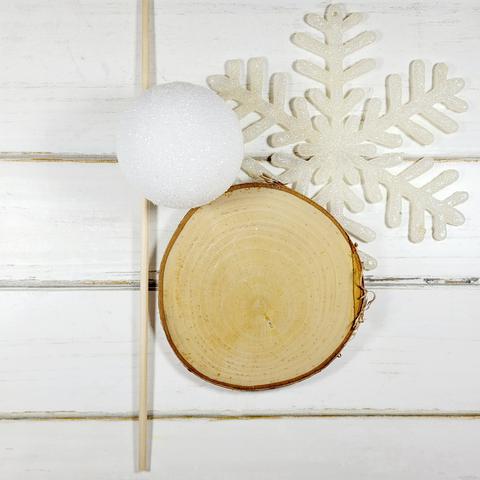
My favourite product to work with is Kunin Felt, their thicker Premium weight is perfect for bigger projects. I also like that it is made from recycled plastic bottles. The felt comes in craft cut sizes and which are also easy to work with. I raided my holiday supplies for fluffy trims, snowflakes and snowballs plus a couple pairs of socks.
You will need:
1 yard of Kunin Premium White Felt available at Hobby Lobby, JOANN and Walmart.
1 bottle of Rit Dye Petal Pink (the white dyes to a soft pink, I use the hot water method, hang to dry. For more vibrant colors use the Rit More product) Dye a 15" by 18" piece for cape
i Pair of white socks and 1 pair of pink
5" Foam ball
12" Dowel
Round wood piece for stand
Large Snowflake
18" White large chenille stem
Mini snowflakes
Mini Snowballs
2 yards Trim, fur or fluffy trim (I used a trim from Trims by the Yard)
2-4mm Safety eyes of beads
1 yard Narrow white elastic
Needle and thread
Beacon 3 in 1 Adhesive
Hot adhesive
Scissors and pins
Ruler, measuring tape, and pencil
STEP 1
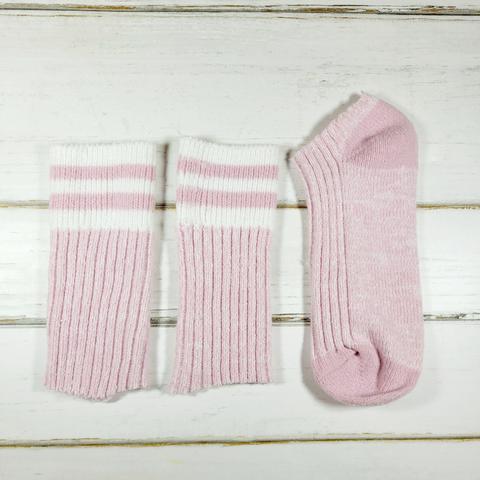
Cut pink socks as shown. The two tops are used for sleeves and the bottom half of one is the hat.
STEP 2
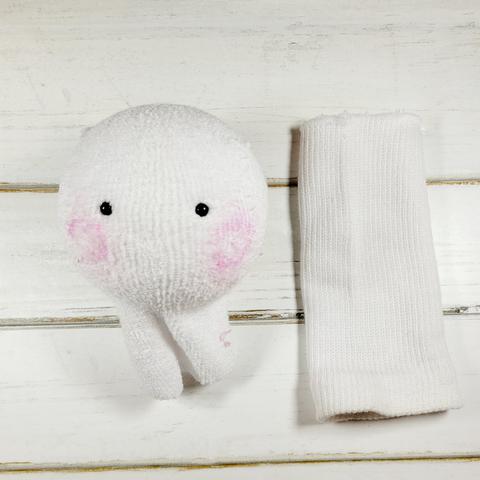
Stretch one white sock over the foam ball. Cut off excess. Insert dowel end into bottom of ball at neck. Glue in place. Insert eyes and blush cheeks.
STEP 3
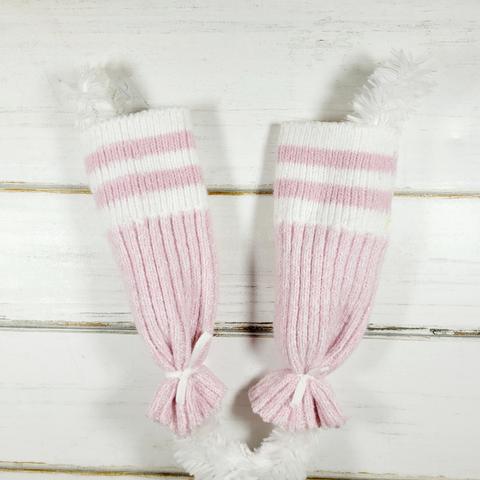
Insert each cuff end over the chenille stem as shown. Bend ends sticking out to form "hands'"
STEP 4
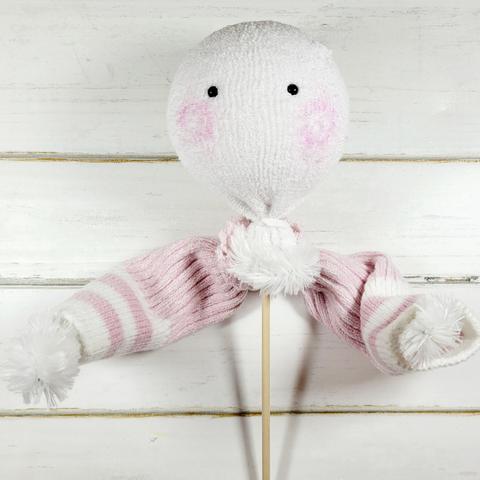
Glue and wrap arms around dowel as shown. Also use a small piece of elastic to tie as well. Press in eye beads and blush cheeks.
STEP 5
Cut a piece of white 12" by 18" for dress. Add trim to bottom edge. Gather and tie around neck. It does not go all the way around. It fills in the front.
STEP 6
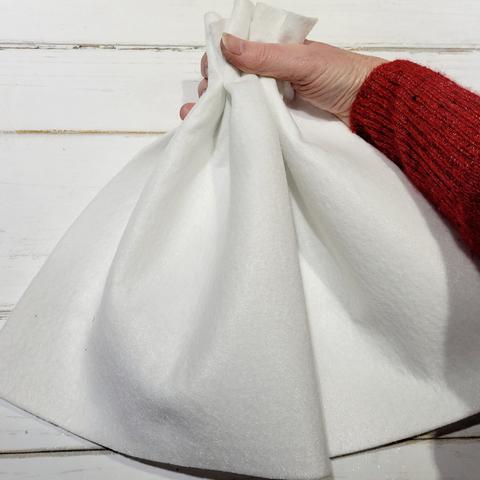
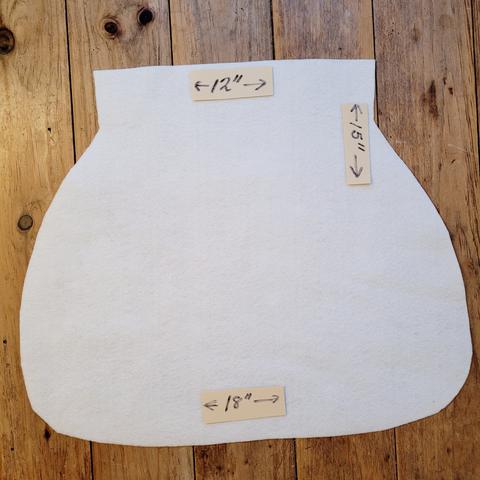
Cut a cape following measurements in photo. Fold in half to make both sides even.
STEP 7
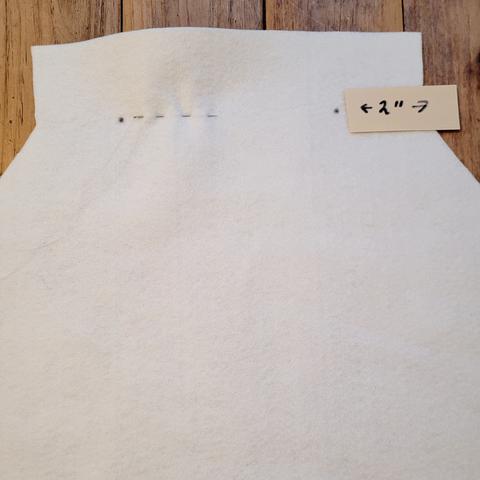
The only sewing in whole project is a gather line in 2" from either end to fit better around the neck.
Glue on trim around outside edge.
STEP 8
Pull stitches in cape and try on Sparkles to see where the arm holes should be cut. Cut small slits and insert arms. Tie cape on with elastic and also glue in place.
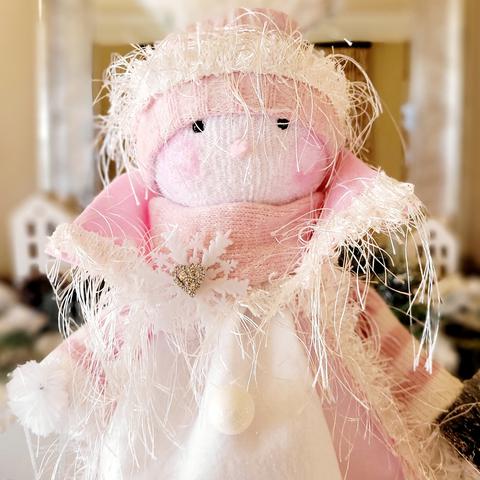
For the hat. I simply tied off top of heell of sock and stretched over the head. Glued on trim once in place. Now embellish as you want and dust with fine glitter for extra sparkle. I did a light coat of hair spray first. You can use the rest of the pink sock to create a muffler.
STEP 8A
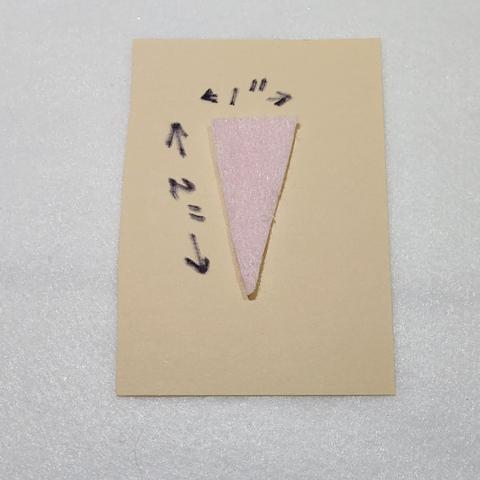
For the nose cut a triangle from pink scrap and roll. Glue and adhere end to face. If too long trim off.
STEP 9
I glued the dowel in to a drilled hole in base and glued it on top of a large snowflake for extra stability. Here she is in my pink themed Parlor this year.
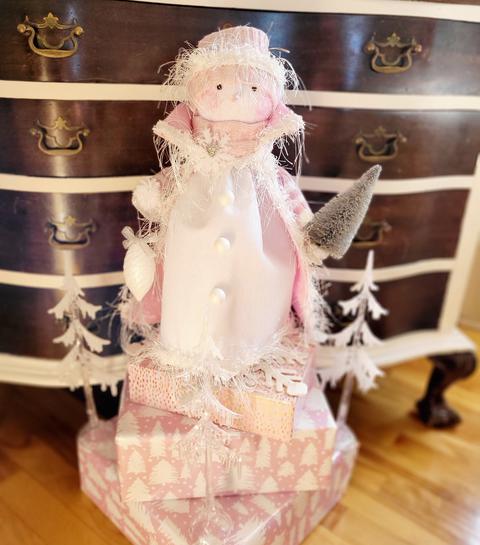
Hope you have been inspired by my No Sew Felt Sparkles Snowman, Snowbelle. Here are more great Snowman Themed Crafts to check out!

Free Printable Snowman Soup Poem from Laura at Me and My INKlings
Dollar Tree Wooden Spoon Snowmen from Beth at Creatively Beth
“Up to Snow Good” Free SVG File from Lindsay at Artsy Fartsy Mama
How to Draw a Snowman from Smitha at Smiling Colors
Snowman Elementary School Worksheets from Justine at Little Dove
Crocheted Snowman Head Ornament from Erica at Five Little Monsters
DIY Snowman Décor from Katie at the Crafty Blog Stalker
Free Printable Snowman Coloring Page from Beth at Creatively Beth
FRIDAY LINKS:
Recycled Champagne Cork Snowmen from Beth at Creatively Beth
Free Printable Snowman Jokes from Lindsay at Artsy Fartsy Mama
Snowman Gift Tag from Laura at Me and My INKlings
No Sew Sparkles the Snowman from Debra at DQ Designs
Snowman Gift Card Jar from Blanca at Creativities Galore
Upcycled Embroidery Hoop Snowman from Beth at Creatively Beth