#
Debra Quartermain Design
 Making & Celebrating 
Tuesday, December 07 2021
Foxy Slumber Lumbar Plush Pillow

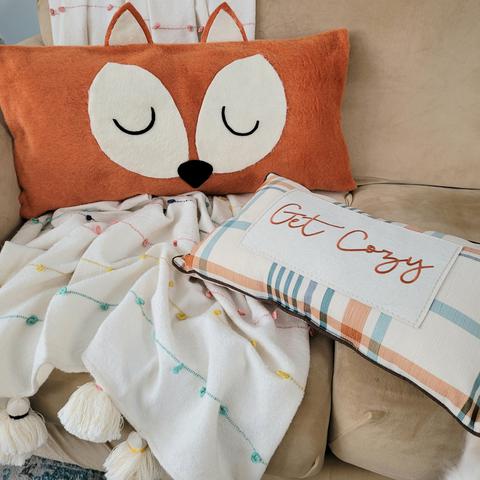
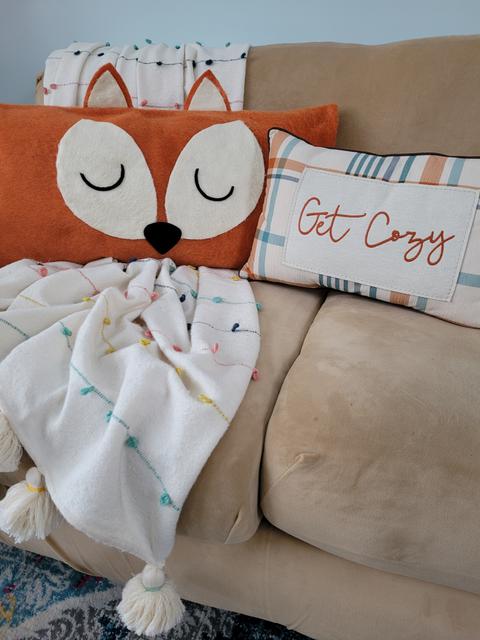
Who doesn't love a Pillow Party and I am so pleased to be part of Fairfield World's 2021 Pillow Party featuring the Lumbar Pillow. What is a pillow party without creative blogger friends joining in! There is a Giveaway too! A $100 JOANN Gift Card and 10 lbs of Poly-fil from Fairfield World. Rafflecopter entry above. Meet my Foxy Slumber Lumbar Plush Pillow! The cover is super cozy plush and the Lumbar pillow inside makes it so comfortable! (Design and comments are mine, I received product to review. ) co=host for the Pillow Party is Laura Kelly! 

This is such an easy pillow cover to make, an envelope pillow style which can be sewn or glued with a fabric adhesive. 
You will need:
Pattern

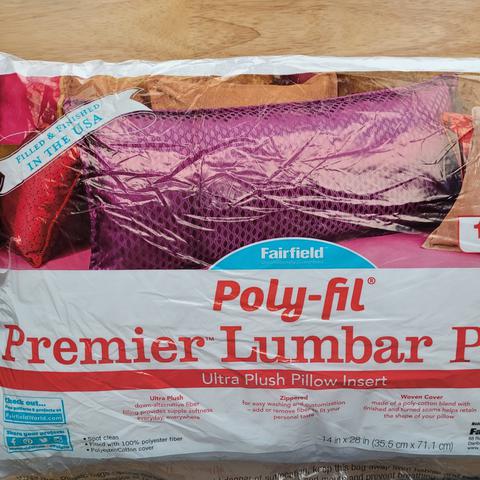
Premier Lumbar Pillow Insert by Fairfield World
1 yard of Kunin Plush Felt: Pumpkin or Honey, Cashmere Tan
1/4 yard of Kunin Plush: Antique White or White
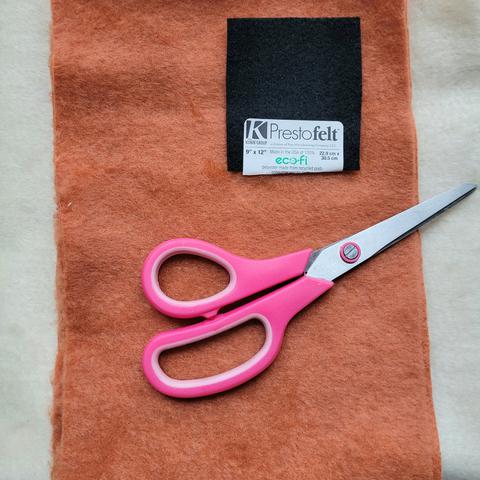
9" x 12" craft cut Kunin Classic or PrestoFelt: 1 Black
Fabric Adhesive
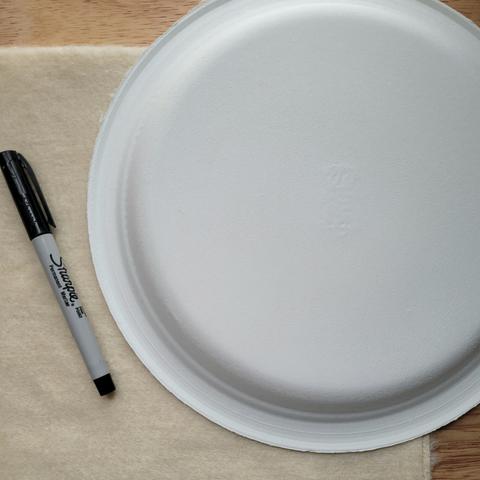
Scissors, paper plate, measuring tape, sewing machine optional, paper


STEP 1:
Cut pillow piece 28" by 36". From second piece of plush folded, place paper plate along fabric as shown. It should be in about 8" from edge. Draw along plate curve.

STEP 2:
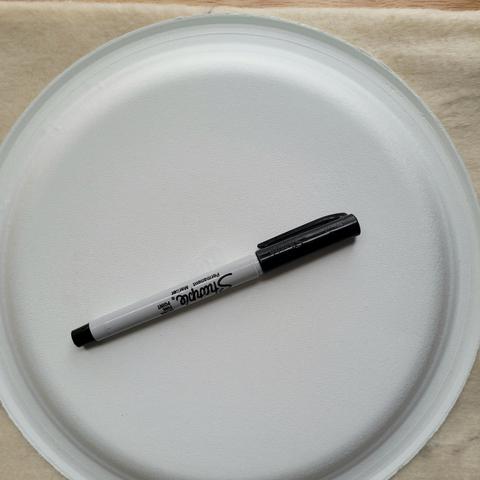
Lift plate up and move so upper curve is as shown. Draw along outer edge of plate. Lift plate again. The width of the curved drawn piece should be about 7". With plush left folded. Cut just inside drawn lines making the two oval face pieces. 
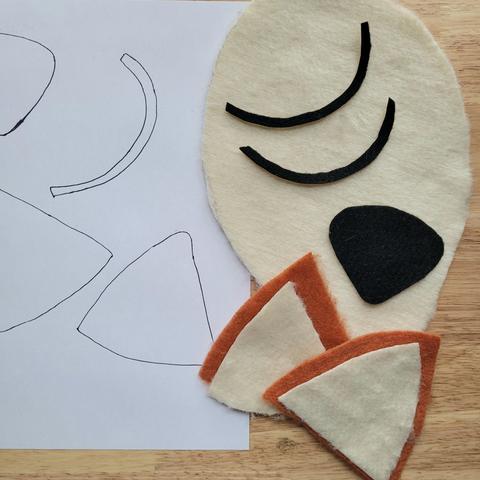
STEP 3:
Print out pattern and cut out pattern pieces as shown, two innner ears, two outer ears, two sleeping eyes, one nose.
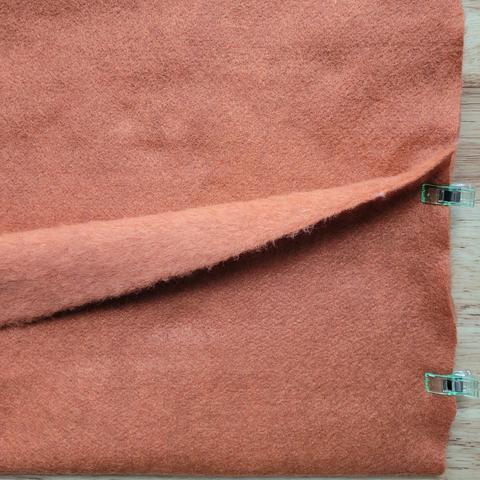
STEP 4:
Along the 28" of plush felt glue or sew a 1" hem. Fold plush felt piece wrong side out overlapping the two long ends with the folded finished edge on the inside. The pillow should measure 14" by 28". Clip sides. Sew or glue along short sides. TIP: When gluing lift the inner edges to glue both layers down. Leave clamps until dried thoroughly. 

STEP 5:
Turn pillow right side out. Smooth and flip over. Make sure plush nap is smooth and in a downward direction for front.

STEP 6:
Glue ear pieces together, center equally from each outside edge with 4" between them. Glue face pieces in place as shown.
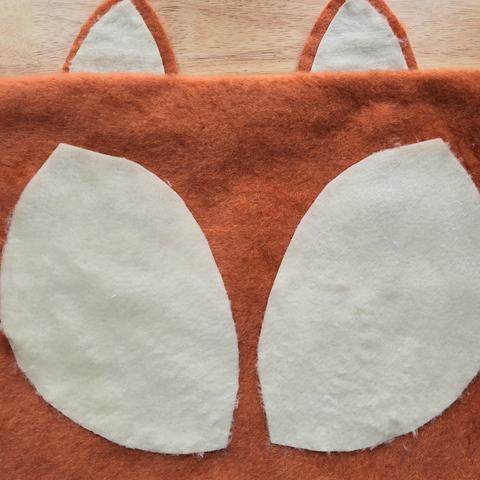
STEP 6: 
Adhere nose and sleeping eyes. If using PrestoFelt, you just have to peel off backing. It is easy to use for small pieces as the pattern can be drawn on paper backing.
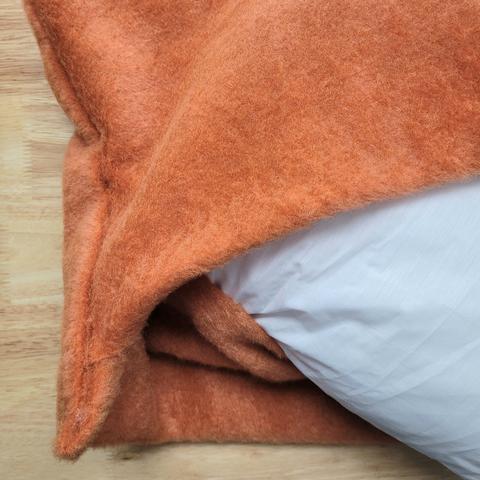
STEP 7: 
Adjust Lumbar Pillow Insert by simply unzipping and removing some poly-fil if desired or try pillow out first and adjust later. Insert pillow easily into plush envelope back. 

Cuddle up with with your Foxy Slumber Lumbar Plush Pillow, a warm throw, hot beverage and GET COZY! Enjoy relaxing and checking out all of the wonderful pillow ideas, enter the Give Away and then maybe take a nap. ZZZZZ 

Thank you for coming by! 


Posted by: Debra Quartermain AT 10:00 pm   |  Permalink   |  2 Comments  |  Email
Tuesday, December 07 2021
Rainbow Patch and Ribbon Hoop Door Hanger

Making gifts for my grandlittle girls is the best. What better gift than a Rainbow Patch and Ribbon Hoop Door Hanger for a girl who loves rainbows! This fun, vibrant Solid and Polka Dot Collection of Ribbons from Gwen Studios is the perfect collection for the project! Available at Walmart. They also have cute patches, I decided it had to be the Rainbow for Lucy! (Sponsorship by Gwen Studios, project and opinions are my own.)

There are 24 spools in the Solid and Polka Dot Collection with 2 yards on each spool. This makes for a great selection in creating any kind of rainbow project. Grosgrain ribbon is my favorite, for its weight and quality. It hangs nicely. The unicorn or mermaid patch would have worked well too but it had to be a rainbow! 

This project takes about an hour and requires very few supplies. 
You will need:
8" Hoop
9" x 12" craft cut Kunin Corduroy or Classicfelt; choice of color (I used Candy Pink)
Fabric Adhesive
Measuring tape, scissors

STEP 1
Cut felt piece in half and insert into hoop. Pulling tight, screw in place. Trim off excess on back. Add glue to keep secure.

STEP 2
Cut 12" ribbon lengths. I decided to follow the colors in the rainbow patch alternating pin dot and solid. For an overall pleasing composition beginning with the pink and duplicating both sides, working towards the middle.  

STEP 3
Keep adding ribbon lengths, gluing along the center side by side. 

STEP 4
To cover the raw edges of the ribbon along the hoop, add a length of the pink ribbon extending around side to back edge. Adhere in place. Add the rainbow patch at top of hoop. I added some patch letters I had. You could die cut letters as well. 

Such a quick and easy project, Rainbow Patch and Ribbon Hoop Door Hanger. Easy to personalize with the variety of colors in Gwen Studios Solid and Pindot Ribbon collection. Kunin felt comes in a wide variety of colors so this is a project for anyone little, tween or teen on your holiday or anytime gift list! 

Thank you for visiting!
Lets connect on IG @debraquartermain

Posted by: Debra Quartermain AT 01:00 pm   |  Permalink   |  3 Comments  |  Email
Facebook
LinkedIn
Add to favorites
Twitter
" "
Debra Quartermain Design

 Magical Mimi to Grandlittles, I love to create, decorate & celebrate. Sharing  joy and inspiration from our 200 year old home, Quartermain House B&B on the east coast of Canada.

" "
Facebook
LinkedIn
Add to favorites
Twitter
    Sign Guest Book  View Guest Book 

    Debra Quartermain Design
    Fredericton, NB
    Canada
    Web Design Debra Quartermain
    Illustration Deborah Peyton
    Content copyright Debra Quartermain
    Email: debraq53@gmail.com

    Design Your Own Website, Today!
    iBuilt Design Software
    Give it a try for Free