#
Debra Quartermain Design
 Making & Celebrating 
Thursday, July 08 2021


Harry Potter fans! His birthday is coming up this month!  We are celebrating with Team Creative Crafts-Harry Potter Edition, link in sidebar to all of the bloggers involved! I am a huge fan and admit to watching all of the movies several times! 
 

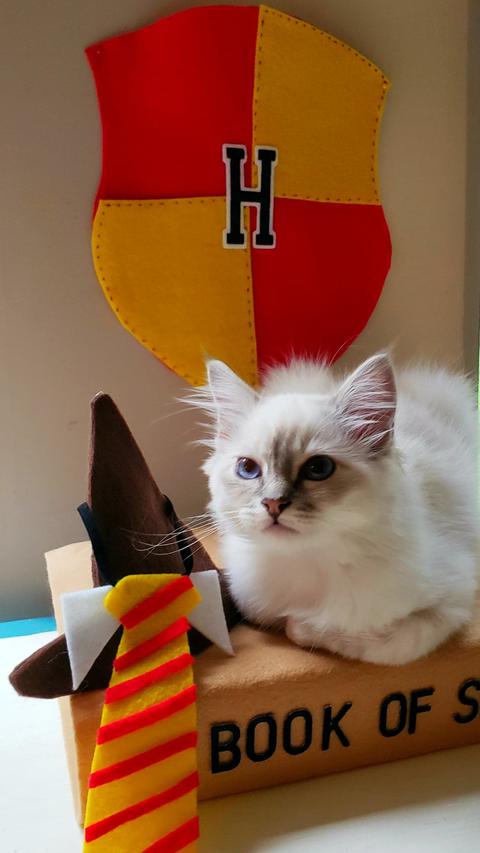
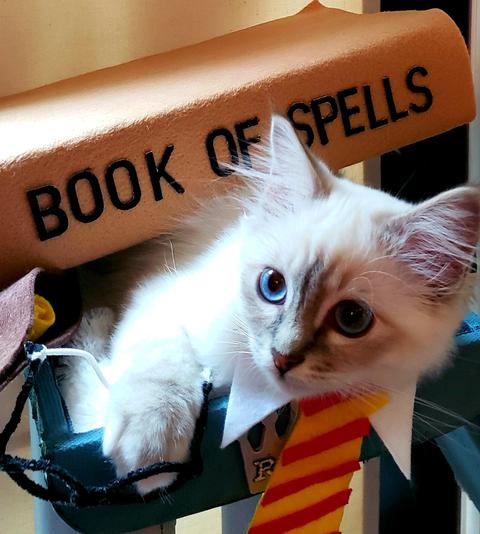
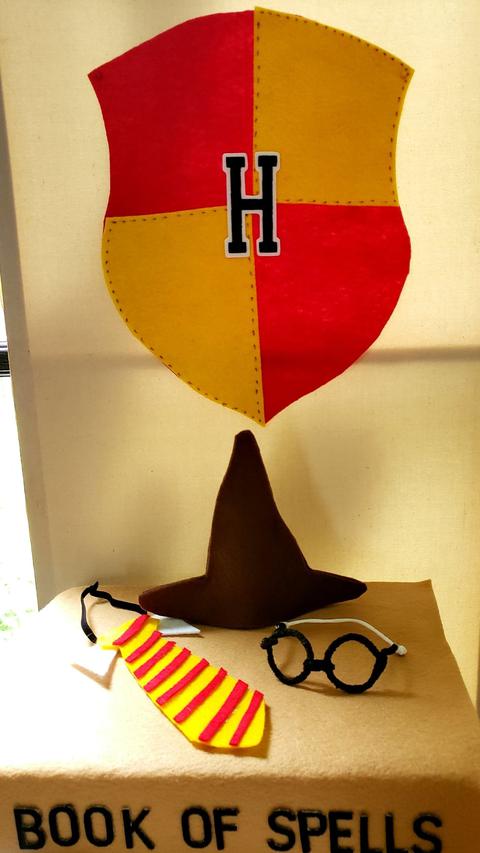
Harry was a member of the House of Gryffindor so of course cat is too! I created a setting for Rory using Kunin Felt. A crest of course, school tie, sorting hat and a Book of Spells. The glasses are made from a soft chenille stem, looked super cute on Rory for two seconds and then became a chew toy. 


Let's get started!

You will need:

Kunin Classicfelt 9" x 12" craft cuts: 1 of each, Red, Yellow, Walnut, scrap of white

Kunin Premium Felt 12" x 18" craft cut: 1 Cashmere Tan

Joy SA Applique Letters

Beacon Fabri-tac

10" soft elastic 

Permanent fine tip marker, black

Paper

Scissors


STEP 1 

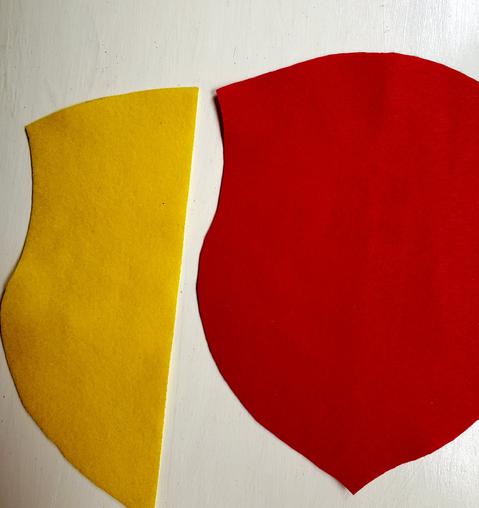
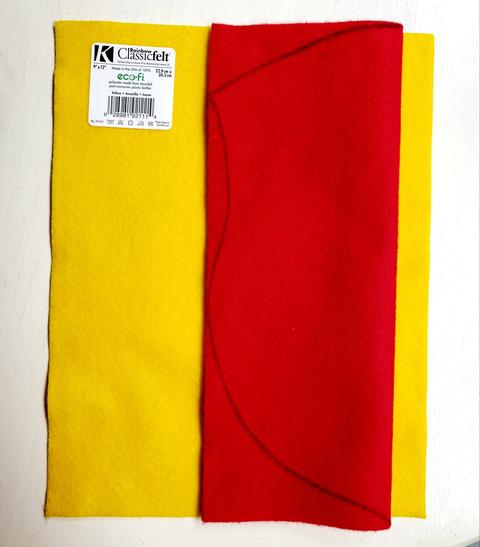
I did a search on Pinterest for an easy crest shape for a guide. By folding the red craft cut in half lengthwise you can trace a simple curve outline and cut it folded. 


STEP 2

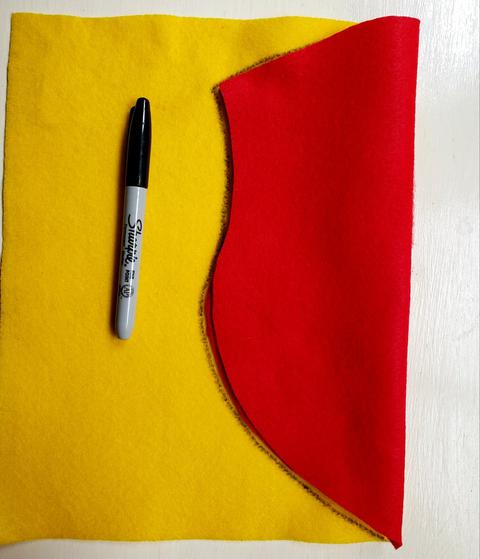
Place cut red piece still folded on yellow lining up fold with edge of felt piece. Draw around the half shape in yellow. Cut out and then cut yellow piece in half again to alternate crest piece colors. Glue in place. Use fine tip marker to create stitch lines. 

STEP 3

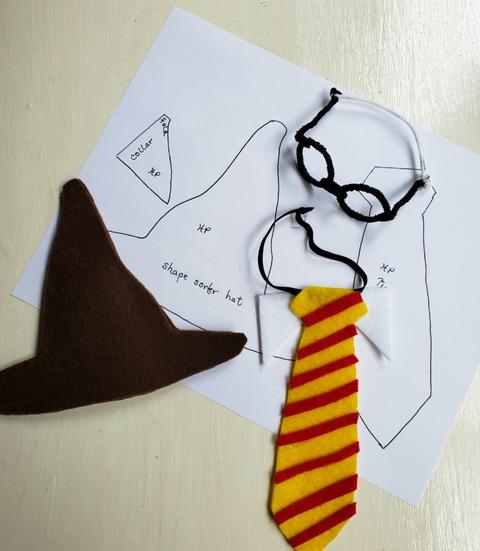
Again searching on Pinterest there are many sorting hat and tie patterns. The sorting hat pattern from Popsugar. There is a cute felt tie pattern over at Wild and Wonderful.  I drew mine out on a piece of paper so I could adjust the sizes some. The tie is a little long for Rory, the idea was to keep him posing with treats but he couldn't see the treats over the tie length. He still sat and then laid down, he likes the Book of Spells, I think it must be the soft felt or the box I used. (His kitty food came in it. ;)


STEP 4

Cut out two sorting hats from the walnut craft cut. Glue along edges leaving bottom open. Stuff with scrap felt to stand or if you have a very quiet cat, it would fit with added elastic. Our kitten was okay with the tie but a big no to the hat and glasses. Cut out one tie and a double triangle piece for a collar. Glue white triangle piece behind tie. Cut narrow strips of red fronm left over scraps. Glue to tie. Glue an elastic piece to back of tie. Measure around neck and tie so it is loose and easy to slip on and off. Rory got his off just fine by himself. 

STEP 5 

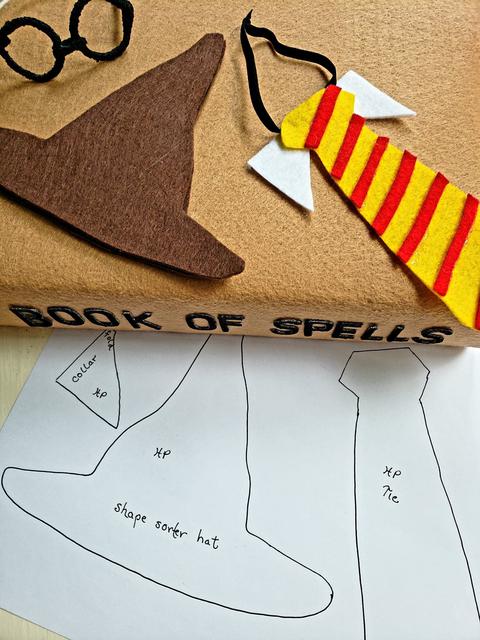
The Book of Spells was the easiest! Rory's kitten cans come in this cardboard case. It measures about 7" by 10". I simply wrapped the 12" by 18" craft cut around the box, and glued. It has a 1" overhang on either end. It is open at the back. Glued in place. Added the Letters to the side and a larger H to the crest. 


These pieces would be suitable for dolls or to use in a birthday setting. Making larger ties to wear and creating Book of Spells Treat bags. 
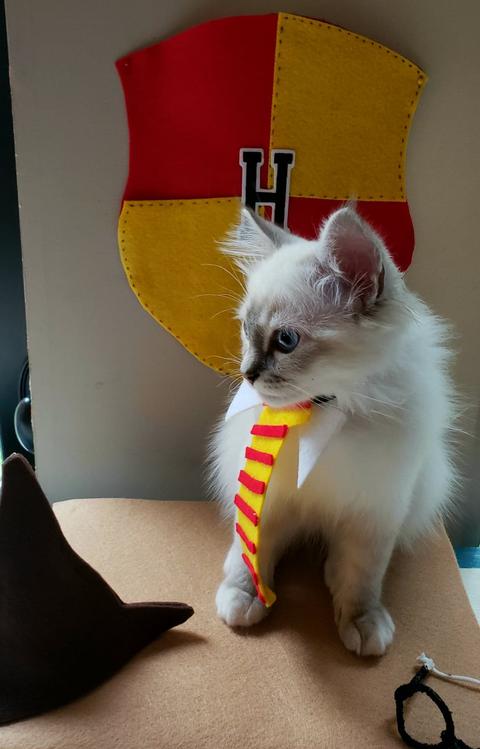


Rory looks very handsome as a House of Gryffindor member. 
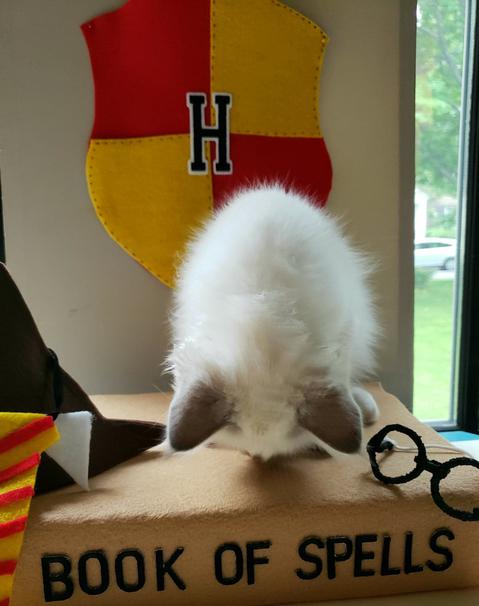

I think Rory at this point in the photo shoot was looking for spell of his own. 
 

Check out all the crafty Harry Potter posts with Team Creative Crafts-Harry Potter Edition. There is a link in on the Home Page for the Rafflecopter Giveaway of a Harry Potter Lego Set!  
 

Want to see more of Rory, catch him on Instagram, @reignofrory. You can follow me too @debraquartermain. 😊 
Thanks for coming by!

Debra

Posted by: Debra Quartermain AT 10:00 pm   |  Permalink   |  2 Comments  |  Email
Thursday, July 08 2021

I am excited to share these beautiful ribbons from Gwen Studios!  With so many to choose from I created some Easy Ribbon Wreath Decor with Gwen Studios collection.  Several designers are participating in this DCC Blog Hop (Designer Crafts Connection) and have created inspiring projects.  I was provided product to use but all comments and opinions are my own.

Burlap ribbon often is stiff and scratchy but Gwen Studios burlap ribbon is soft and comes in several colors. I have been wanting to add a pretty wreath to my kitchen tablescape with a soft natural look. The burlap ribbons come in a pink, mint green and natural. Gwen Studios also has premade matching bows. Quick and easy accents! Their collection is available at Walmart

To make the Burlap Bow:

Gwen Studios Mint Green Burlap Ribbon
Gwen Studios Natural Burlap Ribbon
Gwen Studios Pink Burlap Ribbon
Gwen Studios Natural Burlap Bows
Wreath
Flowers
Chenille Stems or Wire
Hot glue
Scissors
Measuring Tape
 

Make the Bow:  
Leave a length of ribbon hanging for the tail. Make a loop 2-3" and fold ribbon back and forth twice creating equal loops. Add the next ribbon to the center of the first loops repeating side to side. Wrap with chenille stem. Add a premade bow in the center to finish it off. 

Add the Flowers:
Glue bow to wreath and add flowers beginning with the center flower. 
 

Hanging in my kitchen window is a boxwood wreath. I made another bow and it was a perfect addition!

Look how cute our cat Reign of Rory is wearing a Gwen Studios bow!

We have recently painted the house exterior and the playhouse for the grandlittles. Of course the play house front door needs a new wreath!

I chose the Taffy Patriotic Ribbon Collection. 

Gwen Studios Patriotic Taffy Striped Ribbons
Gwen Studios Patriotic Striped Bows
 

I used a simple embroidery hoop to make the playhouse wreath. Extra sprigs of boxwood were added easily by gluing from the back of the hoop.

Wrap the hoop till it is covered. 

Tie separate bows and layer together. Tie with chenille stem. Glue to top of hoop.

Added the Kindness message and tiny pot. How cute is that!

Here it is hanging on the front of the playhouse. Hope you have enjoyed my Easy Wreath Decor with Gwen Studios. Looking for more inspiration, Check out the other projects in the DCC connection! DCC Blog Hop

Thanks for stopping by! Want to follow me @debraquartermain on IG! 
Creatively yours!

Posted by: Debra Quartermain AT 02:00 am   |  Permalink   |  0 Comments  |  Email
Facebook
LinkedIn
Add to favorites
Twitter
" "
Debra Quartermain Design

 Magical Mimi to Grandlittles, I love to create, decorate & celebrate. Sharing  joy and inspiration from our 200 year old home, Quartermain House B&B on the east coast of Canada.

" "
Facebook
LinkedIn
Add to favorites
Twitter
    Sign Guest Book  View Guest Book 

    Debra Quartermain Design
    Fredericton, NB
    Canada
    Web Design Debra Quartermain
    Illustration Deborah Peyton
    Content copyright Debra Quartermain
    Email: debraq53@gmail.com

    Design Your Own Website, Today!
    iBuilt Design Software
    Give it a try for Free