#
Debra Quartermain Design
 Making & Celebrating 
Monday, May 10 2021

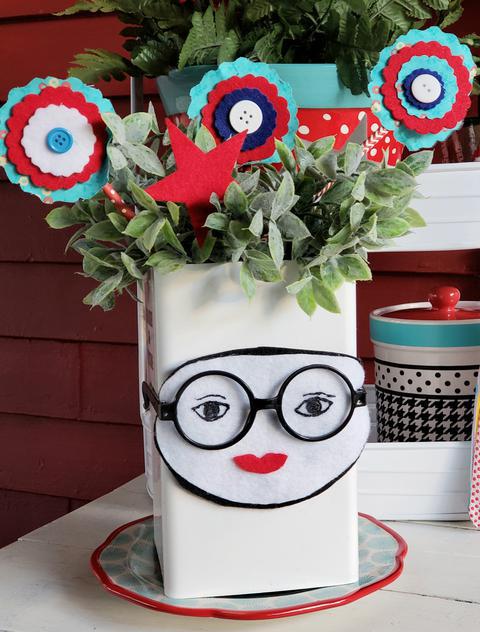
I am all about plants and gardens right now. These trendy head planters I am seeing always make me smile. I designed a Whimsical DIY Head Planter which is a fun easy no sew project. This post is sponsored by Fairfield World, the content and comments are original and my own. I used Poly-pellets to give my planter some weight and shape so it would stand with the plant in it or outside not blow over. 

Materials:
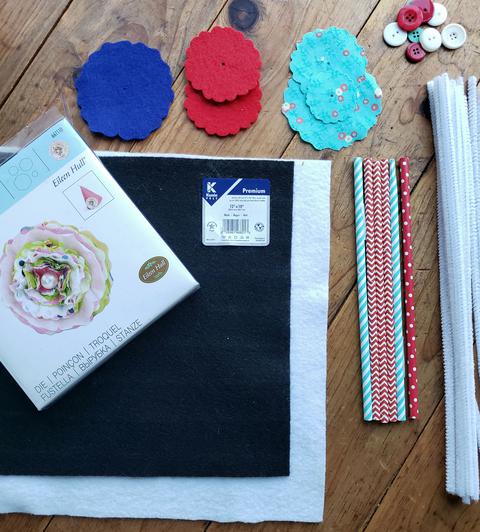
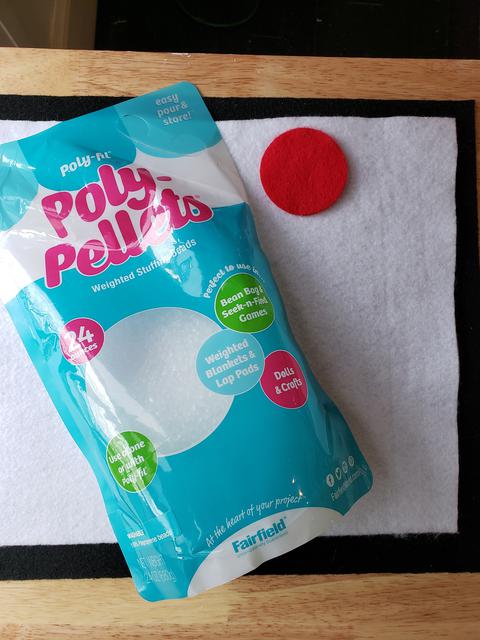
24 oz bag Fairfield World Poly-pellets   
12" x 18" craft cuts Kunin Felt Premium: 1 White, 2 Black 
9" x 12" craft cut of print felt or fabric
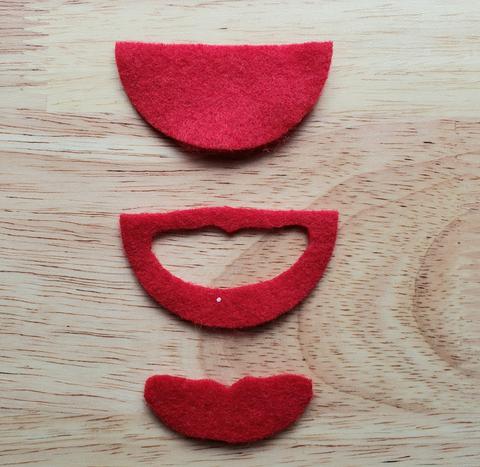
2" scrap red felt for lips
Dimensional black paint
Fabric or felt glue
Scissors, rulers, clips or pins, chalk, marker or pencil, 2" and 6" circle template
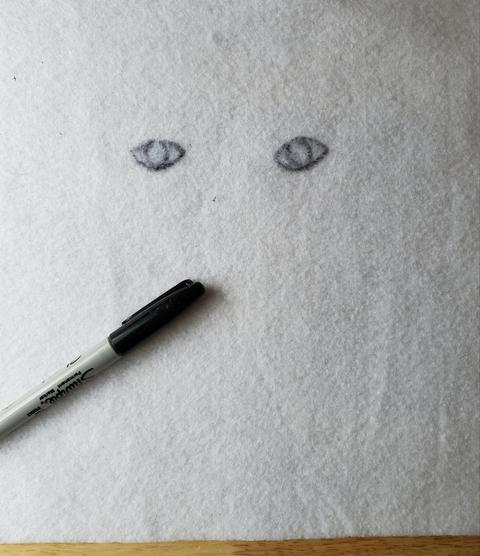
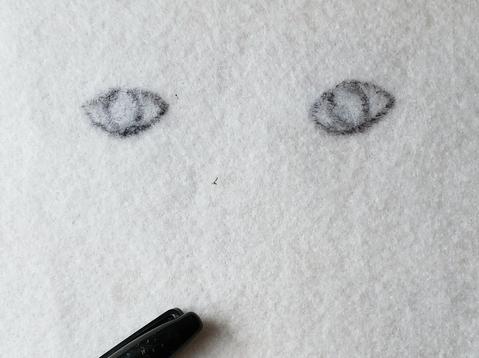
 

STEP 1

Find the center of the white piece lengthwise. Measure down 4" from the top for eye placement. Mine are spaced about 2" apart, 1" on either side of center line. Pencil in and then go over with dimensional paint, let dry. 
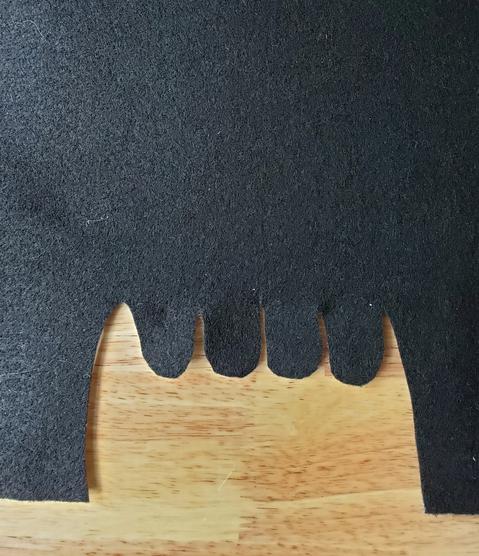
STEP 2

For the hair, here is where you can have a little more fun creating your "do". At the center of the black piece of felt placed as shown measure a rectangle 6" across and 5" down You can use chalk to outline it. Now ready to style some bangs!  Draw with the chalk using this photo as a guide to make a hair style. Cut the bangs carefully with scissors. 

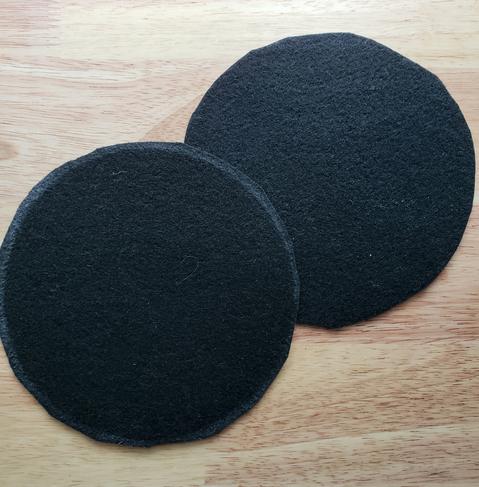
You will also need two 6" circles cut from the second piece of black felt.
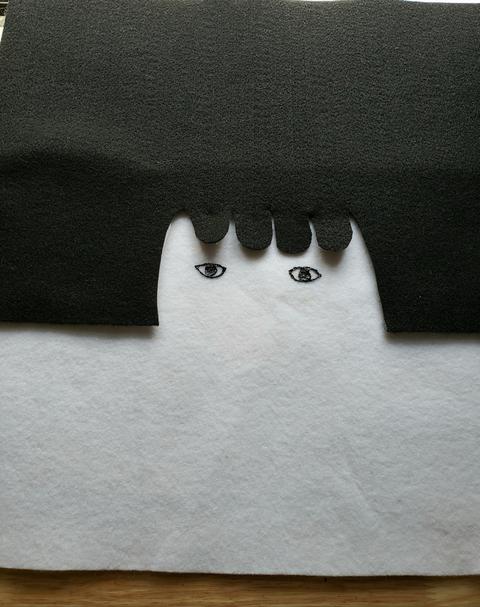
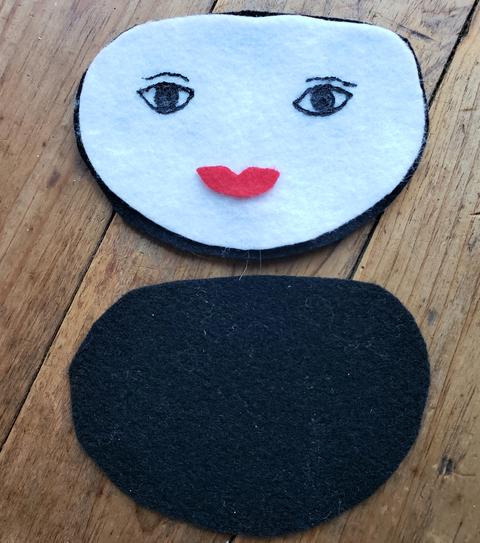
STEP 3

Take the black piece and place over white aligning eyes and hair. Trim hair if it needs adjusting. Glue the two pieces together.

STEP 4

The lips. Take half a 2" circle of red felt. Fold in half again and cut a cute lip shape. Glue to face.

STEP 5

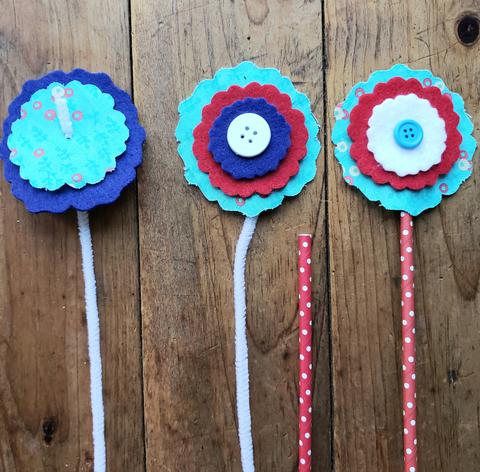
Cut the other 9'" by 12" piece of felt or fabric in half so you have two pieces 4.5" by 12". Center pieces at front and glue along white to create clothing. You could also  paint a piece of felt with dots or use buttons for polka dots. Trim ends even with white felt at ends. 

STEP 6

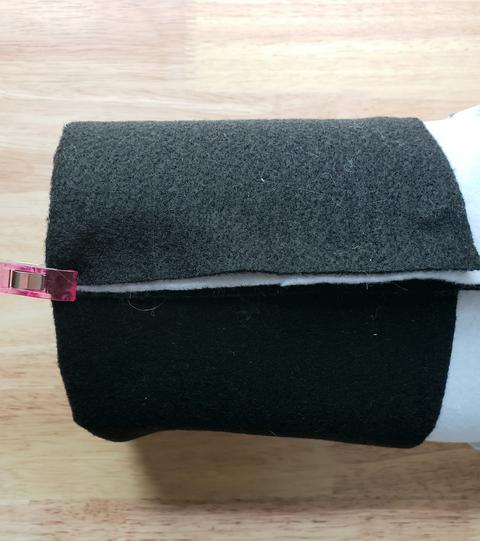
Fold the remaining black felt hair piece over white to the back.  Glue in place. Fold the entire piece into a cylinder, overlapping ends slightly. Glue and clip in place until ompetely dry.  

STEP 7

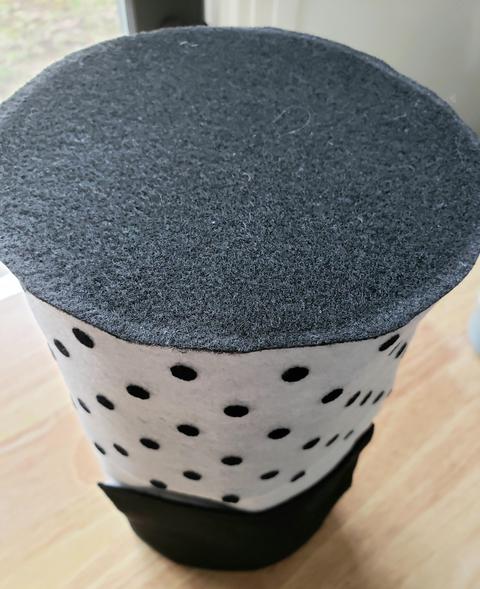
Glue a 6" black circle over bottom of planter. Glue in place. Trim off any excess felt carefully. 

 STEP 8

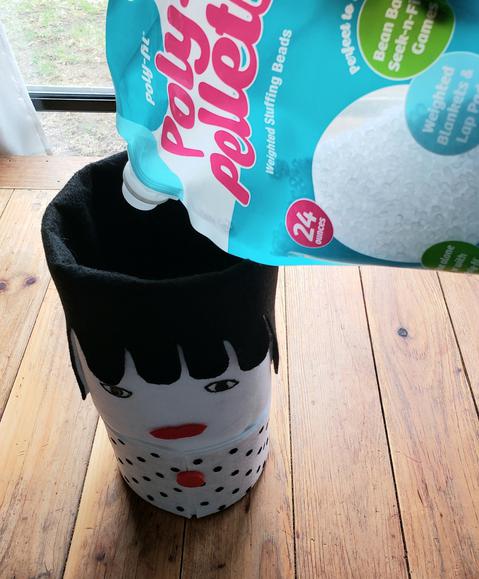
The 24 oz. container of poly-pellets has a handy pouring spout, so convenient. Now I poured the pellets directly into the bottom but you can also place them in plastic bag and put in bottom. I filled the planter about 4". I then placed the second felt circle on top of the pellets and glued in place. Both the poly-pellets and felt can get wet without any damage and will dry easily. Now just add your favorite plant!

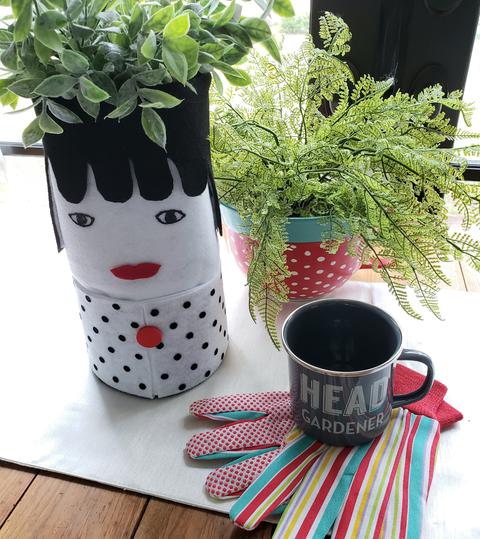
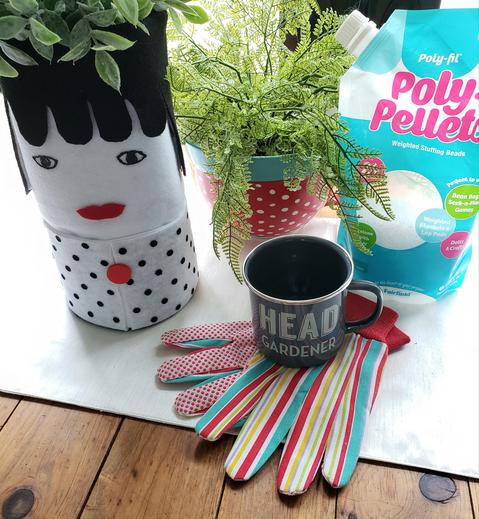
Of course when I saw the mug "Head Gardener" I just had to get it! This setting makes me smile. 

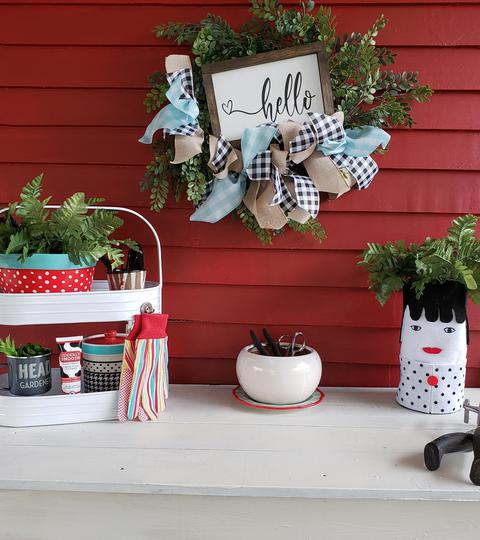
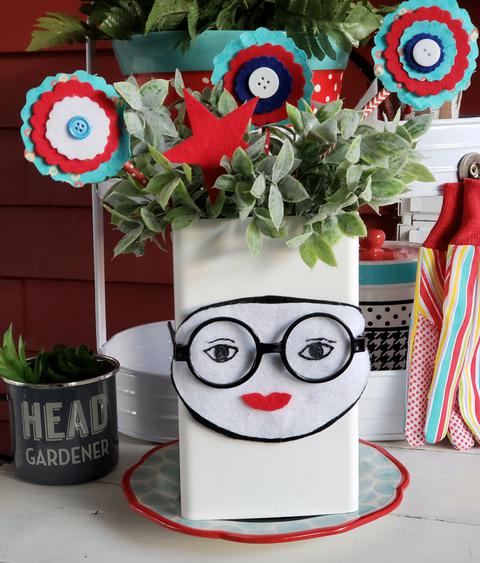
I have a new potting bench area and love this Whimsical DIY Head Planter in the space. How cute is that! I need to make a family of pots. 

Thank you for stopping by my creative corner! You can find me on IG @debraquartermain and Fairfield World @fairfieldworld.
Debra

Posted by: Debra Quartermain AT 01:30 pm   |  Permalink   |  0 Comments  |  Email
Friday, May 07 2021

Have you noticed all the trendy face and head planter pots? They are so fun and whimsical! I used a recycled container and here is my How to Make Face Planter Pot.  I give the pot a Patriotic flair with the addition of DIY felt flowers for the Team Creative Crafts Patriotic Edition. I like to use home decor items from around the house and add details to make them special for different holidays. 


The base for this fun planter were a couple of plastic cubes I glued together. They came with our new arbor assembly and held little bits. I kept them to make something and a whimsical planter was perfect. I used Kunin Felt for the face as it is weather resistant. Now I have a fun addition for my new potting bench. 


Let's get started! 
You will need a container, the face is about 6" but can be adjusted in size. My conta8ner is the same width of 6". 
9" x 12" craft cuts of Kunin Felt: White, Black, Red, Royal Blue    
Fabric Scraps       
White chenille stems    
Straws     
Buttons    
Flower Die, I used Eileen Hull's Flowe Die with Sizzix  (or cut free hand flower shapes)
Fabric Glue    
Dimentional paint in black   
Scissors, ruler, marker, chalk, pencil,  6" and 2" circle templates 

Step 1:

Cut a 6" circle from white and black felt. Trim in to oval shape. Cut the black one slightly larger than the white. Draw eyes with pencil on white. Paint and let dry. Cut 2" circle in half. Fold one half and curt a small lip shape. Glue to face. Glue white face over black back. Glue to front of container. I had these cute Harry Potter glasses that were a perfect fit! 

Step 2: 

Die Cut felt flower shapes from fabric scraps and red, white, blue felt. Layer flower shapes making as many as you want. 


Step 3: 

insert chenille stem through each flower stack, bend end. Glue button over chenille stem at center. Insert straw. Bend end over slightly. Cut off excess. Repeat for each flower. 
 

Place greenery in your Face planter and add felt flowers. Add some felt stars if want and as many flowers as your container needs. 


Want to be inspired by more creative Patriotic crafts, just click the link in the sidebar! 
 

Thank you for enjoying my How to Make Face Planter Pot, such a fast and easy DIY! 
 

Creatively yours,

Debra


Posted by: Debra Quartermain AT 12:00 am   |  Permalink   |  0 Comments  |  Email
Facebook
LinkedIn
Add to favorites
Twitter
" "
Debra Quartermain Design

 Magical Mimi to Grandlittles, I love to create, decorate & celebrate. Sharing  joy and inspiration from our 200 year old home, Quartermain House B&B on the east coast of Canada.

" "
Facebook
LinkedIn
Add to favorites
Twitter
    Sign Guest Book  View Guest Book 

    Debra Quartermain Design
    Fredericton, NB
    Canada
    Web Design Debra Quartermain
    Illustration Deborah Peyton
    Content copyright Debra Quartermain
    Email: debraq53@gmail.com

    Design Your Own Website, Today!
    iBuilt Design Software
    Give it a try for Free