My grandlittle girls love the 18" dolls and yes so do I. We also are makers. So we had lots of creative fun making the No Sew DIY 18" Doll Felt Poodle Skirt. Such an easy project to decorate and personalize. The skirt is a basic circle but look how super cute these turned out! Great project for any doll lover. It can be resized to fit a smaller doll. Just cut a smaller circle.

A little history about the skirt which I wore as a young girl too! In 1947 the poodle skirt or circle skirt was created by a singer and actress Julie Lynn Charlot, she had limited funds, her own unique sense of style and the holiday season had arrived. Her mother owned a factory that used felt. Without any sewing experience Juli DIYed herself a felt skirt with a pair of scissors. She cut a large circle, cut out the center for her waist and glued on some decorations. It was a hit at the party and began her going into business manufacturing the skirts. The iconic "poodle" design came later.
Let's make the Skirt:
(1/2 yard of felt will make 2 skirts)
Kunin Felt Brand Classic or Premiumfelt:
(Available at most major retailers and online)
Candy Pink, Lagoon and Red
20" x 1" piece of felt for waistband
9" x 12" craftcuts Kunin Felt Brand in complimentary colors
1 1/4 yards of trim for each skirt, ric rac, pom pom, fringe (Trims by the Yard has a great selection)
Assorted Buttons
1 Hook and Loop Circle or Snap
Circle Template 15" (I used a lampshade)
Adhesive, scissors, ruler, pencil; Optional pinking shears, flower diecuts
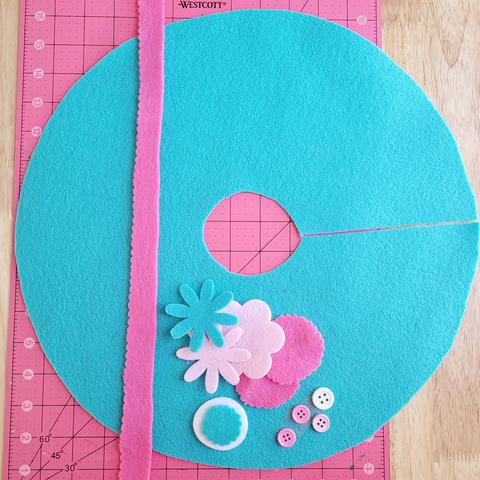
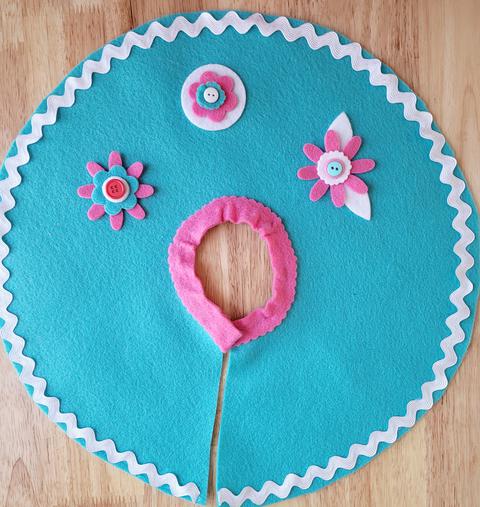
STEP 1:
Draw a 15" circle on the felt. Cut. Fold in half and cut to center. Cut a 2.5" to 3" circle out of center. (Depending on brand of doll, the waist varies slightly, please measure doll.) Cut an 18" by 1" waistband, plain or with decorative scissors.
 -
-
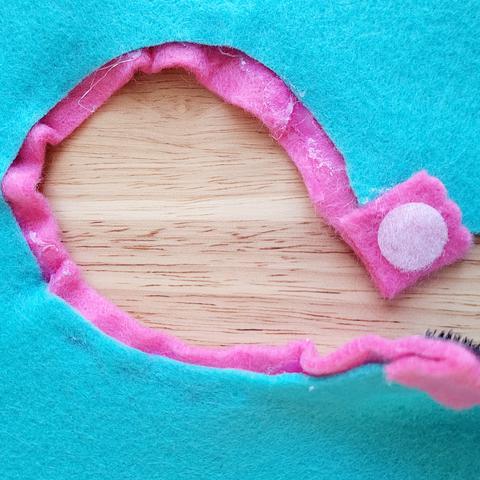
STEP 2:
Leave 1 1/2" beyond the circle waist and glue waistband as shown. Slightly pleat as you go. For younger children this step can be done ahead and hot glue works great for this step. Trim the opposite end at 1 1/2" beyond waist. Try on doll. Fold the extended ends under to overlap. Remove from doll.

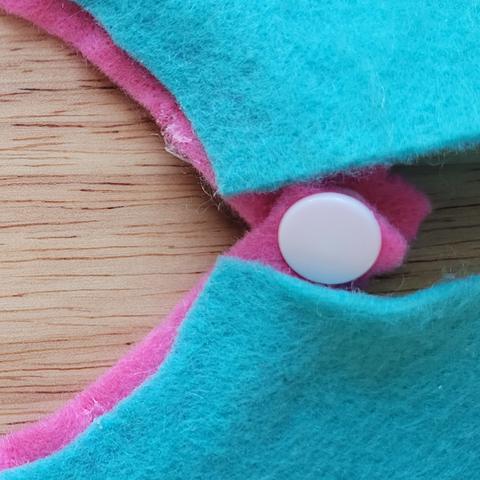
STEP 3:
Glue the folded ends under. Adhere hook and loop to either side of ends. You can also use a snap tool as shown below. (For younger children the hook and loop would be easier. (Also note my first skirt has some messy excess glue on back. I trimmed some off carefully. It is not visible from the front so do not be too concerned with the back of waistband.)

Another fun fact and still true today. "The skirt proved most popular with teenage girls, and in 1952 mail-order catalogs dedicated to poodle skirts were made. Known as the "first teenage fashion trend ", these skirts were perfect for dancing. It could also be said that the skirt's ability to be customized led to its success with teenagers, as it reflected individual personalities."
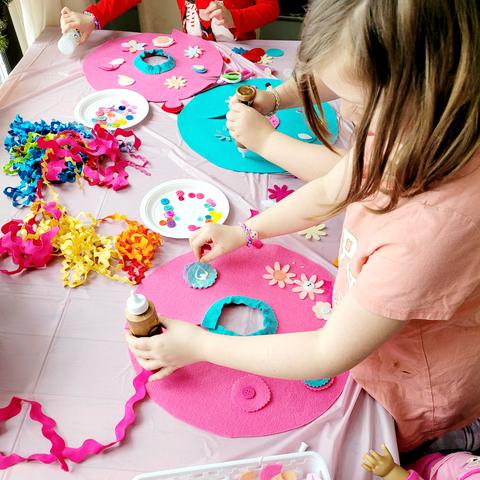
STEP 4:
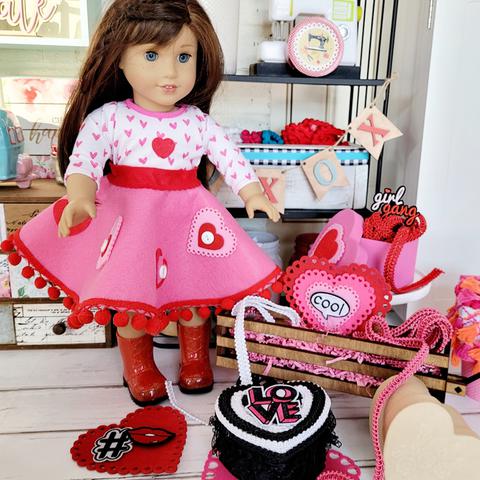
The best part, decorating! Trims, felt flowers, buttons and felt scraps were placed on the table, scissors and adhesive. Tacky glues will take a few minutes to dry. As you can see the girls had a lot of fun and each very creative in their styling of their skirt.
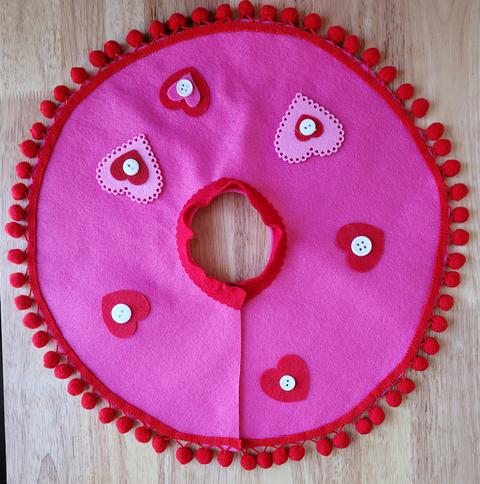
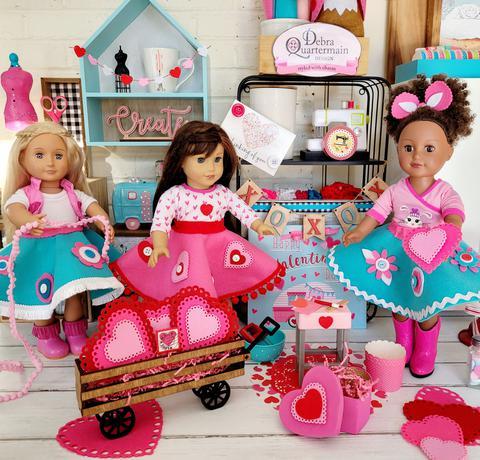
This is a great project to decorate as it can be laid flat. Of course with Valentine's Day around the corner there is a Valentine version too.
Each skirt is unique. The dolls are going to need a skirt for every holiday.
The skirts are simple to put on and off and fun to style. These dolls are accessorized from the wardrobe stash. Those boots!
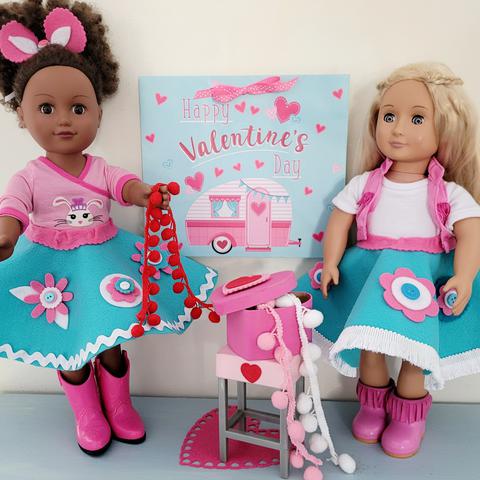
There is a lot of Valentine activity happening! Such fun crafting with the grandlittle girls and putting together some kits to go out to some other little girls too!
Have fun making this No Sew DIY Felt Poodle Skirt. Great to share and pop in the mail to a special someone!
If you want to follow this Magical Mimi on IG @debraquartermain.


 -
-


