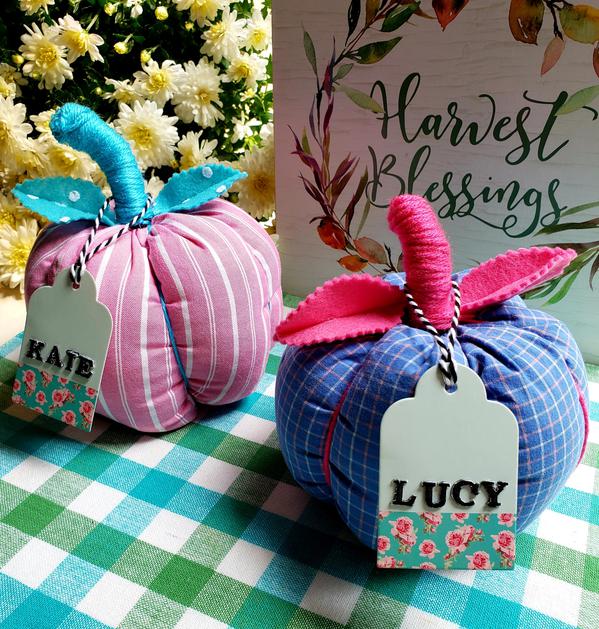
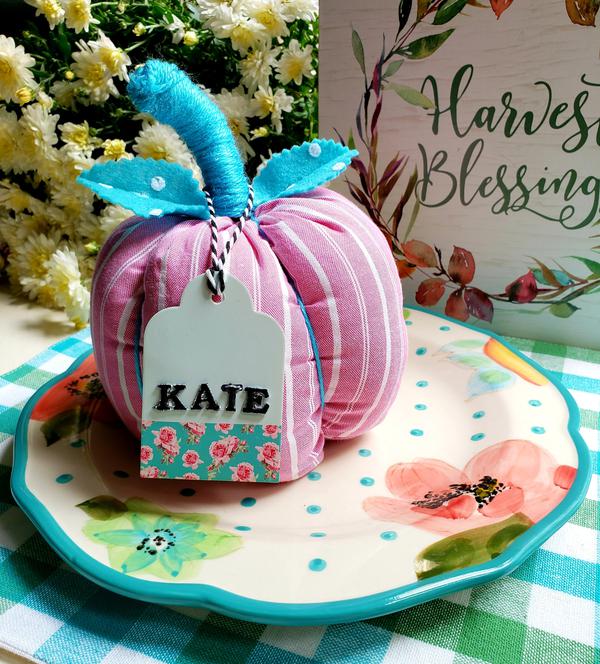
It is pumpkin season! My No Sew Recycled Fabric Pumpkins are made from the sleeves of my husband's cast off shirts. This year I was inspired by the fabuous Beth Eaton's Stuffed Fabric Pumpkins, part of Fairfield World's 80th Birthday Celebrations! Beth gives a full tutorial and video on her blog. These are so easy to make!
I am very excited to be part of the Creative Crafts-Halloween Edition. Link in Sidebar to all of the talented crafters and designers taking part! This is Day 3!
Now let's make a No Sew Recycled Fabric Pumpkin!
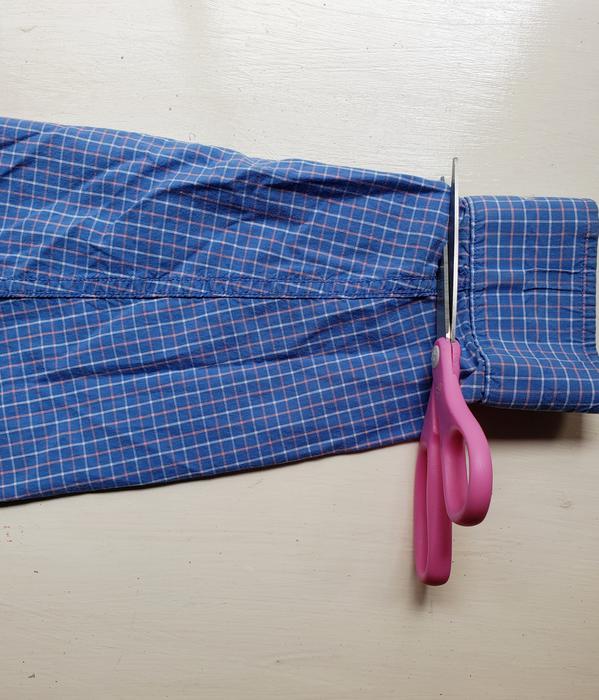
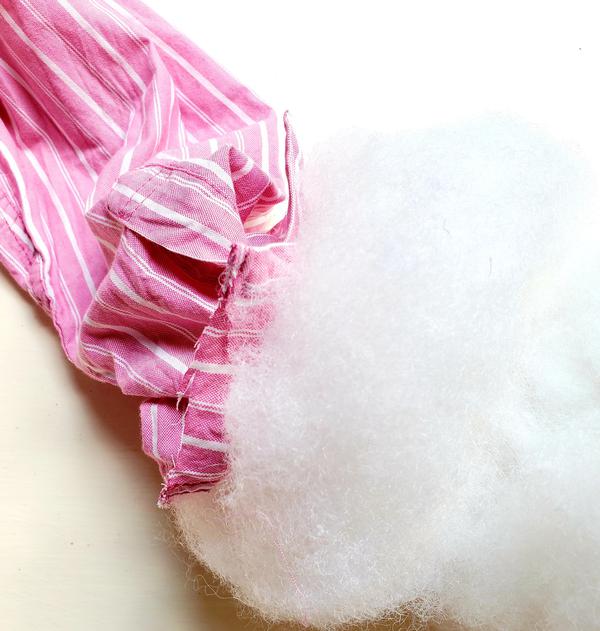
For the fabric you need a long sleeve shirt. Cut off the sleeves and cut off the cuffs.
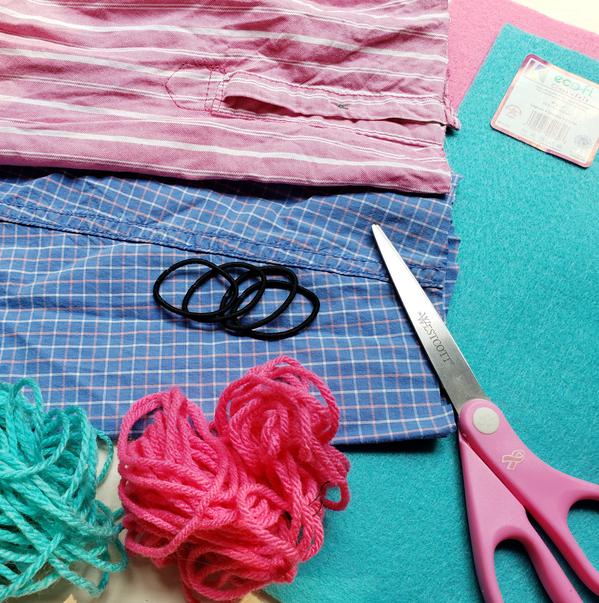
You will also need:
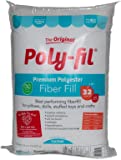
Fairfield World Poly-fil
Twine or Yarn
9" x 12" craft cuts Kunin Felt Brand, color of choice
2 Hair Elastics
Hot Glue and Gun
Scissors
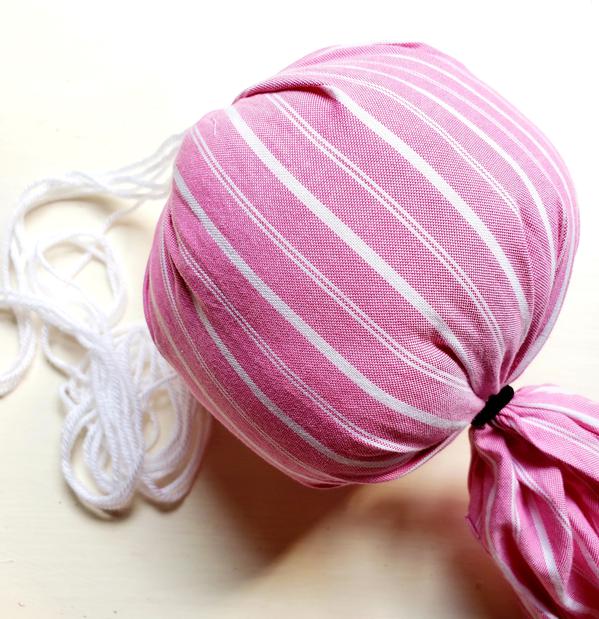
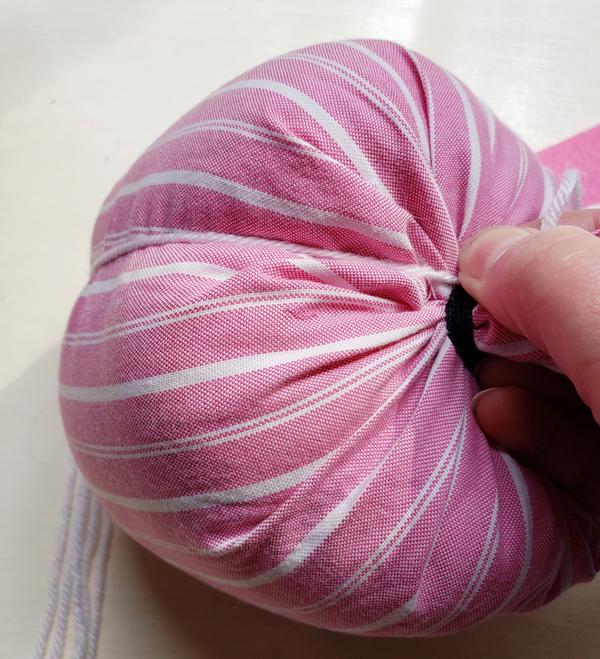
In making the pumpkin with a sleeve you do not have to glue a seam. Follow Beth's instructions for the yarn or twine and tying off bottom of pumpkin. The sleeve is tapered so I used the wider end of the sleeve for the pumpkin. Stuff halfway with Fairfield Poly-fil. The hair elastics are fabulous for tying off the pumpkin. Had extras of those on hand too!
Pull the yarn or twine tight up over pumpkin and wrap around excess fabric at top.
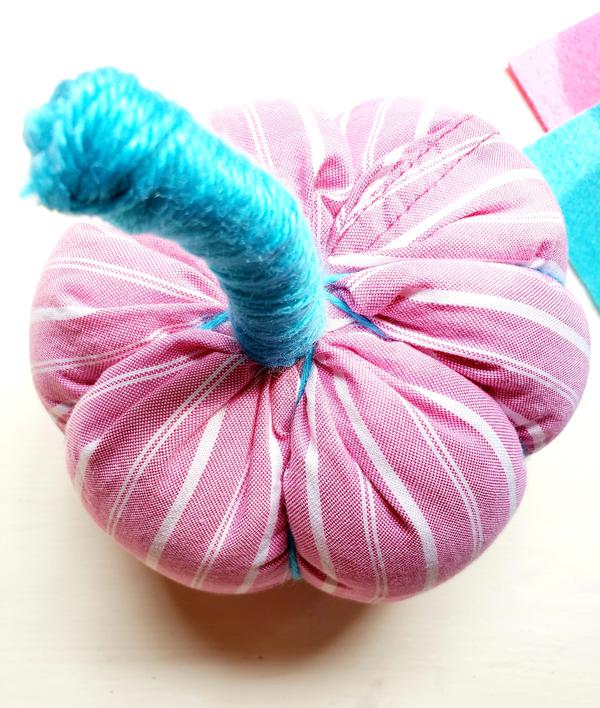
I cut off the excess fabric with a few inches of yarn left and used the hot glue to wrap right over the raw edge at the top.
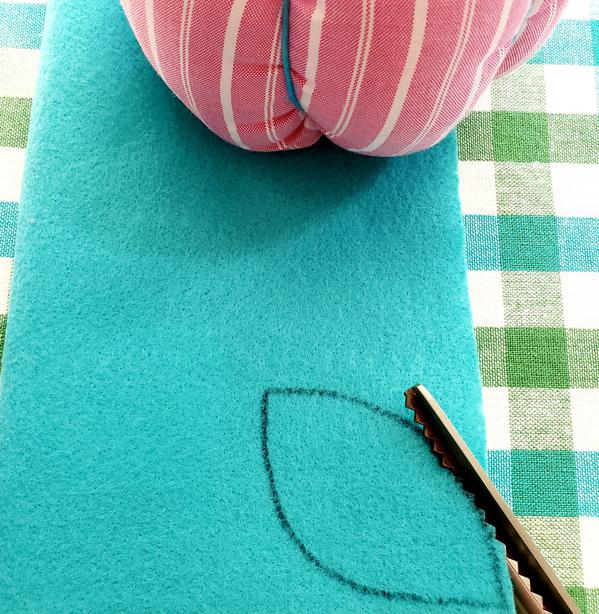
Cut felt leaves with scissors or pinking shears if you have them. You could also die cut them as well.
Glue a thin seam down center of leaf. Press a seam, glue to top of pumpkin.
I am planning to make everyone their own personal pumpkin for Thanksgiving. My husband has lost wieght and got himself in great shape and health however he is sad about losing some great shirts including his favorite fishing shirt! So guess what pumpkin he is getting.
Check out more wonderfully creative Halloween crafts by clicking on the link in the sidebar!
Till next time!
Debra
Find me on IG @debraquartermain
Posted by: Debra Quartermain AT 12:15 am
| Permalink
| Email
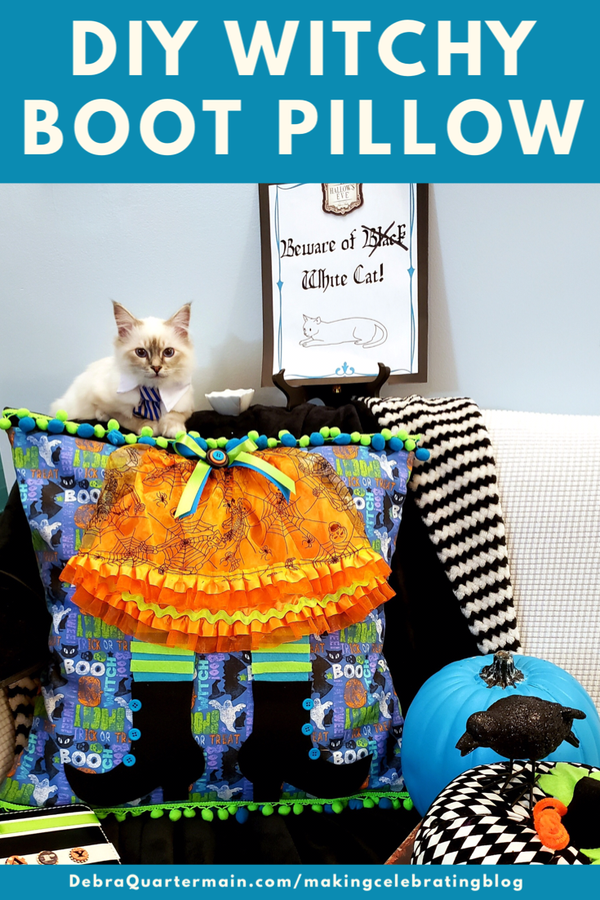
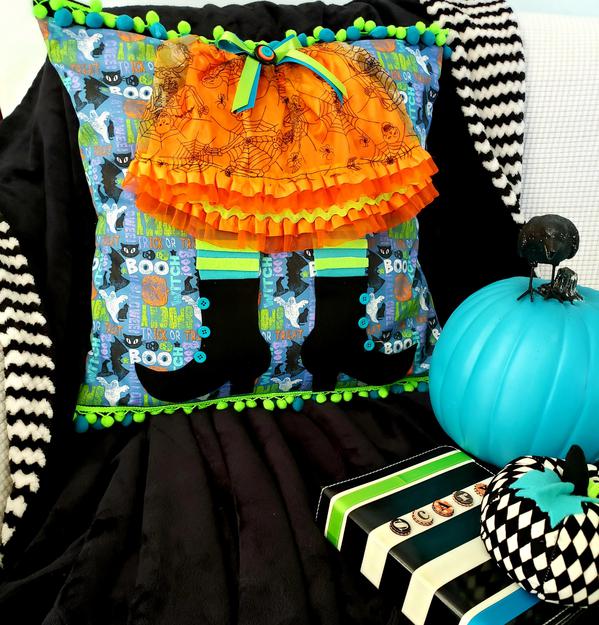
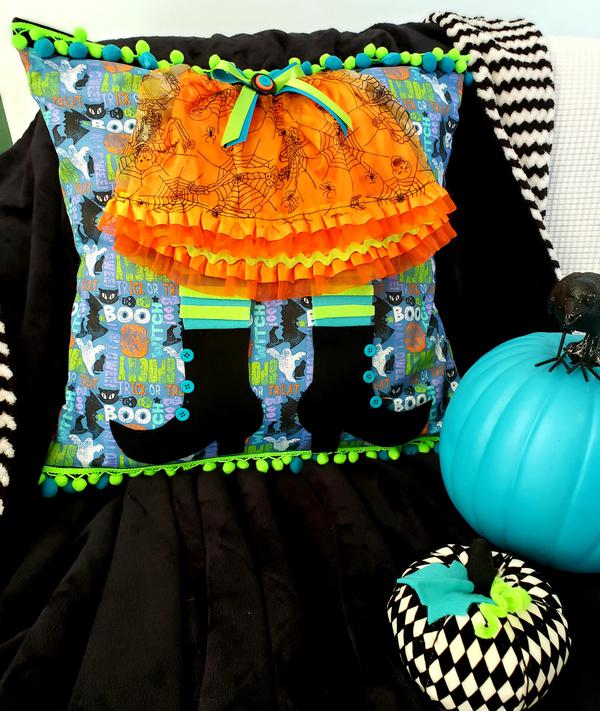
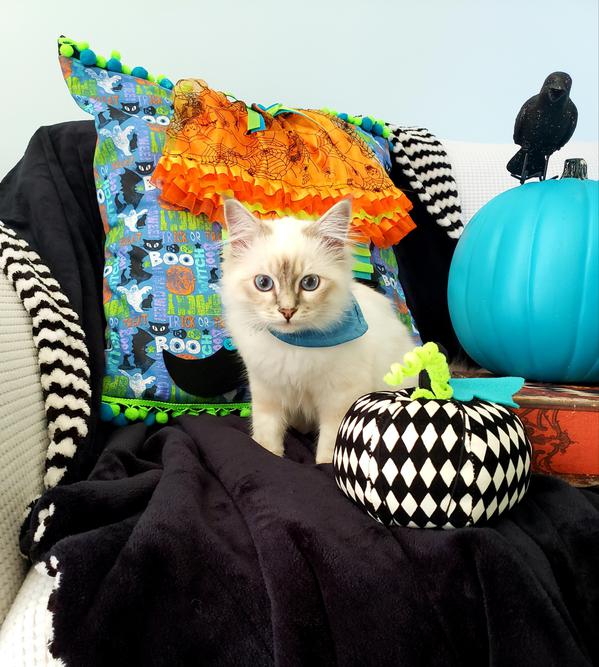
Fall is coming and bring on the decor! Decking the halls and everything else for Halloween this year in punchy colors! Check out this DIY Witchy Boot Pillow I designed. (This post is sponsored by Fairfield World but all opinion and comments are my own.) This year is extra fun for me along with the grandlittles we now have our Birman kitten Rory to add to the Holidays! Here he takes his role of Scary Watch Cat very seriously.
In designing this pillow I used some of my very favorite products, The Premier pillow insert from Fairfield World. Comfy and keeps it's shape felt from Kunin Felt Brand, punchy pompom trims from Trims by the Yard. The grandlittle girls had outgrown the dollar store Halloween skirt so I cut it in half added ricrac for the witches skirt. Seriously what witch would not like a ruffled with ribbon and tulle!
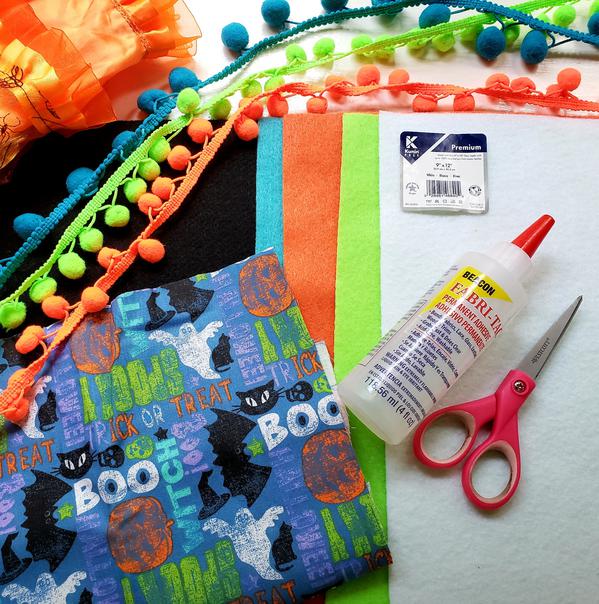
You will need:
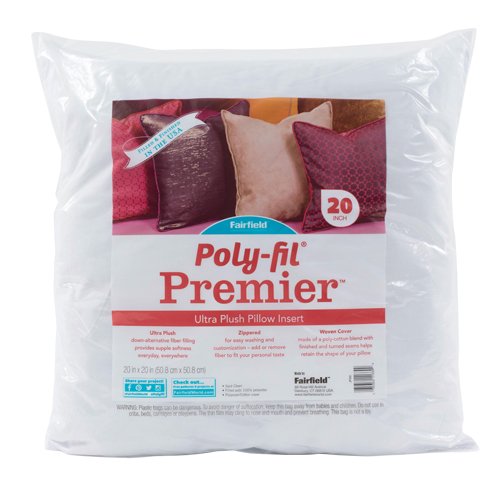
20" Pillow Form Fairfield World
20" Square Fabric for front of pillow
1 yard Kunin PremiumFelt: Black for back of pillow
3- 9" x 12" craft cuts of Kunin Classic or Prestofelt: (1 of each) Teal, Neon Green, Black
1 1/2 yards each Pom Pom trim: Teal, Lime Green
1 yard ricrac trim: Lime Green
1 yard assorted Ribbons
6-8 Buttons to co-ordinate
Fabri-tac by Beacon Adhesives
Dollar store
Scissors, sewing machine and matching thread. (Could be no-sew as well using the Fabri-tac.)
I used the Premier Pillow Insert from Fairfield World but for crafting projects, holiday or every day couch pillows they also have a 2 cushion value pack. I like the quality of the Premier. All of their products have been my favorites to use over the past fifteen years. The bonus of the envelope style pillow is just slipping off the cover and putting on a new one, economical both for cost and storage. Yes we are all about storage these days! Just remove cover, flat and ready to store!
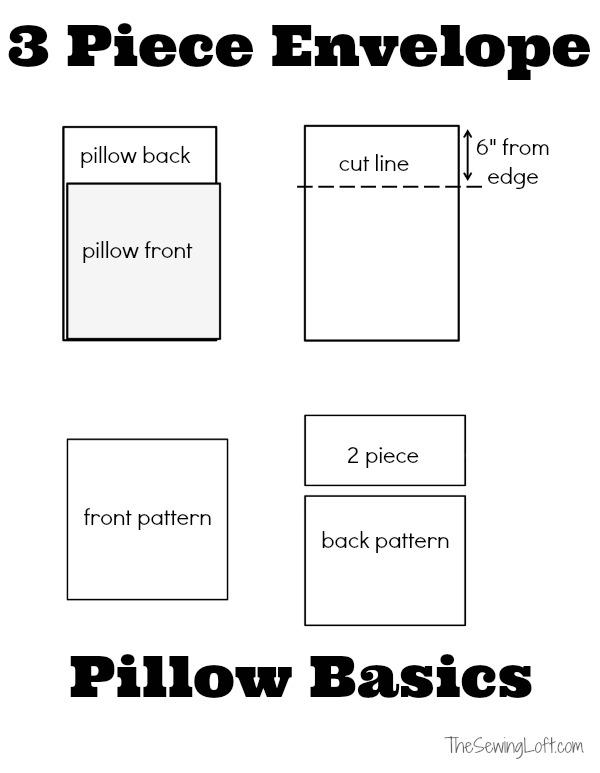
STEP 1: Make the Pillow
The easiest style of pillow I like to make is the Envelope style. Here is a great tutorial and illustration by The Sewing Loft. I used a 20" pillow form so the finished pillow is 19" square. (It is recommended to make your pillow an 1" smaller than the form by Fairfield World.) The pillow is nice and plump!
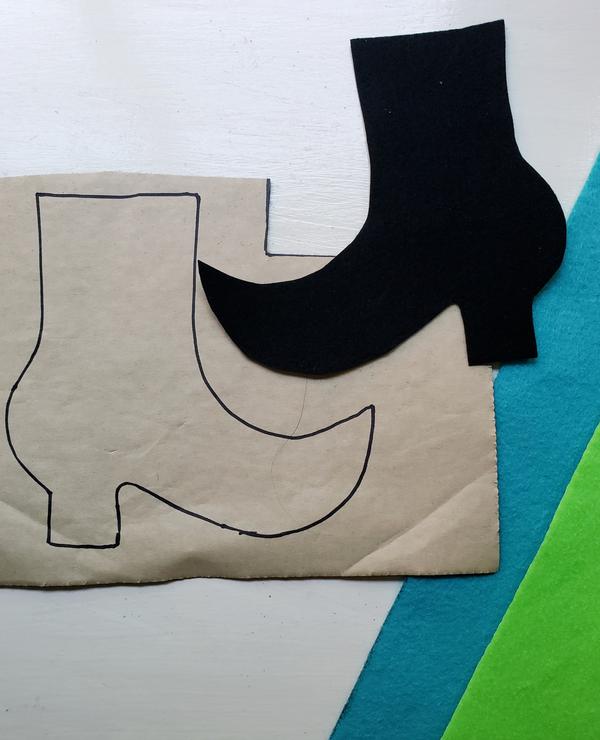
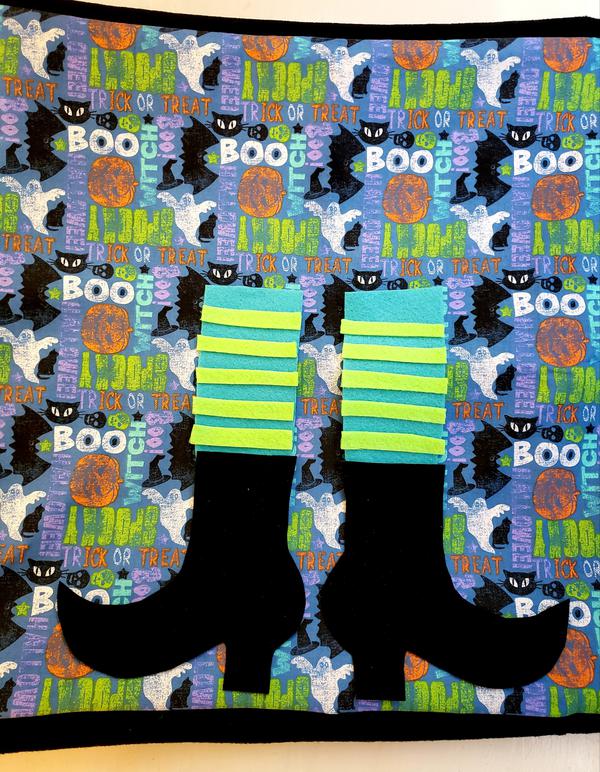
STEP 2: Make the Boots
As this is a popular theme and of course Witches always wear boots you can find several different styles of boot patterns to use. I used this one from Lindseys PaperScraps but there are many others on Pinterest to choose from. This style reminded me of a pair my Grandmother had. She was the best Witch ever, always had time to show us a little magic!
Print pattern, cut and trace onto Prestofelt back or use chalk to trace on regular felt two boots. TIP: Prestofelt make sure to reverse pattern or she will have both boots facing same direction. Cut out 3" by 9" pieces of green and teal felt for stockings.
STEP 3: Making the Legs
Decide which felt you want for the main leg color and then cut 1/4" or so strips from the second color for stripes. Adhere stripes to stocking and place stockings and boots as shown on pillow. The stockings are extra long but with her flouncy skirt she needs long ones and of course the wind, you never know! Glue in place.
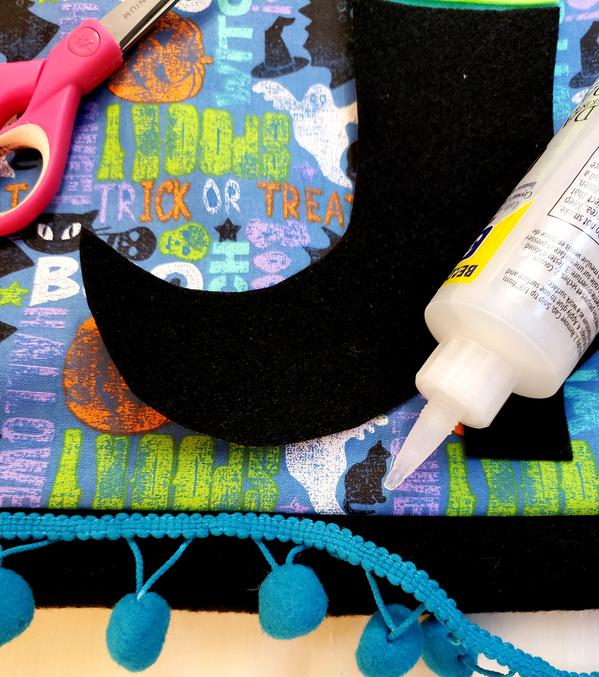
STEP 4: Adding the Pom Pom Trim
I find the easiest way to apply pom pom trim is using a quality fabric adhesive. Fabri-tac by Beacon is my go to. Glue in from edge of pillow front 1" along top and bottom of pillow. Repeat with second pom pom trim staggering them.
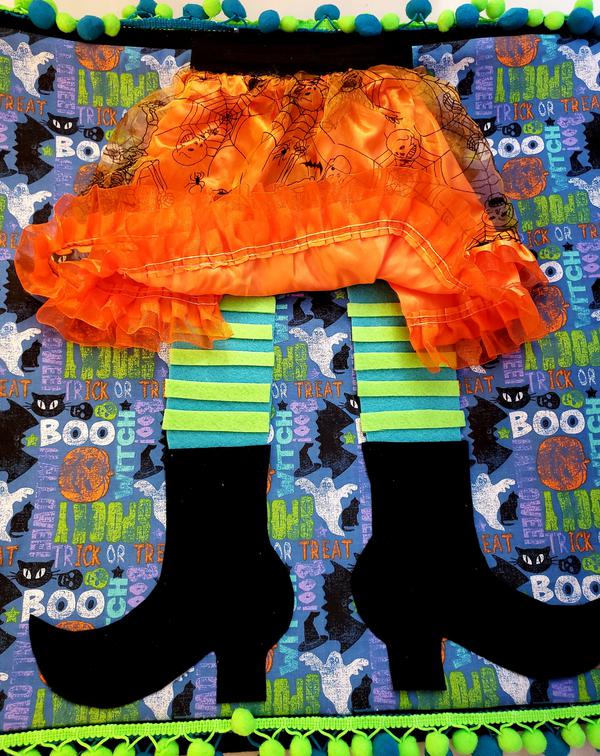
STEP 5: Adding the Skirt
I cut the skirt open down the back seam and then cut it in half. Fold under the raw edges. Place on pillow. Glue along top and side seams to pillow front.
Add finishing touches as you please. Personalize with buttons and ribbons or maybe a spider applique or whatever you like! Insert pillow form . You can also add a hook and loop closure at back.
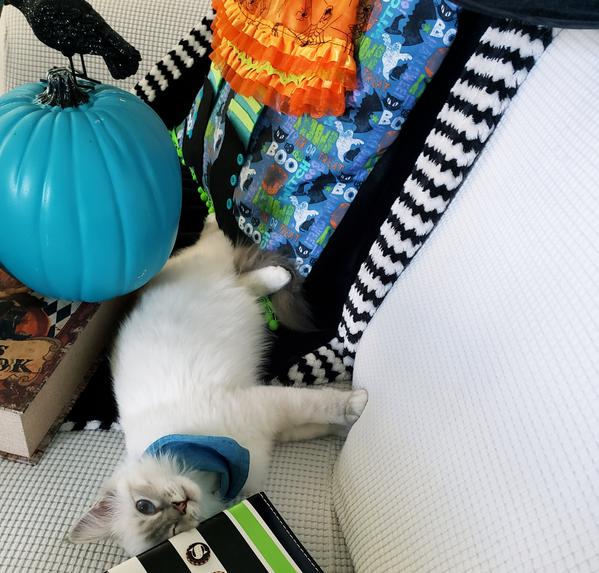
Rory decided this was a cozy spot to be and still stayed in character as the Scary White not Black Watch Cat!
There were several out takes from this shoot.
Hope this post sponsored by my friends at Fairfield World gets you inspired to be thinking of Fall Decor and beyond. A pillow insert can take you through every holiday and season. More to come!
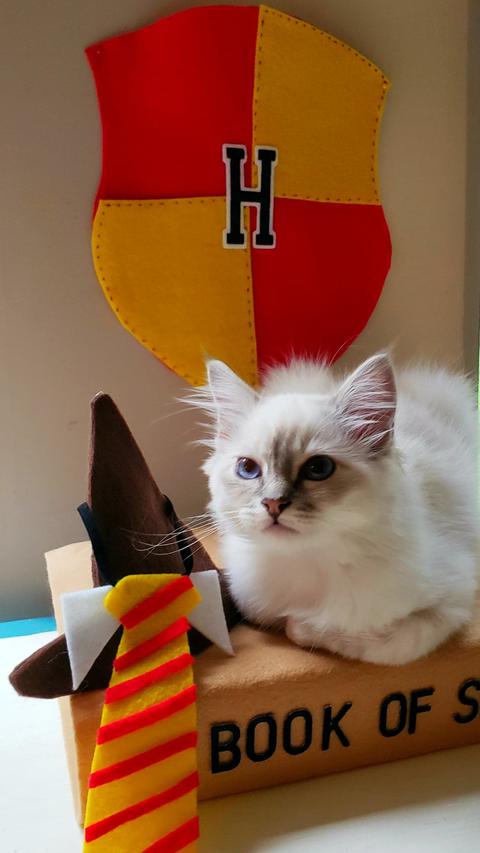
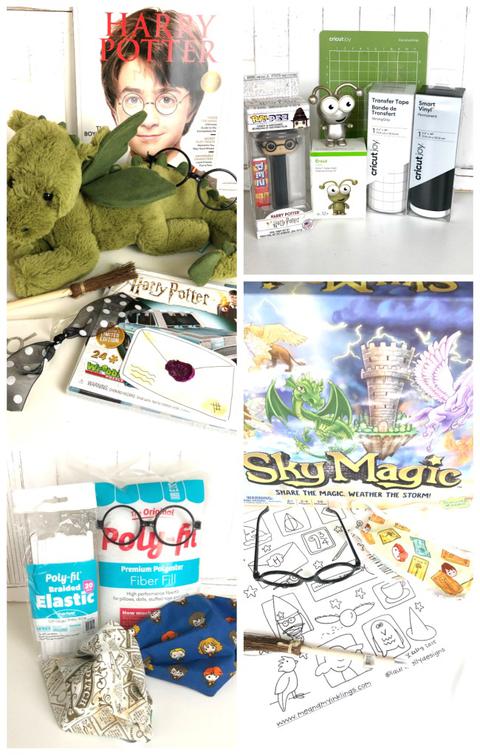
Are you a Harry Potter Fan? Did you know he turns 40 this month! We are celebrating with The Creative Crafts Collaborative, link in sidebar to all of the bloggers involved! I am celebrating two birthdays with a mini version of Harry Potter Inspired Felt Crafts to fit our new Birman kitten Rory's four month birthday this month too! We are kitten smitten around here with our first pet in many years. I am also a big Harry Potter fan too so this was too perfect!
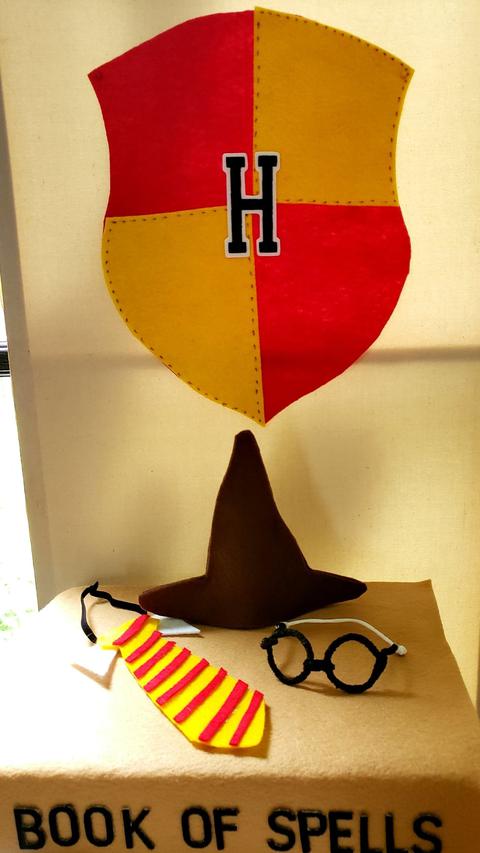
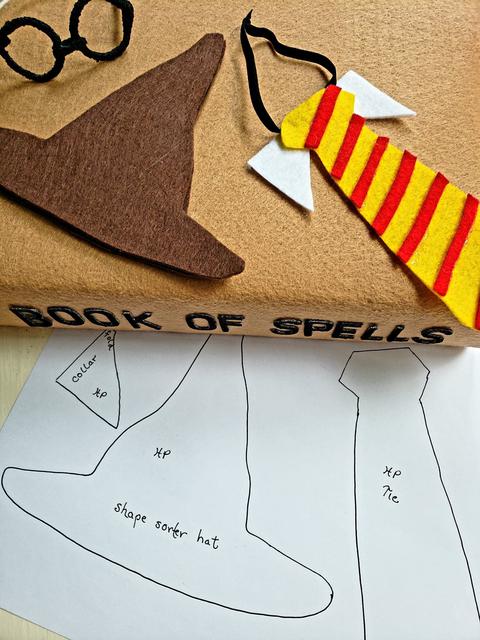
Harry was a member of the House of Gryffindor so of course Rory is too! I created a setting for Rory using Kunin Felt. A crest of course, school tie, sorting hat and a Book of Spells. The glasses are made from a soft chenille stem, looked super cute on Rory for two seconds and then became a chew toy. His four month birthday is going to be extra special!
Let's get started!
You will need:
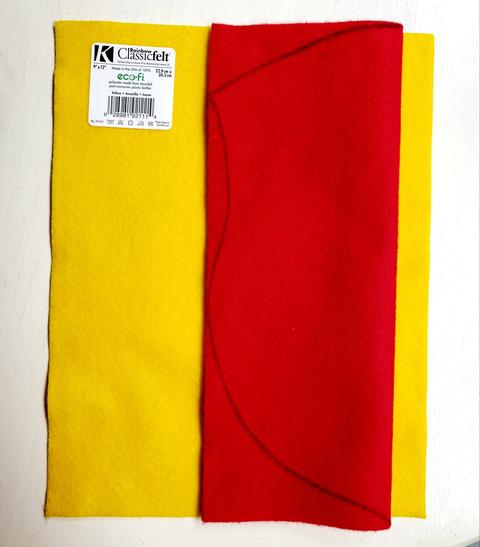
Kunin Classicfelt 9" x 12" craft cuts: 1 of each, Red, Yellow, Walnut, scrap of white
Kunin Premium Felt 12" x 18" craft cut: 1 Cashmere Tan
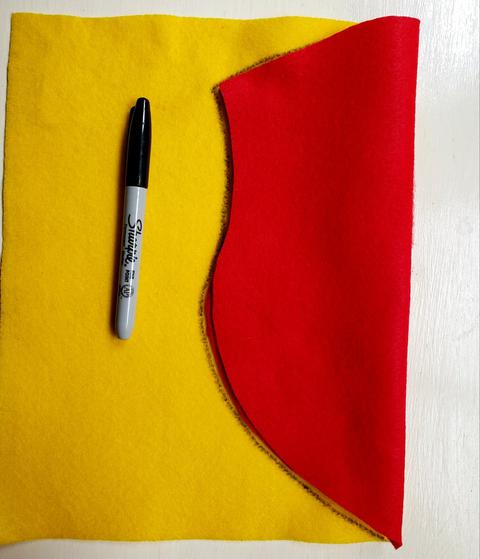
I did a search on Pinterest for an easy crest shape for a guide. By folding the red craft cut in half lengthwise you can trace a simple curve outline and cut it folded.
STEP 2
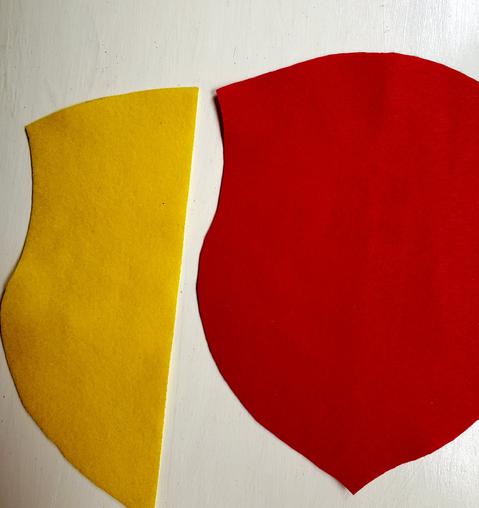
Place cut red piece still folded on yellow lining up fold with edge of felt piece. Draw around the half shape in yellow. Cut out and then cut yellow piece in half again to alternate crest piece colors. Glue in place. Use fine tip marker to create stitch lines.
STEP 3
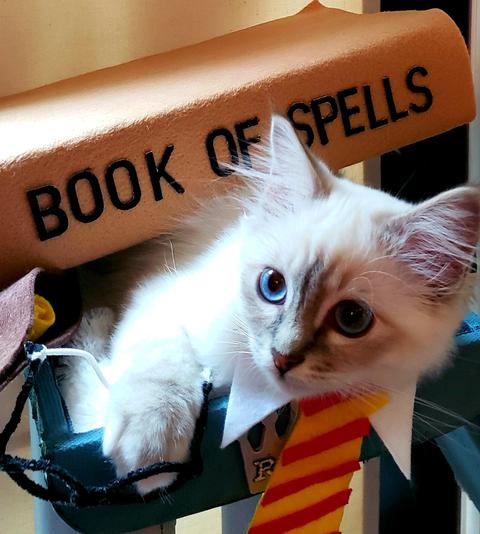
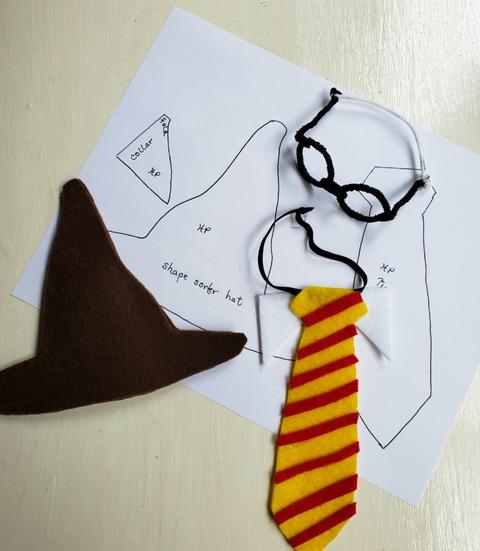
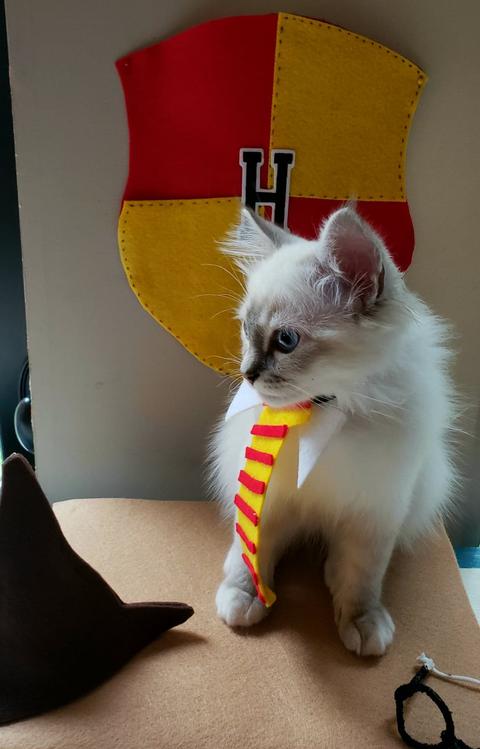
Again searching on Pinterest there are many sorting hat and tie patterns. The sorting hat pattern from Popsugar. There is a cute felt tie pattern over at Wild and Wonderful. I drew mine out on a piece of paper so I could adjust the sizes some. The tie is a little long for Rory, the idea was to keep him posing with treats but he couldn't see the treats over the tie length. He still sat and then laid down, he likes the Book of Spells, I think it must be the soft felt or the box I used. (His kitty food came in it. ;)
STEP 4
Cut out two sorting hats from the walnut craft cut. Glue along edges leaving bottom open. Stuff with scrap felt to stand or if you have a very quiet cat, it would fit with added elastic. Our kitten was okay with the tie but a big no to the hat and glasses. Cut out one tie and a double triangle piece for a collar. Glue white triangle piece behind tie. Cut narrow strips of red fronm left over scraps. Glue to tie. Glue an elastic piece to back of tie. Measure around neck and tie so it is loose and easy to slip on and off. Rory got his off just fine by himself.
STEP 5
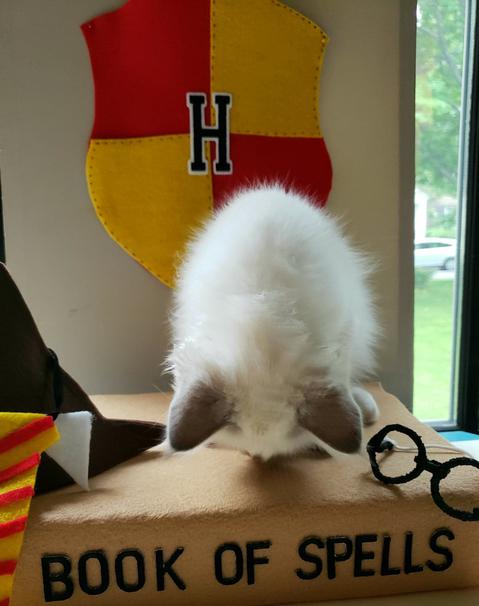
The Book of Spells was the easiest! Rory's kitten cans come in this cardboard case. It measures about 7" by 10". I simply wrapped the 12" by 18" craft cut around the box, and glued. It has a 1" overhang on either end. It is open at the back. Glued in place. Added the Letters to the side and a larger H to the crest.
These pieces would be suitable for dolls or to use in a birthday setting. Making larger ties to wear and creating Book of Spells Treat bags.
Rory looks very handsome as a House of Gryffindor member.
I think Rory at this point in the photo shoot was looking for spell of his own.
Check out all the crafty Harry Potter posts with the Creative Crafts Collaborative, link in the sidebar as we celebrate Harry Potter crafts all week! Thanks Laura and Meg! Enter to win some awesome prizes!
Want to see more of Rory, catch him on Instagram, @reignofrory. You can follow me too. 😊
Thanks for coming by!
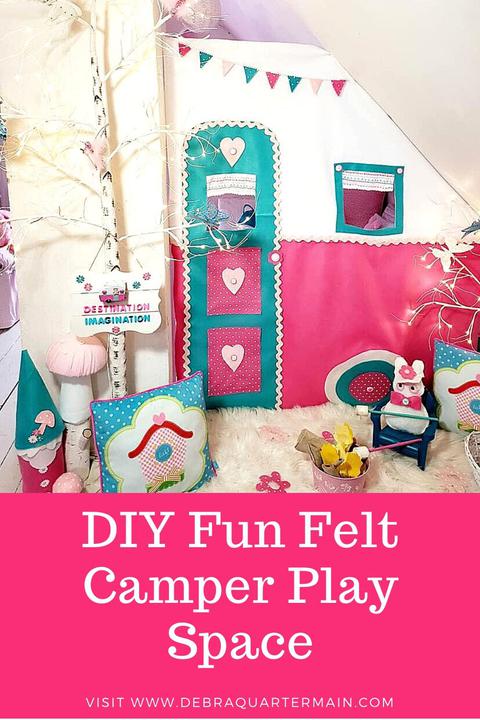
Creativity "the ability to produce or original and unusual ideas, or to make something new or imaginative." The magic of creativity is the gift it brings to both the maker and those it is shared with. There is such Joy in the creative process. So my latest project is a Felt Camper for the girls.
When my grandlittle Anna was on her way over to visit one day, my daughter heard from the back seat, "Hurry up Mama we have to get to Mimi's and make some Magic!" My daughter refers to the house as Mimi's Magical Mansion. I have always loved to design and make things. Creativity extends to many other skills like cooking or painting but it is about thinking creatively to make something concrete or an experience or a surprise.
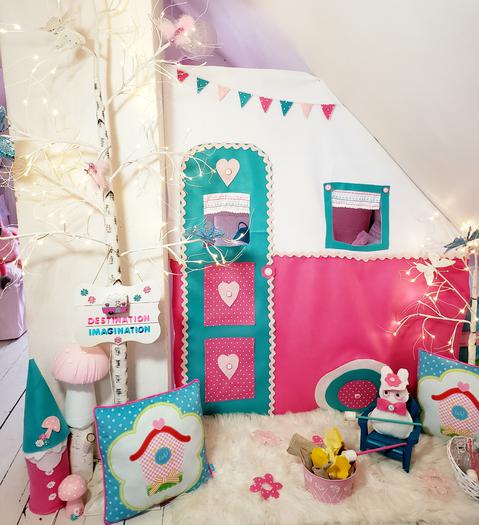
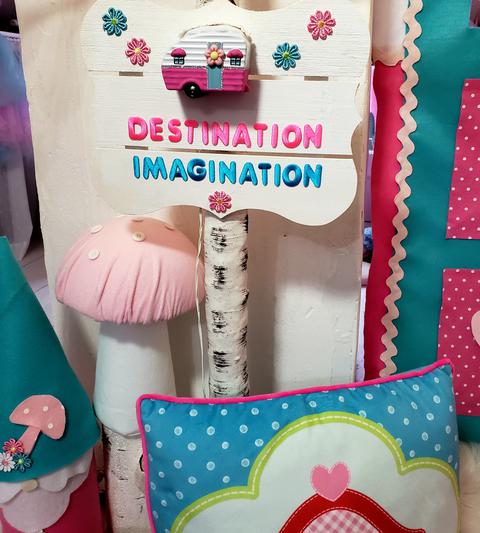
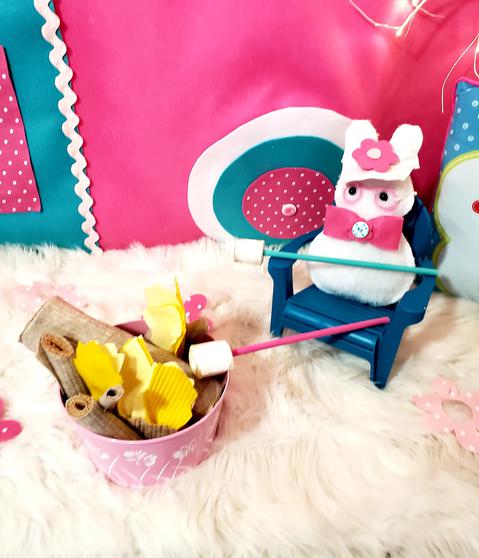
This is a felt camper hideaway I designed for the grandlittle girls fairy tale attic play space perfect for sleepovers. "Destination Imagination" complete with felt campfire and toasted marshmallows. The attic ceiling is sloped so it was perfect for a camper shape between the chimney and the sidewall. Basically I used a camper photo, measured the dimensions and multiplied it into almost life size. The wheels I used a plate as a large circle to create.
I remember as a child my grandmother's home , a large old house very much like the one I live in now. The attic was filled with hats, vintage clothes and toys, she had a wee elf that glowed in the dark she brought out at the holidays for us to see just for a minute. She created magic.
The thing about being creative you can make something out of anything. Simply throwing a blanket over a table, adding pillows and a cosy throw for inside, makes a fort or hideaway. A large box can be painted and colored. These ideas are perennial favorites and if you add snacks or a picnic it makes it so much better! The campfire addition is a super easy project. I used a metal container I had already. Another intention these days is shopping the house and recycling items I already have.
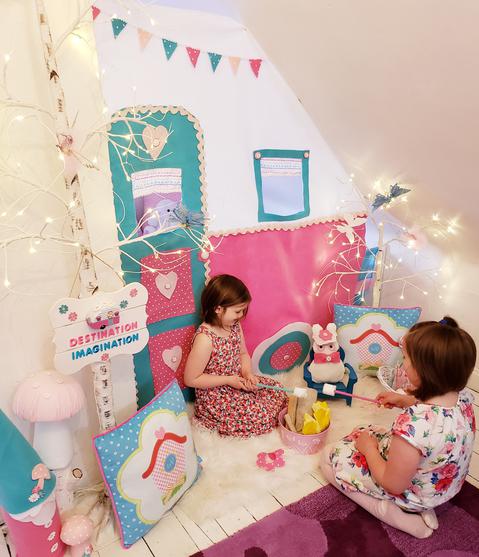
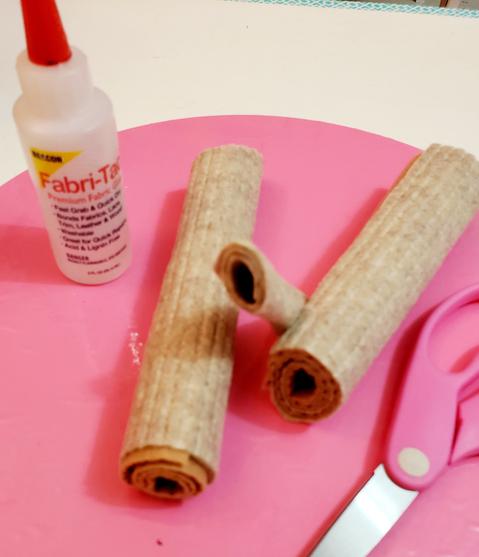
You can use 9" x 12" craft cuts of felt for this project. Kunin Brand felt was used in yellow, white, sandstone and cashmere tan but you can mix up the log colors to be birch or a darker "wood". For the logs roll and glue two craft sheets together so you get the spiral effect of a cut log. Cut ends on an angle. Cut logs in different lengths. For the flame cut jagged oval shapes from yellow and glue into a log.
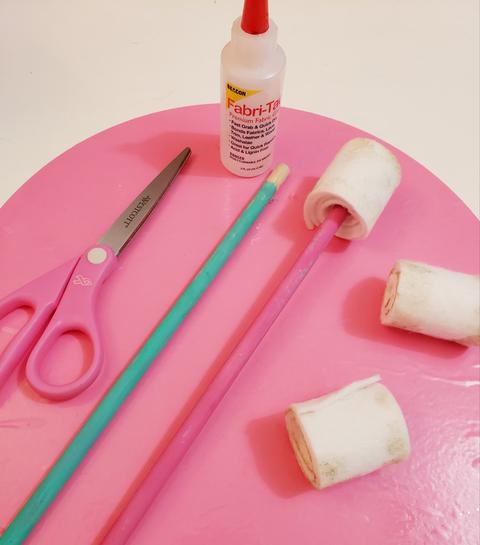
The marshmallows are simply two inch wide strips of white. Paint a couple of dowels for sticks. Roll a marshmallow around a stick gluing as you go so it will have a hole in center. Add some toasted effects with a brown marker lightly around the ends. Be careful not to burn them! Anna has requested Smores for the next sleepover. She did say the chocolate could be real.
For me making surprises for the little ones is the best. Maya requested a princess castle playhouse with capes and crowns for her guinea pigs.
The magic of creativity is just that, magical and it has nothing to do with how elaborate or simple it might be. A thoughtful surprise, a new twist on something old, a cardboard box, with imagination and love comes the joy! For me I get to be Magical Mimi!
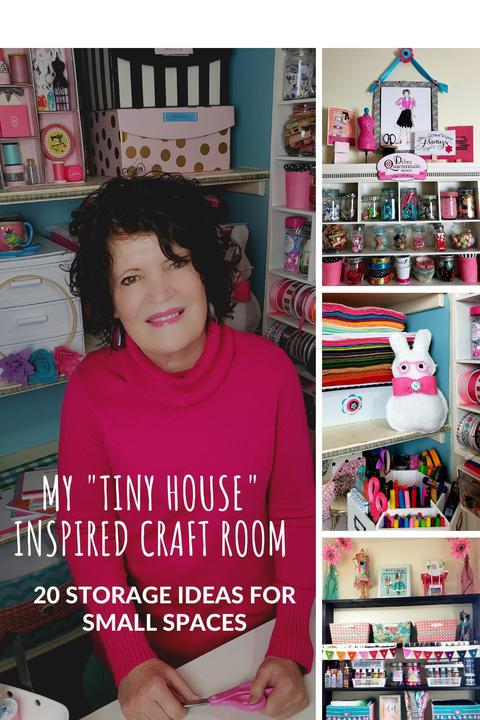
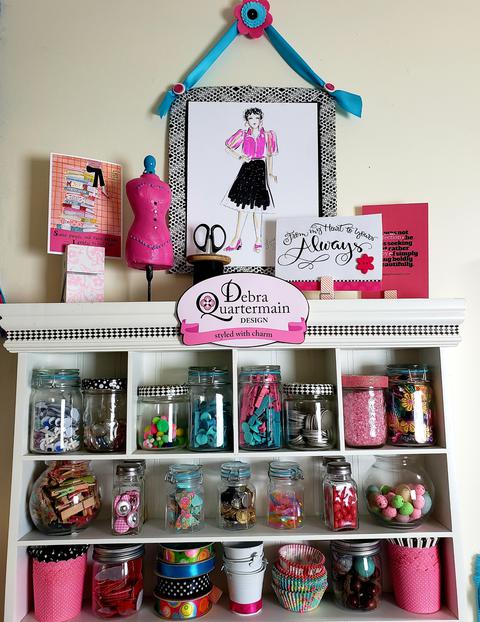
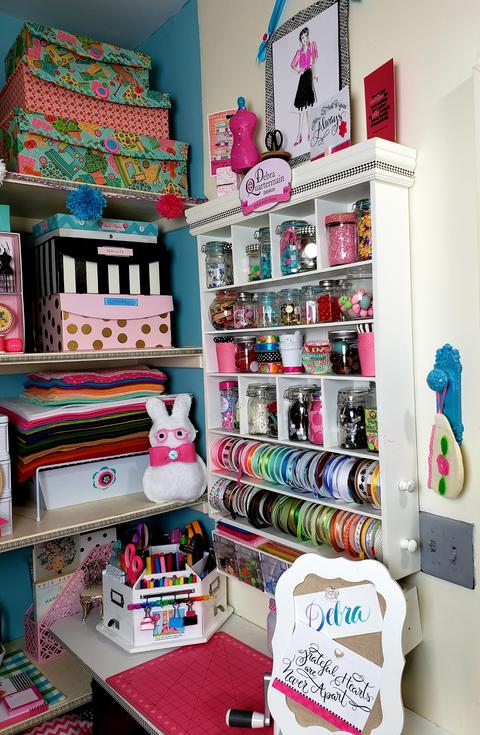
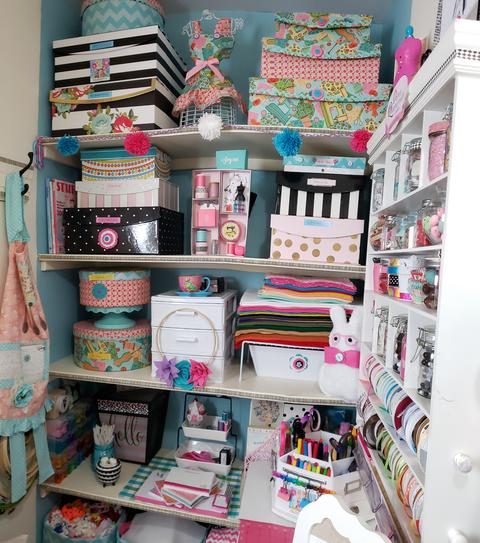
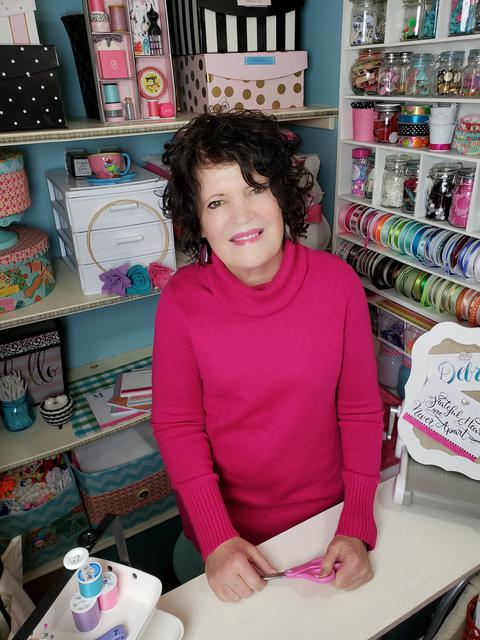
I admit to being a huge fan of shows featuring tiny house builds. I like the innovative solutions to storage. I wanted to downsize my craft space and have it more conveniently located near the kitchen. Two hundred year old houses often have large pantries and this house has a four foot by eight foot pantry off the kitchen. It also is a walk through to the back of the house, that meant two doorways. So welcome to My "Tiny House" Inspired Craft Room and 20 storage ideas I incorporated. Everything was repurposed and upcycled, nothing new was purchased. It was four full days of painting and organizing.
One of the major issues with the space is the walk through doorways. The first door was removed that swung in. With the door casings it measured almost six inches from the wall to the doorway. My darling husband is handy and also open to my ideas... most of the time. So many craft supplies are small. A wall of narrow shelves was a perfect solution. Storage DIY number 1! The easiest thing to do was build a separate unit that could be screwed between the two doorways. Did I mention it was a two hundred year old house, plaster and lathe ugh, you disturb it as little as possible. He created a frame with six four foot long shelves using two by fours. I painted the unit black, leftover paint from another project. Once it had a couple coats, we installed the shelves. Wow do they hold a lot of craft supplies!
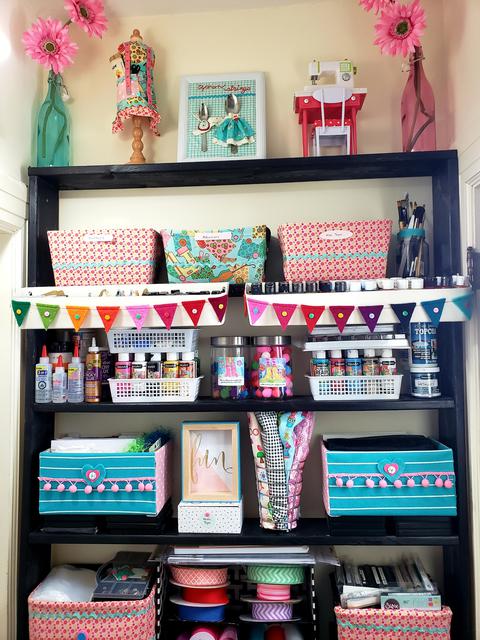
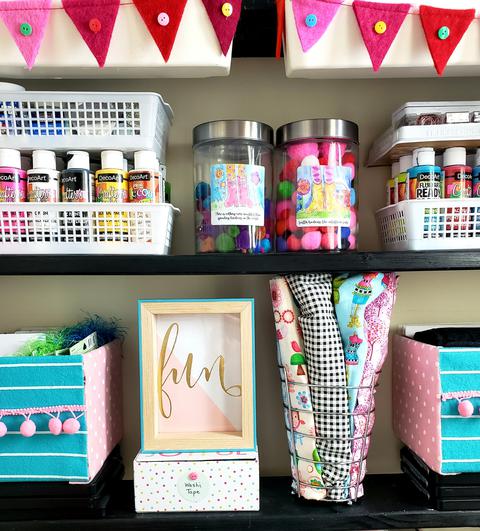
Since I was downsizing my supplies and just in general spending time spring cleaning and decluttering I ended up with a bunch of odd containers. A few shoe boxes and a lot of jars. I also discovered about three yards of sewing fabric I purchased for something a while back. Storage ideas 2, 3, 4, 5 and 6! Cover, paint or decoupage shoe boxes to match your space. Add trims or washi tape. Fill jars with bright colored items like pom poms, small flowers, clothespins etc.
I found a couple of long storage containers on the inside of an old sewing machine cabinet. Painted and then mounted on the outiside of the shelf to hold small paint bottles. Organizing by craft category was the goal and top high shelf holds some favourite things. I made an apron for the mini mannequin from the sewing fabric. I used every scrap! A note card box holds a collection of washi tape. A wire container from the Dollar store holds a few fabrics. On the lower shelf pictured above a basket that was too wide was turned on its side to hold larger ribbon rolls.
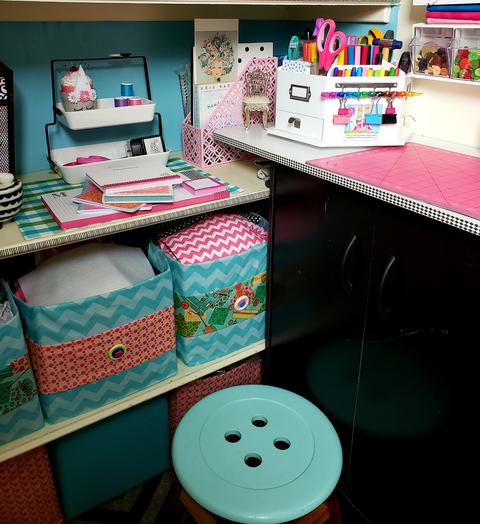
Storage ideas 7 through 10. A small old cabinet was outfitted with a new counter top just nailed on to give extra work and storage space. Inside the cabinet are felt and fabric storage. Craft carousel holds lots of tools and prodcuts. A kitchen tiered dish with an easy handle has scissors, thread and pin cushion. It can be moved to main counter. I had a bunch of fold up storage cubes, all black. Going for a lighter fun feel I used Fabri-Tac and and some of the fabrics to cover not the whole containers. I had only so much fabric and eight of those containers to cover. I covered the front and the sides about six inches. Just wrapping the fabric and gluing. I also discovered I had about three huge bottles of buttons and used stacked buttons to decorate the front of the containers. These containers hold many supplies, trims and kids craft items. Yes that is a button stool and I admit to a love affair with buttons!
Storage ideas 11 and 12. When my daughter moved into her previous home there was a set of shelves used for craft supplies she offered it to me. This holds tiny items and has two ribbon roll dowel holders. Saved jam and mason bottles, did I mention we have a Bed and Breakfast too, lots of jam jars! Washi tape wrapped around the covers made a decorative accent. The clear jars are great for small items as you can see exactly what is in them The small rose bowls also hold other small items. When you have alot of small supplies look for narrow display options, medecine cabinet. The top holds some of my favorite items. To high to reach anyway so just filled with inspiration. Decorative clothespins were glued to large buttons to make cards stands.
Storage ideas 13 and 14. A Deflecto storage unit is fastened underneath the craft storage, it holds buttons. I left enough space for the top to be a shelf to hold rulers and other small items that are easily accessed from the counter.
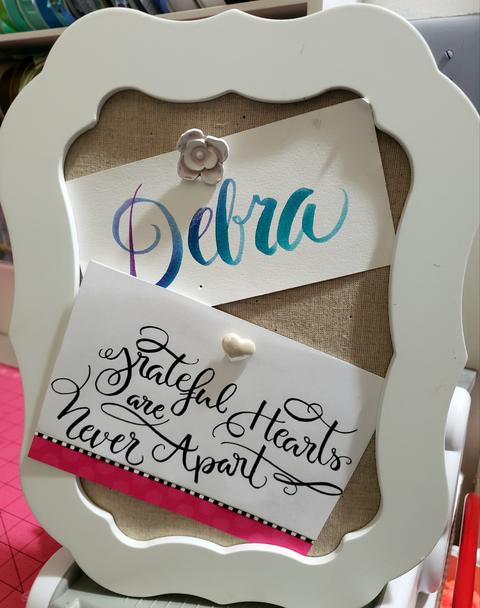
15. A small message board can be moved around and be used for inspiration, reminders or notes. It stands or hangs, that is handy. More mismatched containers on the top shelf were recovered to match the room plus with yarn on hand created a pom pom garland.
16. Being a "Tiny House" inspired Craft Room and only four feet wide the opposite wall had hooks which we left. I hung a couple of cloth bags with art canvasses, embroidery hoops and aprons. Shelves would have made it just too narrow.
17. A kitchen wire shelf made room for another container underneath to hold glue guns and other frequently used items. More felt in the colours I use often fit on top of the rack along with the craft space mascot. I use a lot of Kunin Felt!
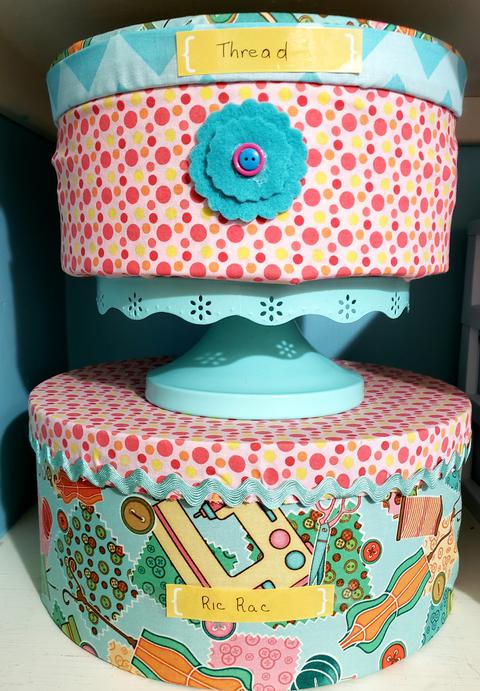
18. Beat up black hat boxes from the attic were covered with fabric. The cake plate is used for display and when not in use makes a whimsical storage accent. It does kind of look like a cake and keeps it out of the way.
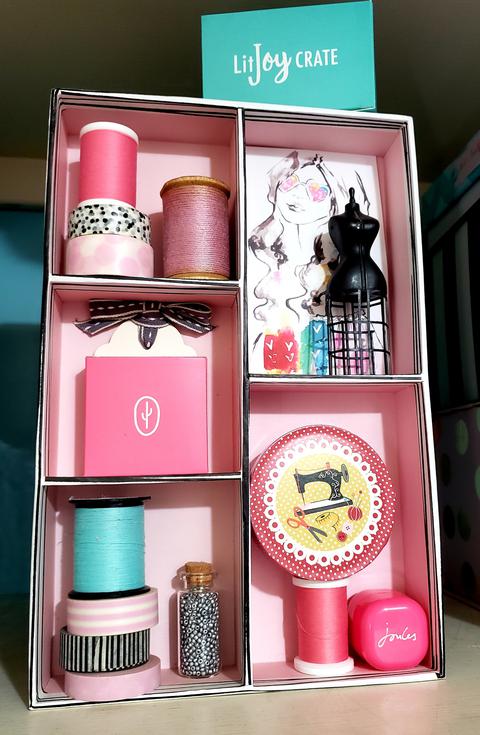
19. There is something about a shadow box with miniatures. I found this drawer box and tipped it up to use as a shadow box.
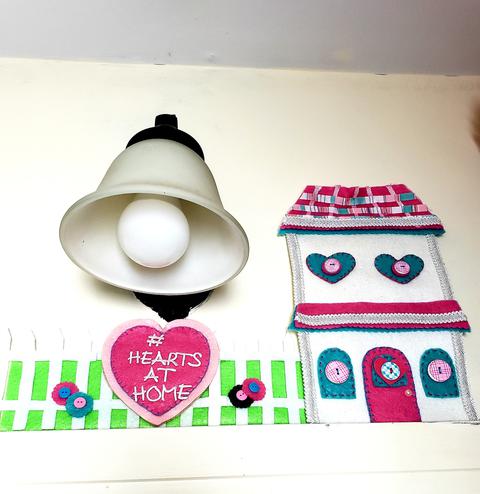
Using all of the space, above the door my felt house with #heartsathome. This makes me smile as soon as I walk in the room.
20. The final idea, not really storage but extra counter space simply made by a scrap piece of board which lifts up and off so I can get out. A piece of trim was attached to the wall with hooks and the board notched. Thanks again to my handy guy. The board simply rests on the trim and over to the other counter. It stores along the wall behind the apron. The doorway allows for extra lighting and the camera attached to the narrow shelves. Perfect for my doing some videos and more importantly crafty Facetime with my grandlittles!
I hope you find some inspiration from my "Tiny House" Inspired Craft Room. I set a goal to have all of my craft supplies fit in there except some of my bolts of felt fabric. Those fit in the cold cellar in the old coal bins. Everything else is in that very tiny space. It makes me smile everytime I walk in. It was a big job getting it organized but it was so worth it! It cost me exactly nothing, everything was repurposed and upcycled. I did learn though small spaces are a big commitment of time and organization! How do you organize your space? Looking for more inspiration? Over at Decorelated they have many great storage units and ideas.
Thank you for stopping by! You can find me on IG @debraquartermain.
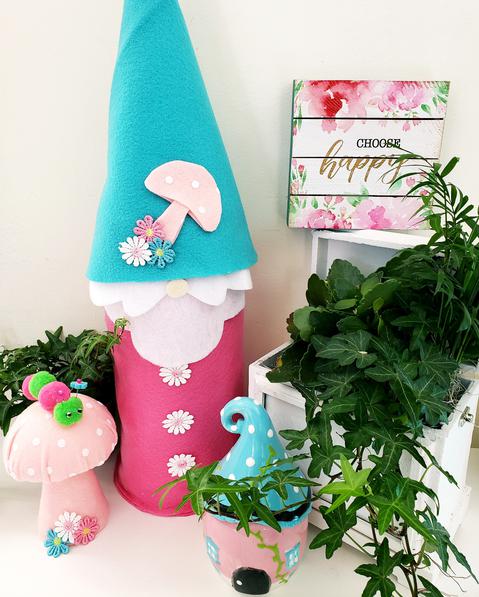
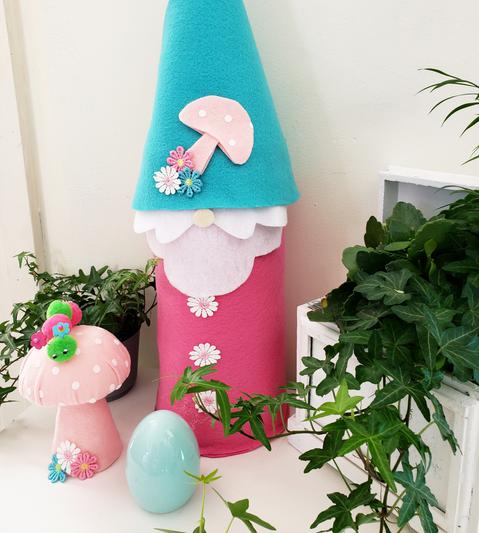
I am partnering again with Fairfield World to share my DIY No Sew Daisy Garden Gnome. I have received compensation but all of my opinions and experience expressed are my own. I have been using Fairfield products for years in my projects. This delightful Daisy Gnome is so easy and you can use it inside or out!
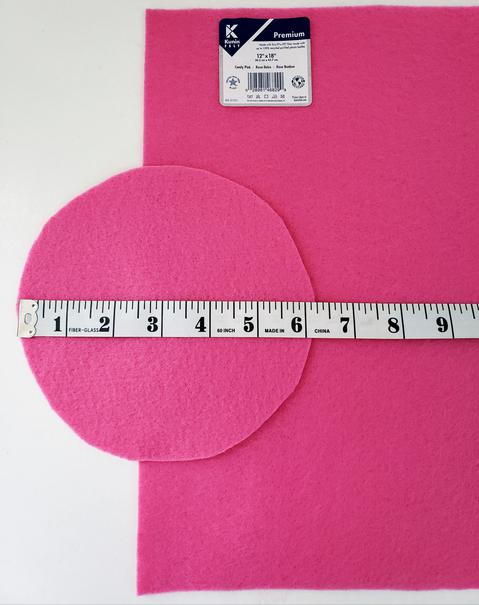
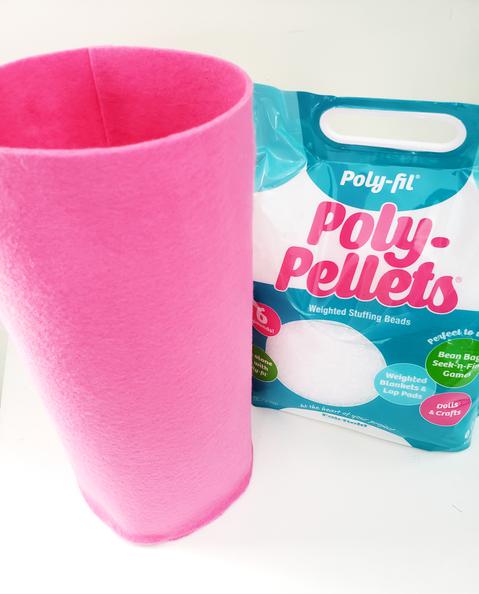
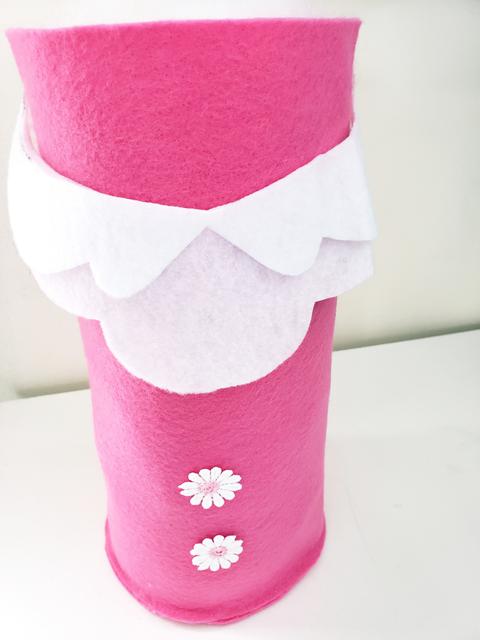
1. Use a small 6" plate as a template and cut a circle from one piece of the Candy Pink felt. Fold the second piece of felt into a cylinder and overlap edges 1/4" Glue seam.
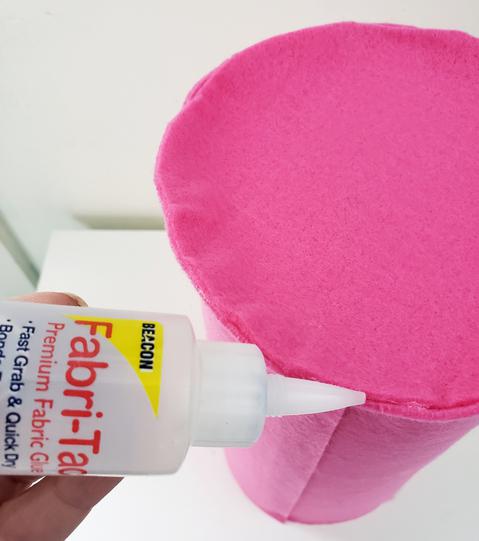
2. Glue circle to one end of cylinder. Pressing firmly as you go, 1/2" at a time.
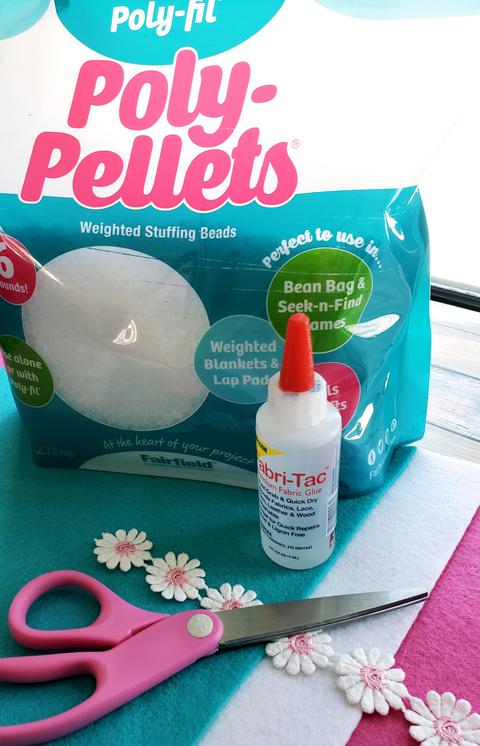
3. I placed a large open ziplock bag in bottom of cylinder and poured the Poly-Pellets into the bag filling the cylinder 1/3 of the way up.
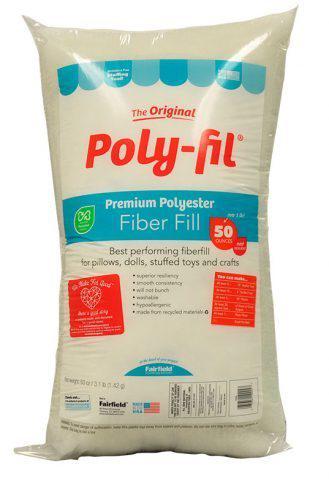
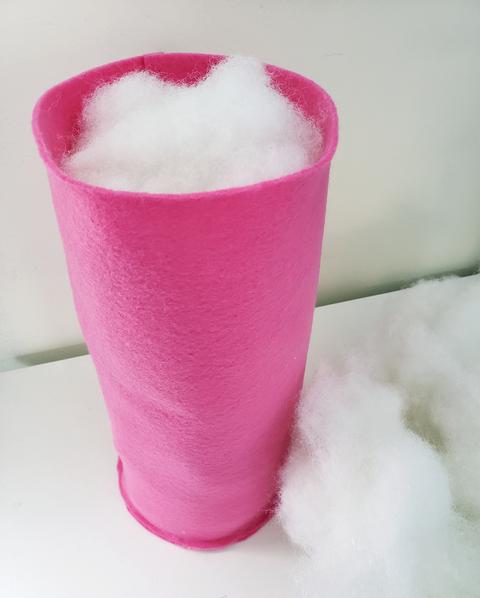
4. Fill remainder of cylinder with the Fiber Fill.
Finishing the Daisy Gnome Features:
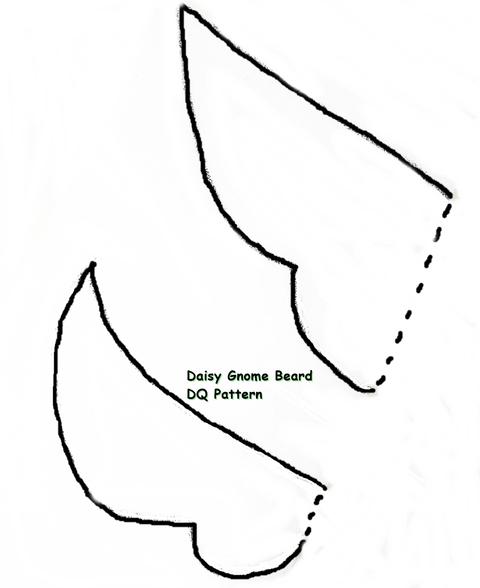
5. Save and print Beard pattern photo and cut out on fold from white felt. Add beard to cylinder. Place moustache piece over top. Adjust, the ends should be about 2" down from top of cylinder. This can be glued in place once you try the hat on.
6. Cut two 3/4" circles for nose from the ivory scrap. Glue together.
7. Cut daisies individually. Place as buttons on body.
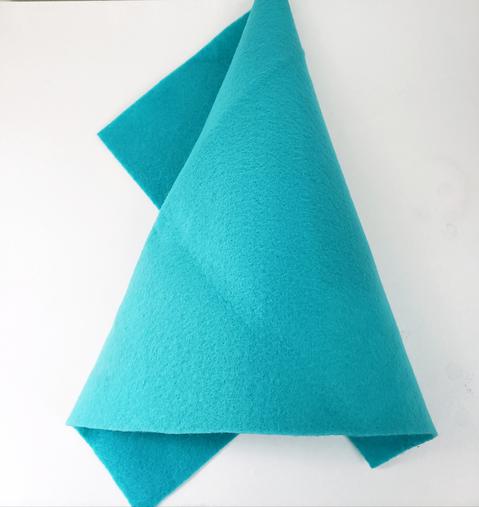
8. Fold lagoon felt piece into cylinder shape. Cut off excess along upper side. Glue back seam. Trim off lower edge evenly.
9. Stuff hat leaving 4" unstuffed at end.
10. Place hat on cylinder pulling down about 1 1/2".
11. Adjust beard pieces and glue in place. Glue nose in place.
12. Glue hat.
13. Cut out a little mushroom shape from pink for hat or use die cut shapes. Add daisies.
Make this darling DIY Daisy Garden Gnome in your own color choices. The products can withstand weather and you can add this to your front porch or in your garden. Thank you Fairfield World for the great products! "What is on the inside matters as much as what is on the outside."
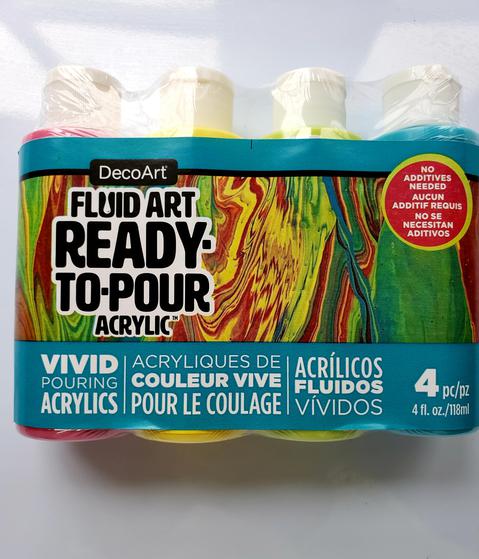
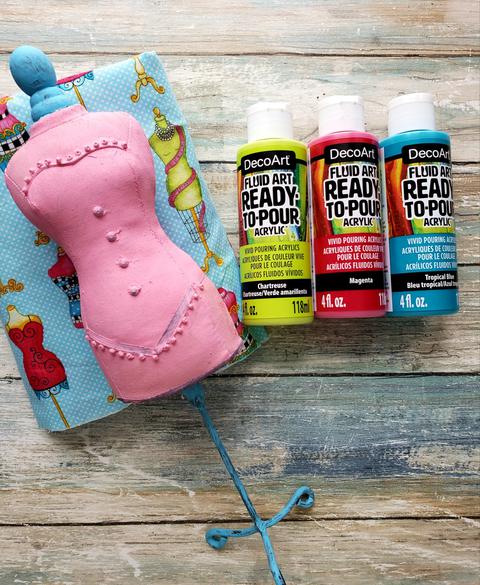
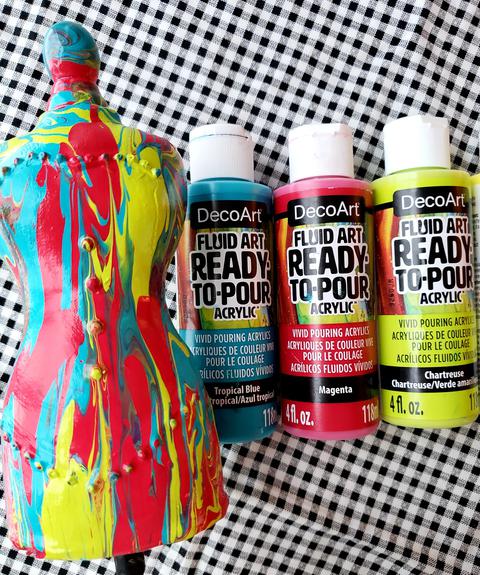
I am so very excited to be sharing a brand new product, DecoArt Fluid Ready to Pour Acrylic now available at Michaels! I was provided a Vivid four pack collection to use and compensation but all opinions shared are my own experience with the product. DecoArt products have always been my favorite for painting my craft projects. A couple of years ago I tried paint pouring and so enjoyed it. With these new pouring fluid paints no medium is required. So easy!
Just look at these colors! Basically you shake gently and can pour directly from the bottle.
.
For this project I wanted to recycle a 3D object, this sad little dressform I had tried to paint before and was not happy with the results. I was inspired by this favorite piece of fabric and just look how the colors were perfect! I also thought having the wire bottom to hang onto would make it even easier.
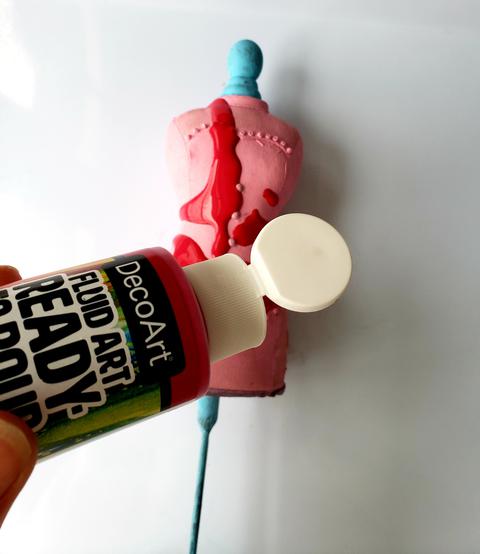
i started with the Magenta, squeezing from the bottle in a random fashion, turning the dressform so it flowed across.
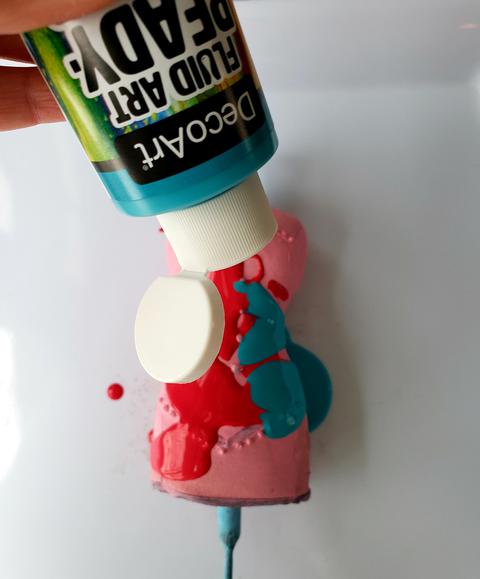
i repeated with two remaining colors, Tropical Blue and Chartreuse, one at a time, rolling and tilting the form. Flipped it over to add some to the back. I used a Dollar Store tray underneath to catch the drippings. It made a very unique design there too.
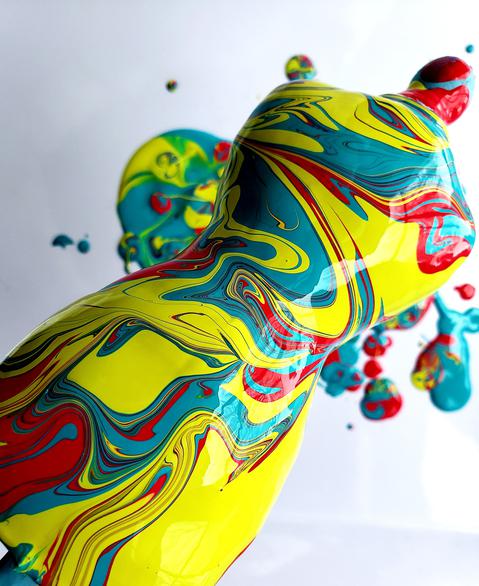
Look at how cool the back turned out! Even when it dried the colors stayed as vibrant. The acrylics are both fast drying and permanent. Quick clean up too while wet if needed just using soap and water. You can also seal it with a topcoat for extra brilliance!
i finished my project by painting the stand black and adding ribbon. Such a perfect piece for my craft room! Have some fun with any 3D piece you want to recycle. DecoArt Fluid Ready Pour is really easy to use and I am already thinking of other pieces to pour. This is brand new and now available at Michaels!
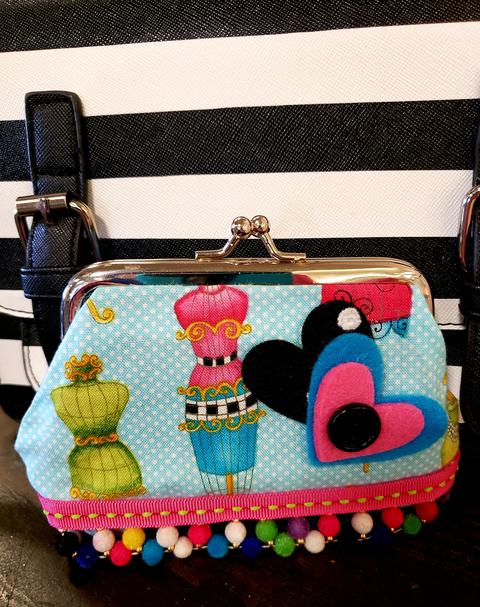
When you receive a pretty package of felt hearts in the colors of the rainbow, it is happy mail! Hearts and Rainbows are two of my favorite things and was sent to me by creative friend Laura Kelly. We work together on many projects together. The hearts reminded me of one of my pretty sewing fabrics . I had an old change purse I wanted to recycle and the hearts would be the perfect finishing touch!
i used the change purse as a template, cutting fabric slightly large, one piece for both sides. I folded a narrow edge around the fabric and then glued around the top and sides. My favorite glue adheres instantly, Beacon's Fabri-Tac. Make sure to open change purse wide when gluing around the sides. Simply embellish! I used a fun pom pom trim from Trims by the Yard. Simply stacked and glued the hearts, added a button. Ta da!
This super cute change purse is perfect with my black and white striped purse!
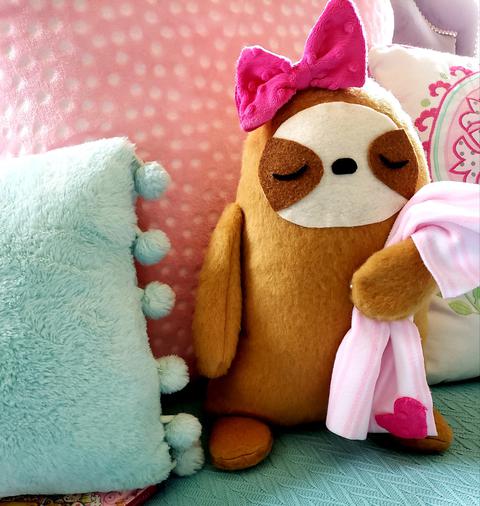
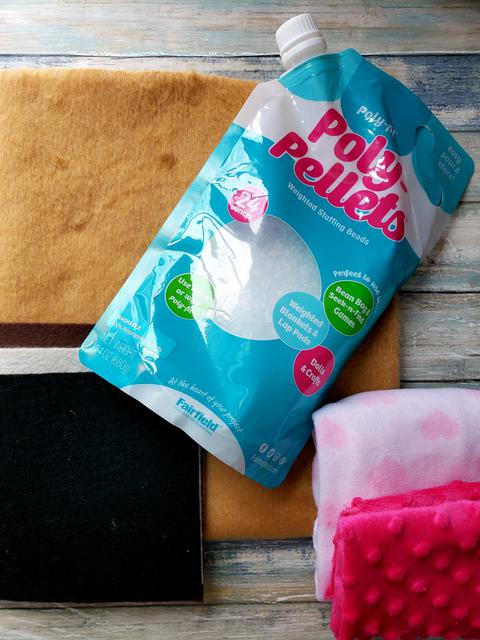
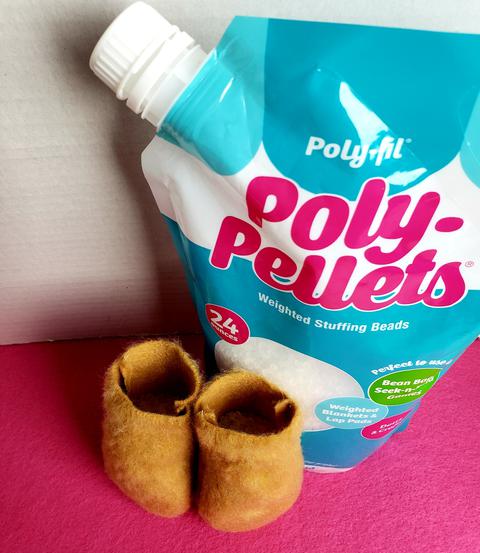
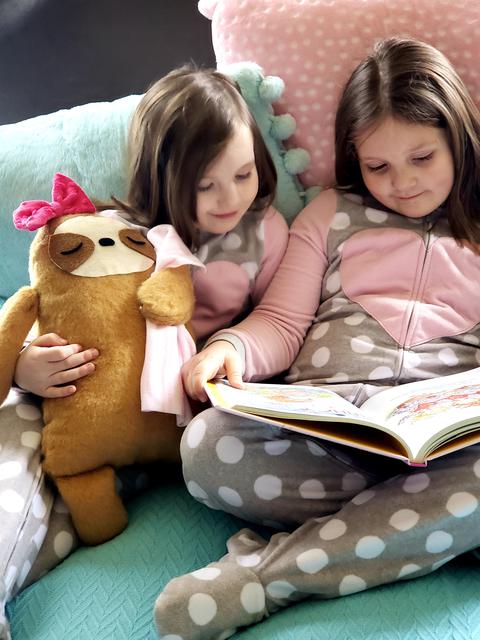
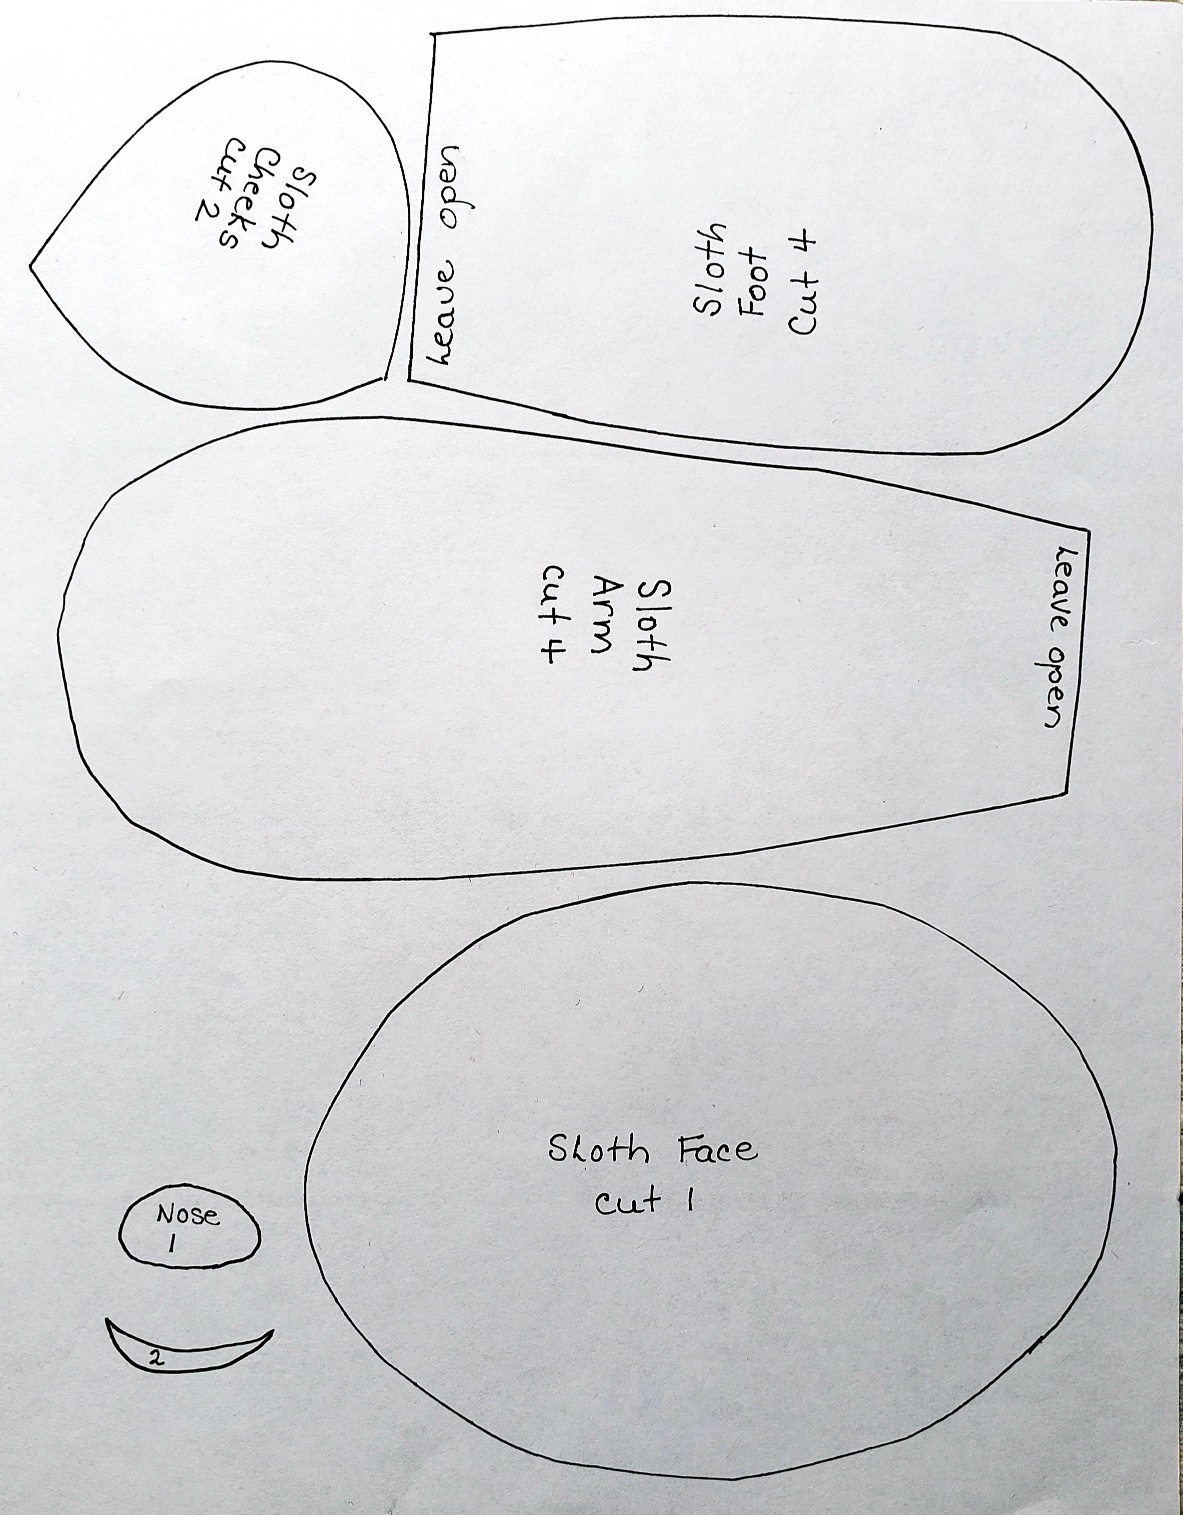
I am delighted to be partnering with Fairfield World on this post. Making stuffies has always been my first love and now with grandlittles to sew for it is even more fun! I designed this Plush Stuffie Sloth for sleepovers at Mimi's house. I have been using Fairfield World Poly-fil forever and now adding the Poly-Pellets for weight. The sloth can sit when not being hugged and the paws are squishy. (So I am informed by a four year old expert :)
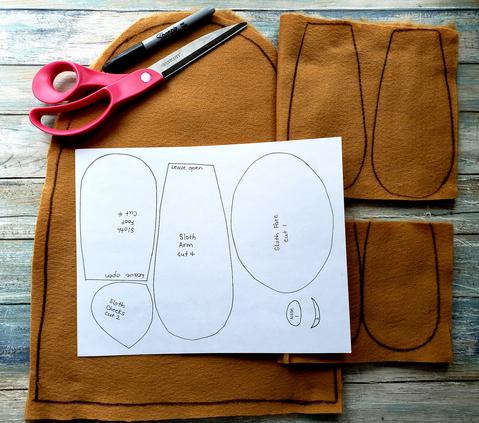
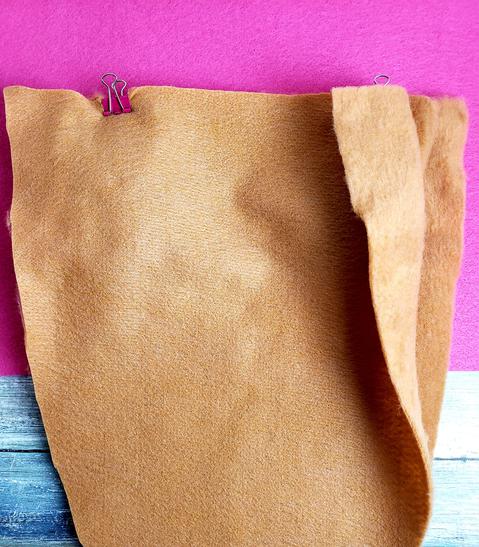
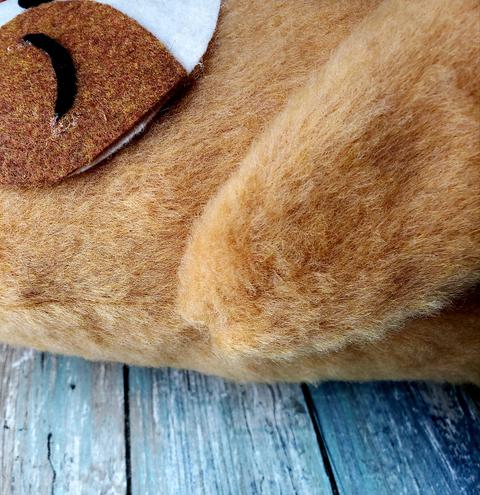
1. Plush felt has a nap. Cut out pieces with nap running down when you brush it. For body pattern piece tape paper together to make a piece 13" by 17". Fold in half and draw a curved oval from center point at top and to 6" width at bottom. Cut and you will have a curved body piece 12" wide at bottom. Print off pattern page and cut out pattern pieces.
2. Fold plush felt in half wrong side out. Draw pattern as shown. TIP: Cut out larger than needed around pattern pieces. It is easier to sew plush pieces this way. Use clips to hold pieces together.
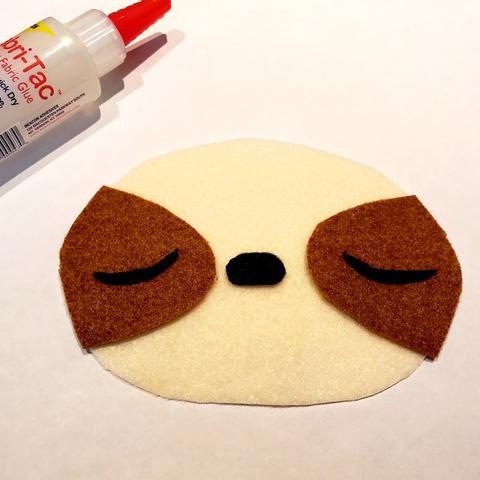
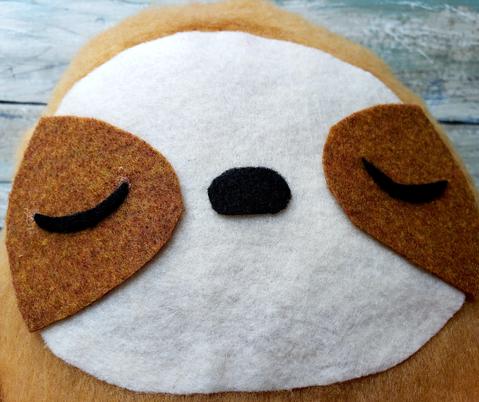
3. Cut face pieces out of felt and glue in place on sloth face.
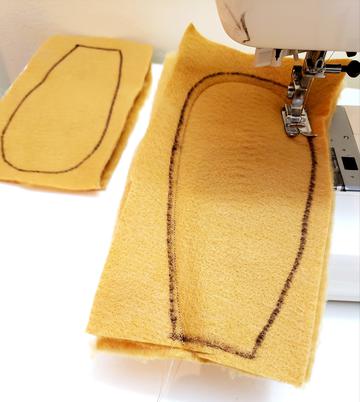
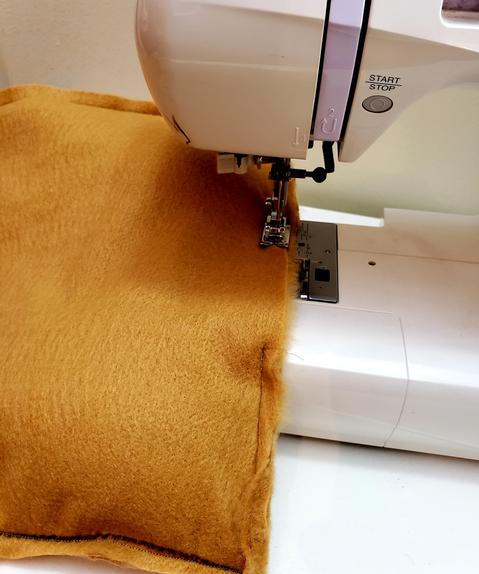
4. Sew around arms and feet for sloth. Cut out and turn right side out.
5. Fill feet and arms two thirds with pellets. Glue feet at this level inside. Sew top of arms tightly shut.
6. Insert feet 1" from either side of lower edge of body and clip in place.
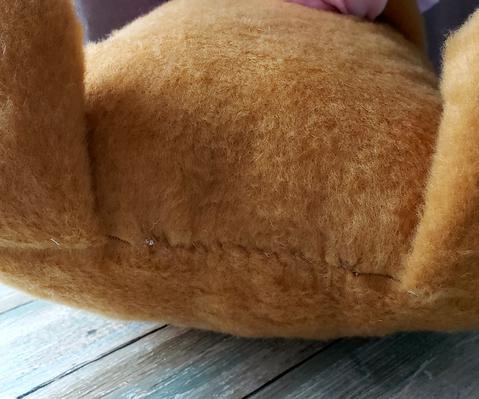
7. Sew around body leaving 3-4" open in center of body.
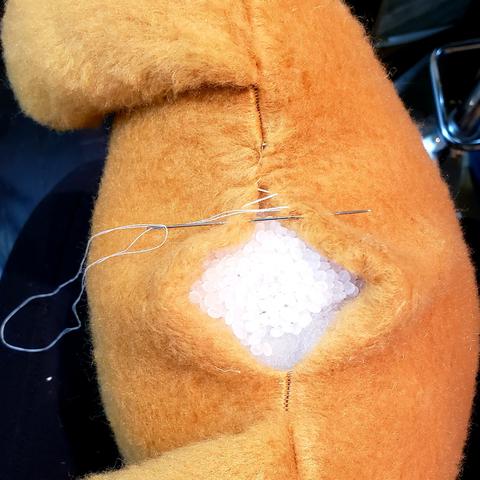
8. Stuff body with Poly-fil. Fill last two inches with Poly-Pellets. Turn upside down. TIP: Easiest way to sew this flipped upside down, hold between your knees and use a back and forth ladder stitch to sew tightly together.
9. Plush felt is very forgiving, when you pull the stitches tight they disappear!
10. Glue on that cute face. TIP: I like to position the face first before adding the arms. You can then adjust arms to the right level.
11. Place arms on side seam and stitch in place. This plush Sloth is going to get a lot of loving so the arms need to be very secure.
12. I added a bow cut from a 6" square, folded in half and sewn leaving an 1" opening. Turn right side out. Tie strip around center. Cut a fleece blankie 12" square.
The plush Sloth well as you can see these grandlittle girls love her. Me, I get to partner with my favorite brands and create what i love for those I love. What could be better!
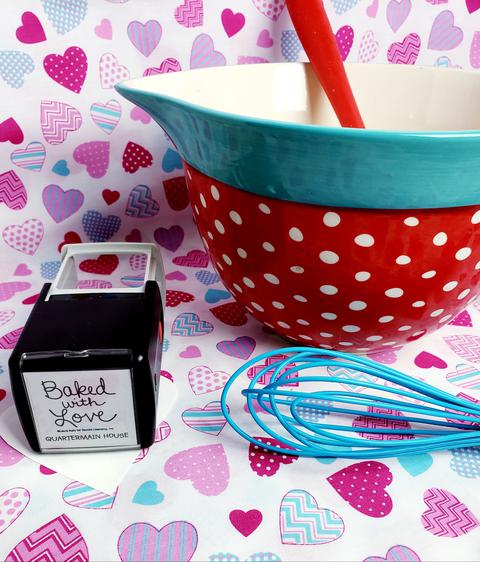
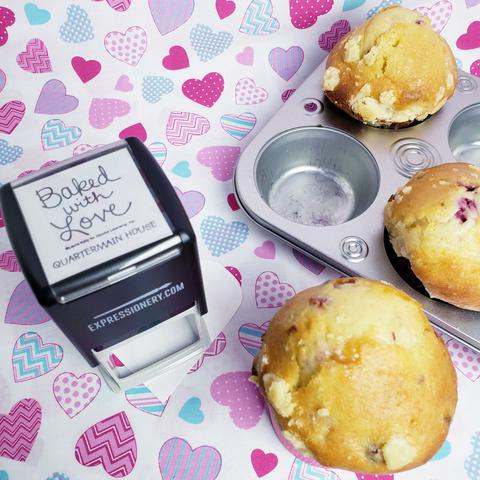
There is something special about baking and the warm aromas that come from the kitchen. It is just so welcoming! "Baked with Love", gifts from the kitchen are some of the best! I love baking for family and for my guests at our B&B. This week a special package arrived with a stamp from Expressionery designed by my creative friend Laura Kelly. I am very happy to share some of her very fun products. This stamp is perfect," Baked with Love from Quartermain House."
I also enjoy baking with fun bright kitchen items, my polka dot mixing bowl and colored whisks, teal and red my favorite combination. I usually mix up a basic muffin mix using the best ingredients. I always use butter and lots of fresh fruit.
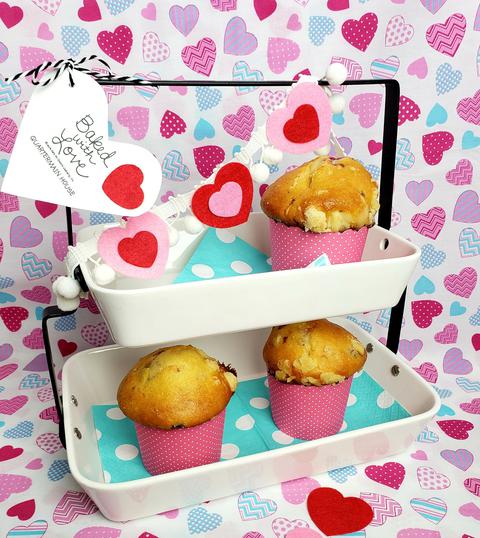
Cranberry and orange muffins with a crumb topping warm out of the oven were served this morning to the guests. I like to have warm muffins, fresh juice and hot coffee in the dining room to greet them when they come in.
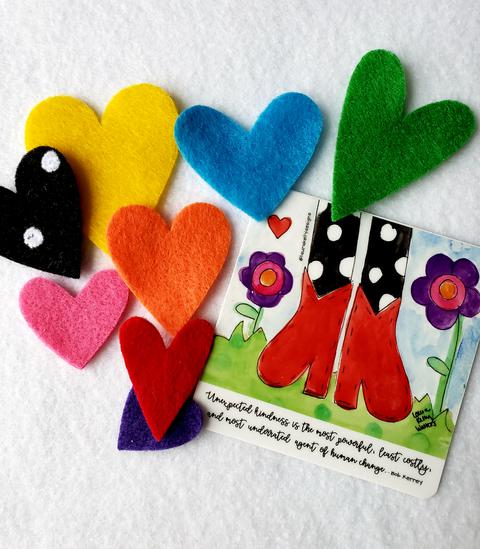
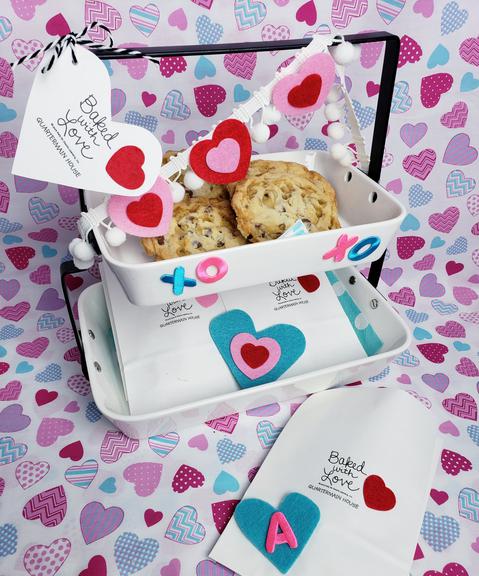
Of course we also have to have fresh cookies for the guests and the grandlittles. I baked a batch of salted caramel chocolate chip cookies and added each one to a special stamped treat bag. The felt hearts are a cute addition for Valentines. I die cut hearts from felt and added embroidered letters, decorated a stand with pom pom trim and put together this sweet treat display. I appreciate the brands I work with that have wonderful creative products, JOY SA Letters, Kunin Felt and Trims by the Yard. Thank you Laura for the special stamp, it will be well used between Quartermain House B&B and the grandlittles!
Magical Mimi to Grandlittles, I love to create, decorate & celebrate. Sharing joy and inspiration from our 200 year old home, Quartermain House B&B on the east coast of Canada.


