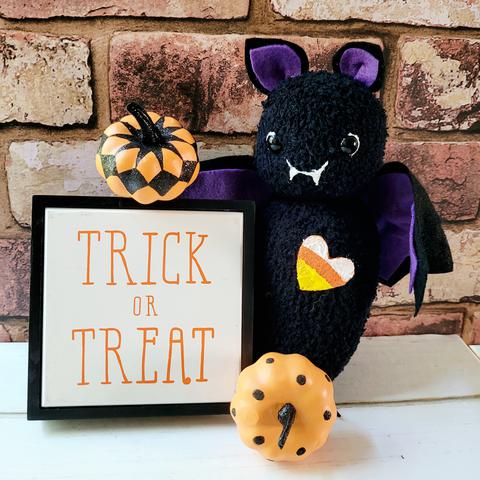

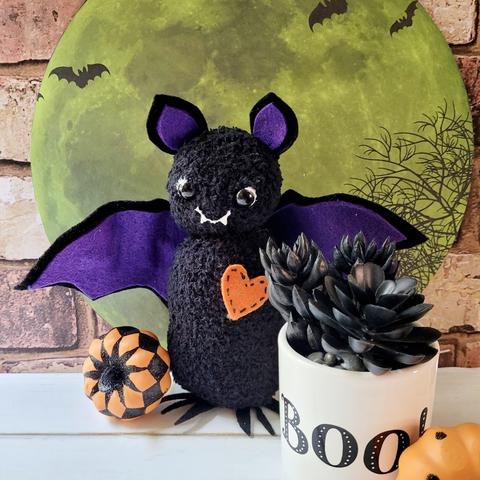
Do you love Halloween parties? I sure do especially for the grandlittles and family. They love a party craft and this No Sew Baby Bat Sock Stuffie is a fun easy craft for a group. Makes a perfect party favor to go home with. Let's get this DIY party started with a group of talented bloggers hosted by my friends at Team Creative Crafts!
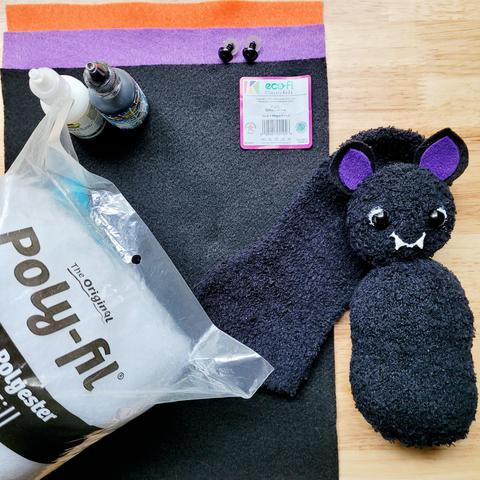
You will need:
Black ankle sock (1 per bat)
9" x 12" craft cuts of Kunin Brand Classic Felt: 1 Black, 1 Purple or Violet, Orange Scrap
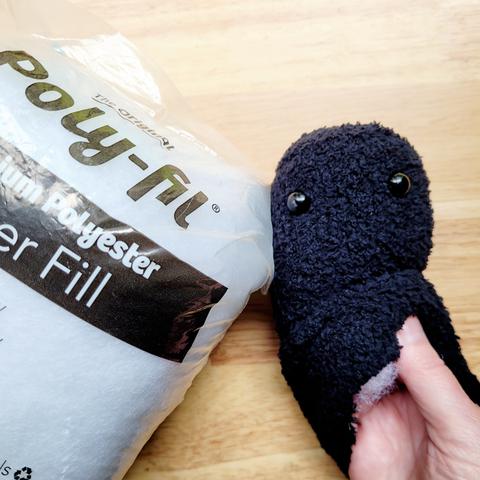
Fairfield World Poly-fil
1 Pair safety eyes (for young children) or wiggly eyes, buttons or paint
2 Chenille stems
Tulip Scribbles paint: white, yellow
Adhesive: Tacky Glue for the littles (with an adult or two helping, using hot glue to adhere the larger pieces like the wings)
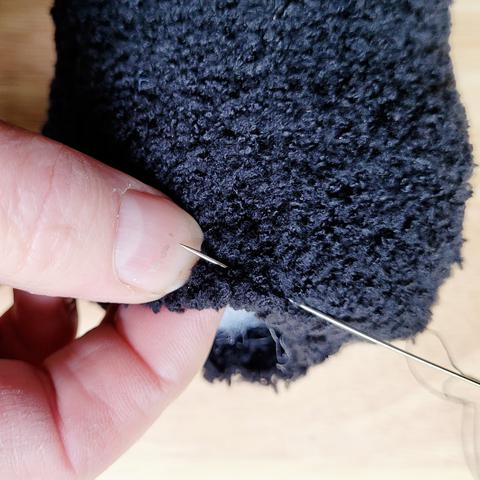
Needle and thread or elastic, scissors
Printable Bat Wing, Ear and Feet Pattern
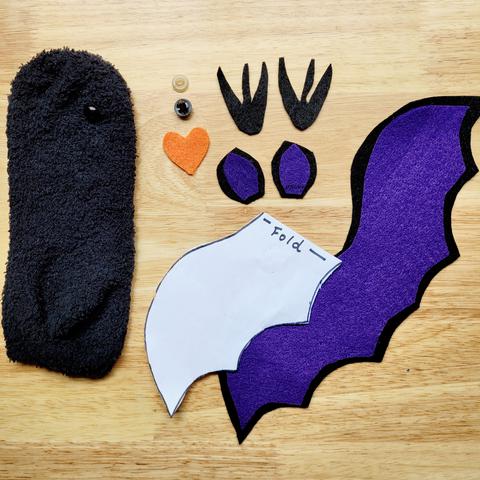
STEP 1
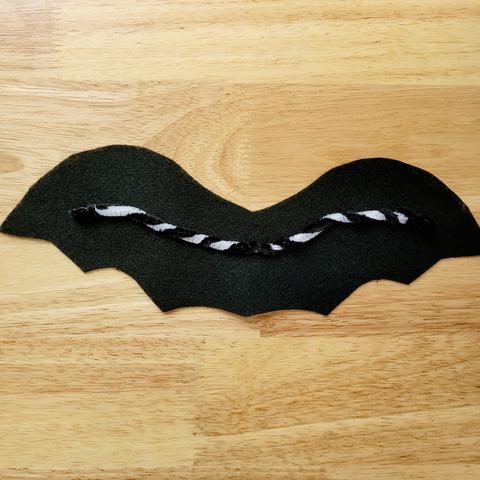
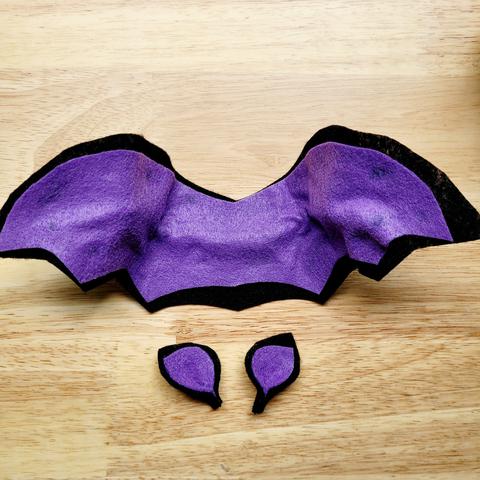
Print out pattern, cut out pieces. Cut from black; 2 feet, 1 outer wing and two ears. Cut from purple two inner ears and 1 wing. Trim these 1/8" of an inch smaller all the way around.
STEP 2
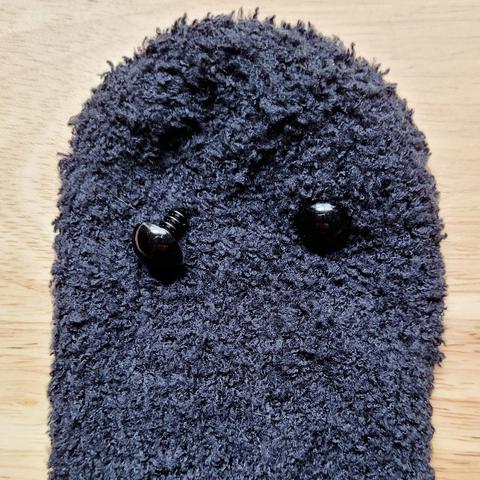
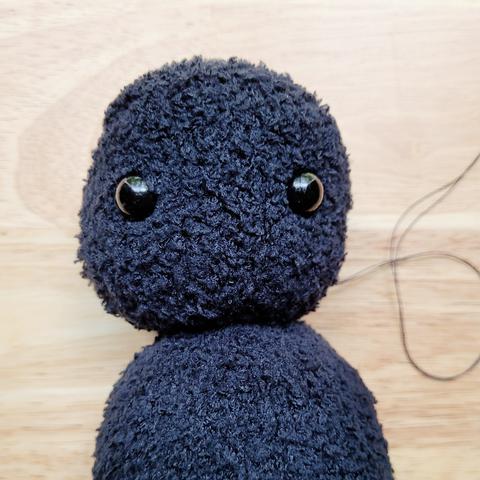
Flatten sock and use chalk to mark eye placement. (If you have a large group of younger ones, affix safety eyes before the party)
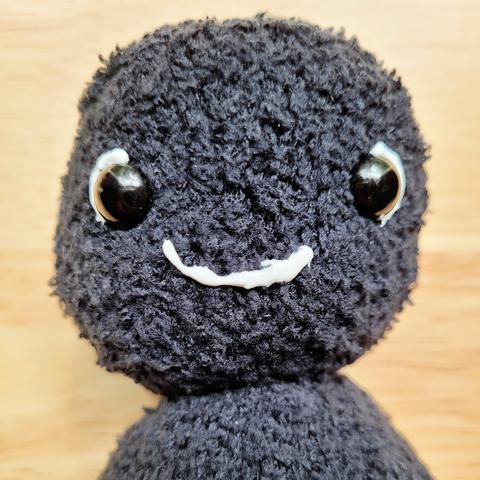
Make a tiny hole, insert eye shaft and reaching inside insert back firmly. Repeat for second eye. If using other types of eyes like buttons or wiggly eyes these can be applied near the end.
STEP 3
Stuff! Socks are stretchy so stuff gently or not. (I prefer Fairfield World Polyfil as it is soft and easy to work with.) Bats can be all different sizes too! (TIP: give the kids a premeasured amount of stuffing and that will keep the bat size within a certain size so the wings show.)
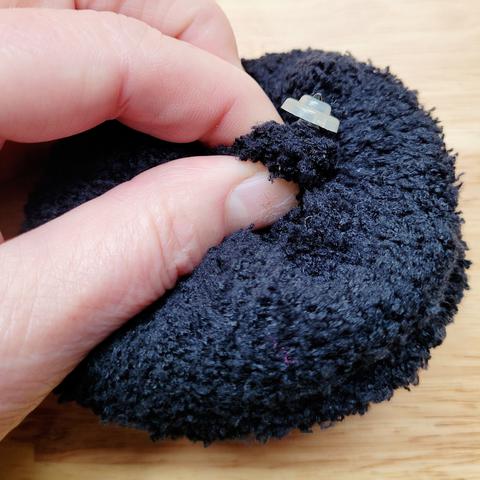
I did sew the bottom shut but black hair elastics work as well. Just tuck extra sock at bottom into center.
Place an elastic around the neck to make a cute head ball.
STEP 4
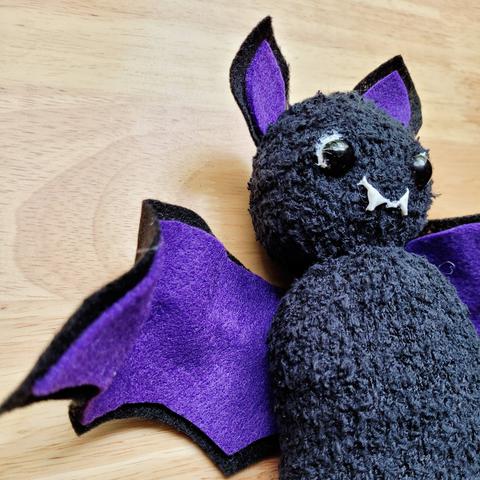
Align inner ears on outer ears and glue together. Pinch centers slightly. Glue to top of back of head as shown.

STEP 5
Twist two chenille stems together and glue to center of outer wing. (This will allow wings to be shaped.) Place inner wing over top and glue in place.
STEP 6
Add a line of adhesive to center of wing on inside and firmly press back of bat into the glue. Glue feet on bottom.
STEP 7
As the puffy paint needs drying time finishing the face at the end is the easiest way to finish the bats. Make a smile with the white and then add a line on each end pulling into triangles for teeth. Add a thin line around edge of the safety eyes. Like every crafty project allow for individual expression and some bats may have three eyes or teeth. Let the kids decide!
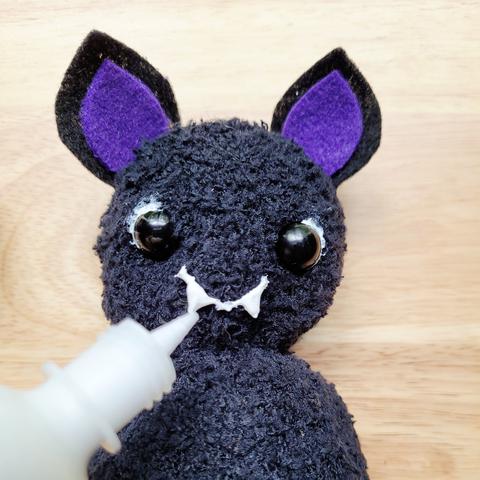
Set the bats aside to dry. Clip them upside down to a tree branch for added party decor. If drying time needs to be hastened, warm air or a hair dryer will work.
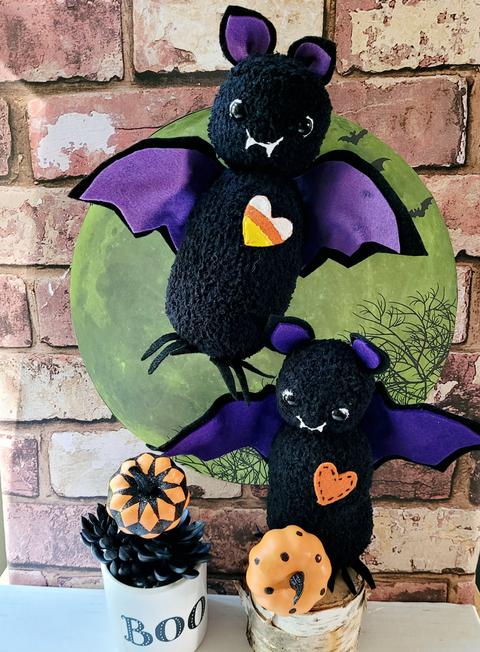
Thanks for stopping by to check out my No Sew Baby Bat Sock Stuffie! Please hop along with the button below to see all of the Halloween party inspo and enter the Rafflecopter giveaway!
Follow me on IG @debraquartermain where I am always "Making and Celebrating Heart, Home and Holidays" everyday!


